
Set Up Triggers
Add contacts to a Follow-up list automatically when they send a keyword to your WhatsApp, and remove them once they've bought.
A trigger adds contacts to a list automatically when they send a keyword to your WhatsApp, and they start the campaign right away. This is the main way to fill a list, because the contacts reached out to you first.
The example in this guide: customers who send BARISTA CLASS join the Barista Class Participants list.
Before you start, have a list and an active campaign ready. Triggers are only available for Personal lists, not group lists.
1. Open Triggers
Open the list from WhatsApp › Follow-up, then click Triggers.
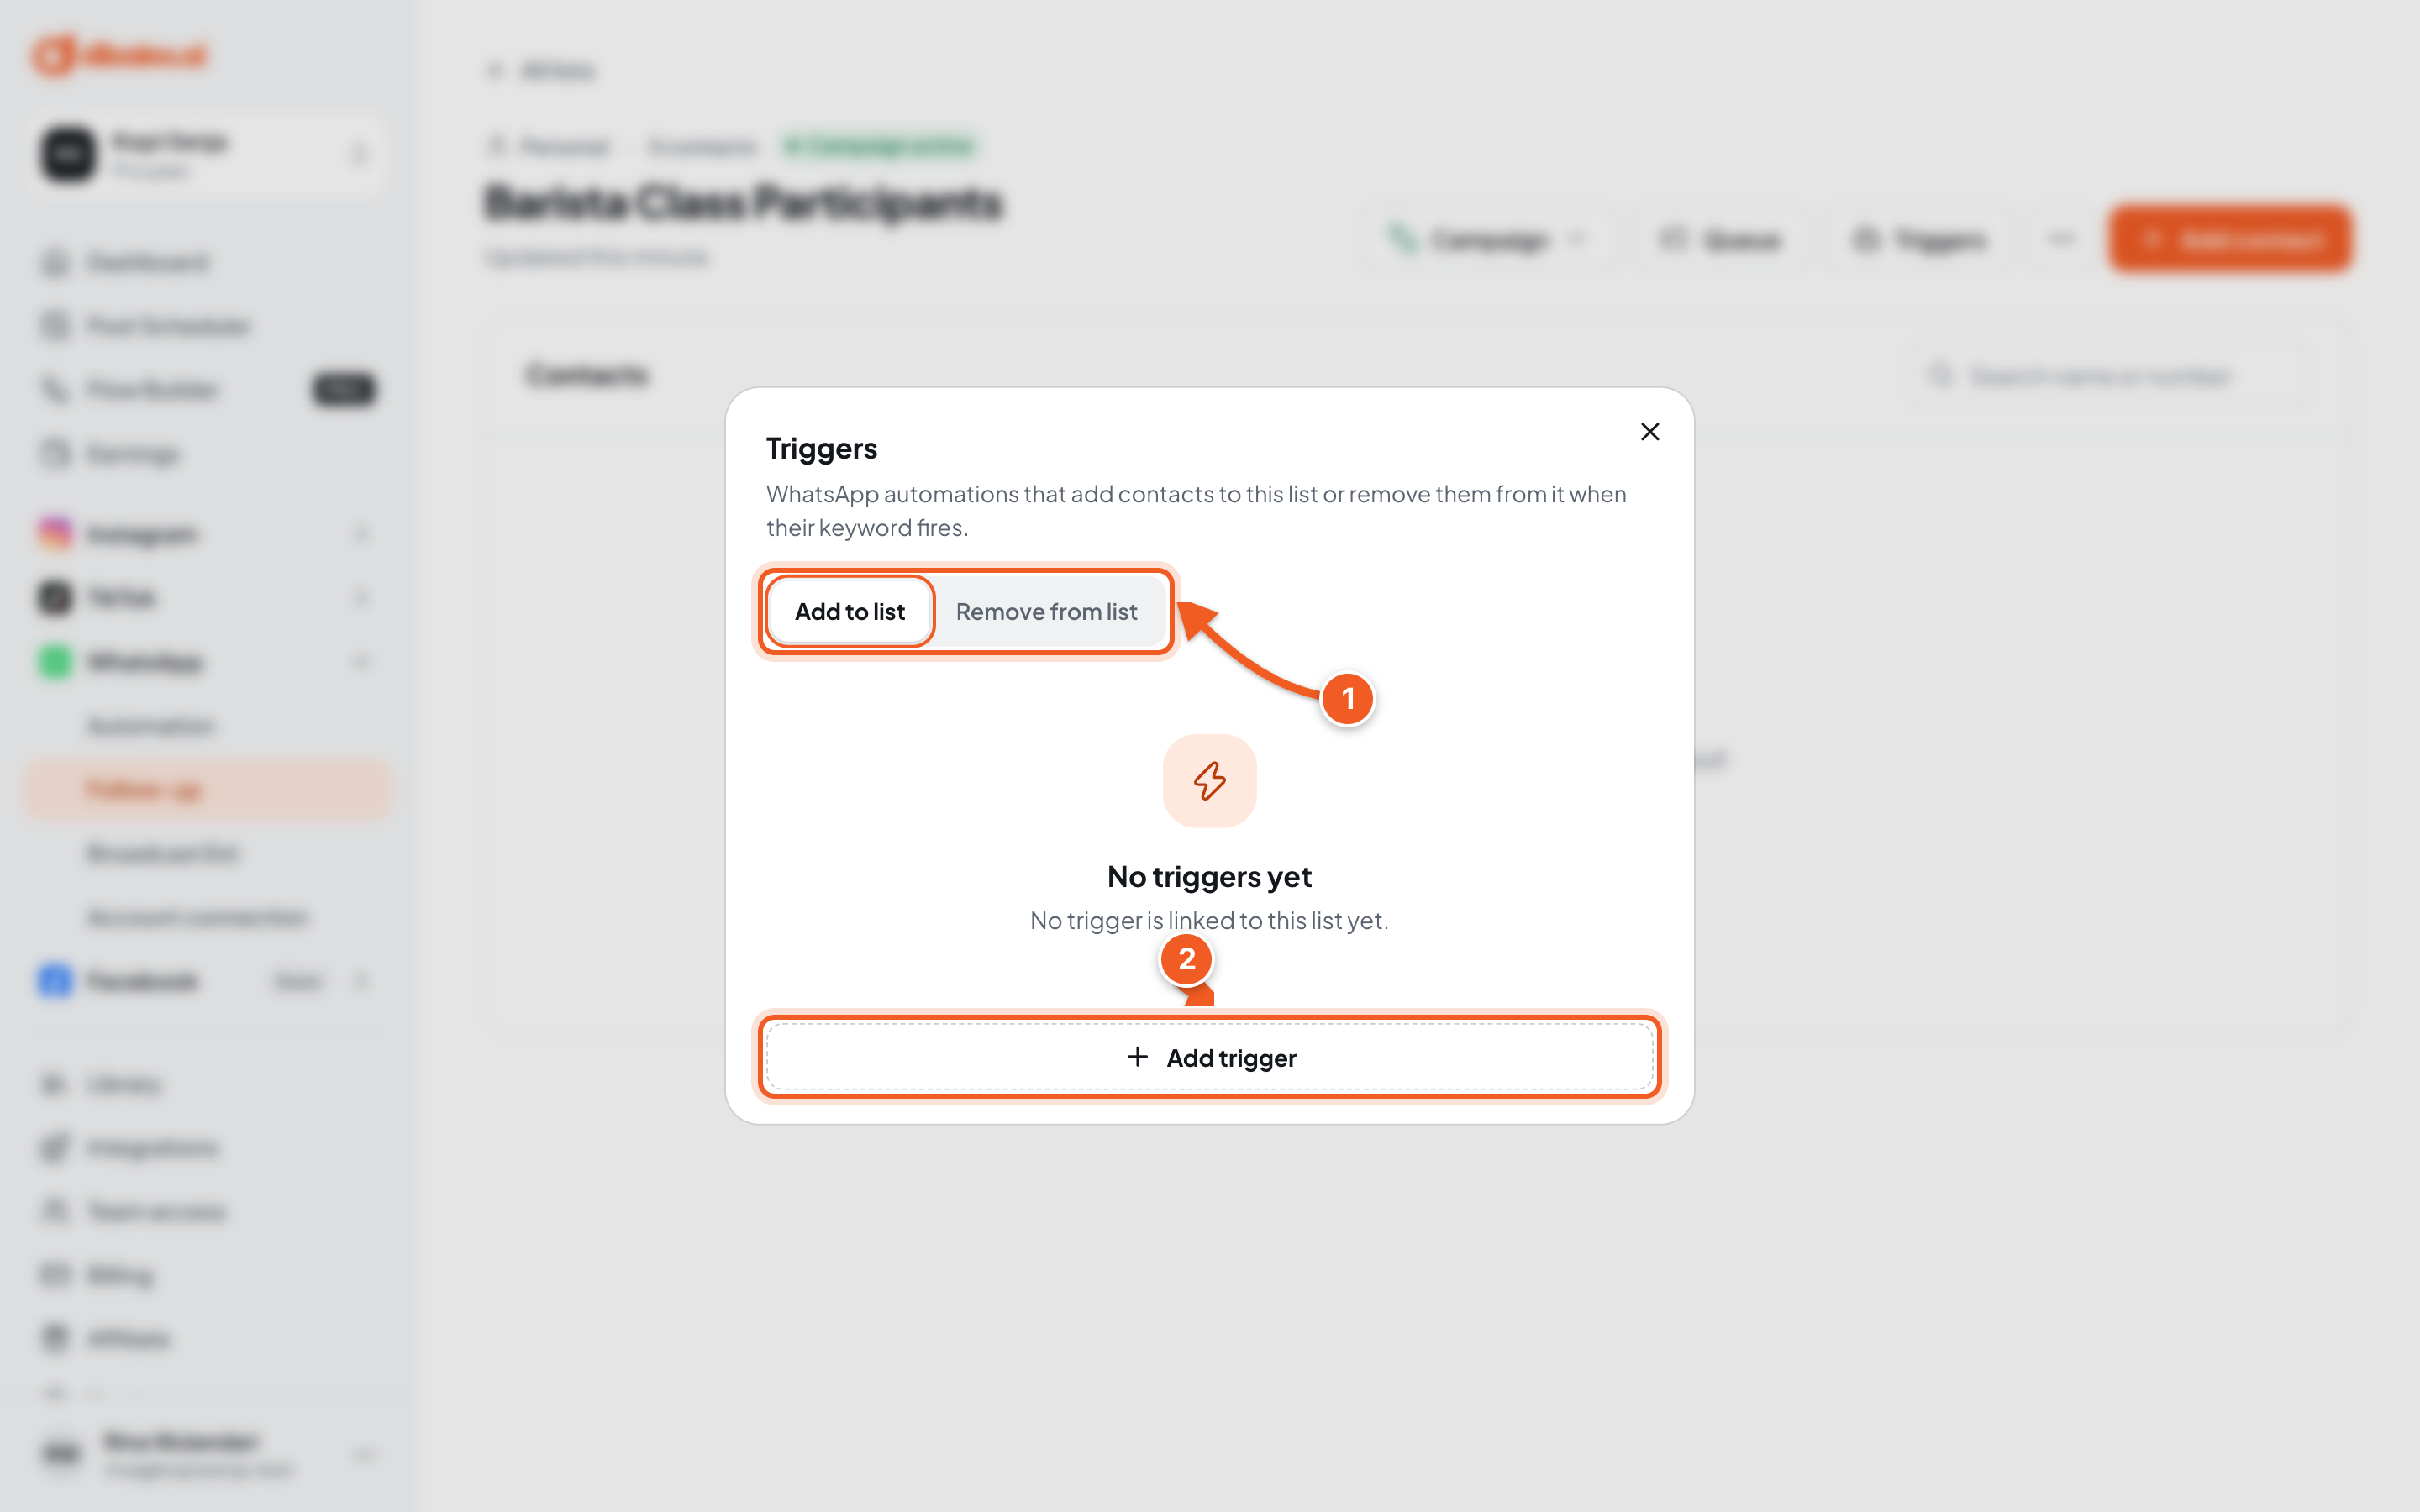
- Make sure the Add to list tab is selected. The Remove from list tab removes contacts, see below.
- Click Add trigger.
2. Choose Create new
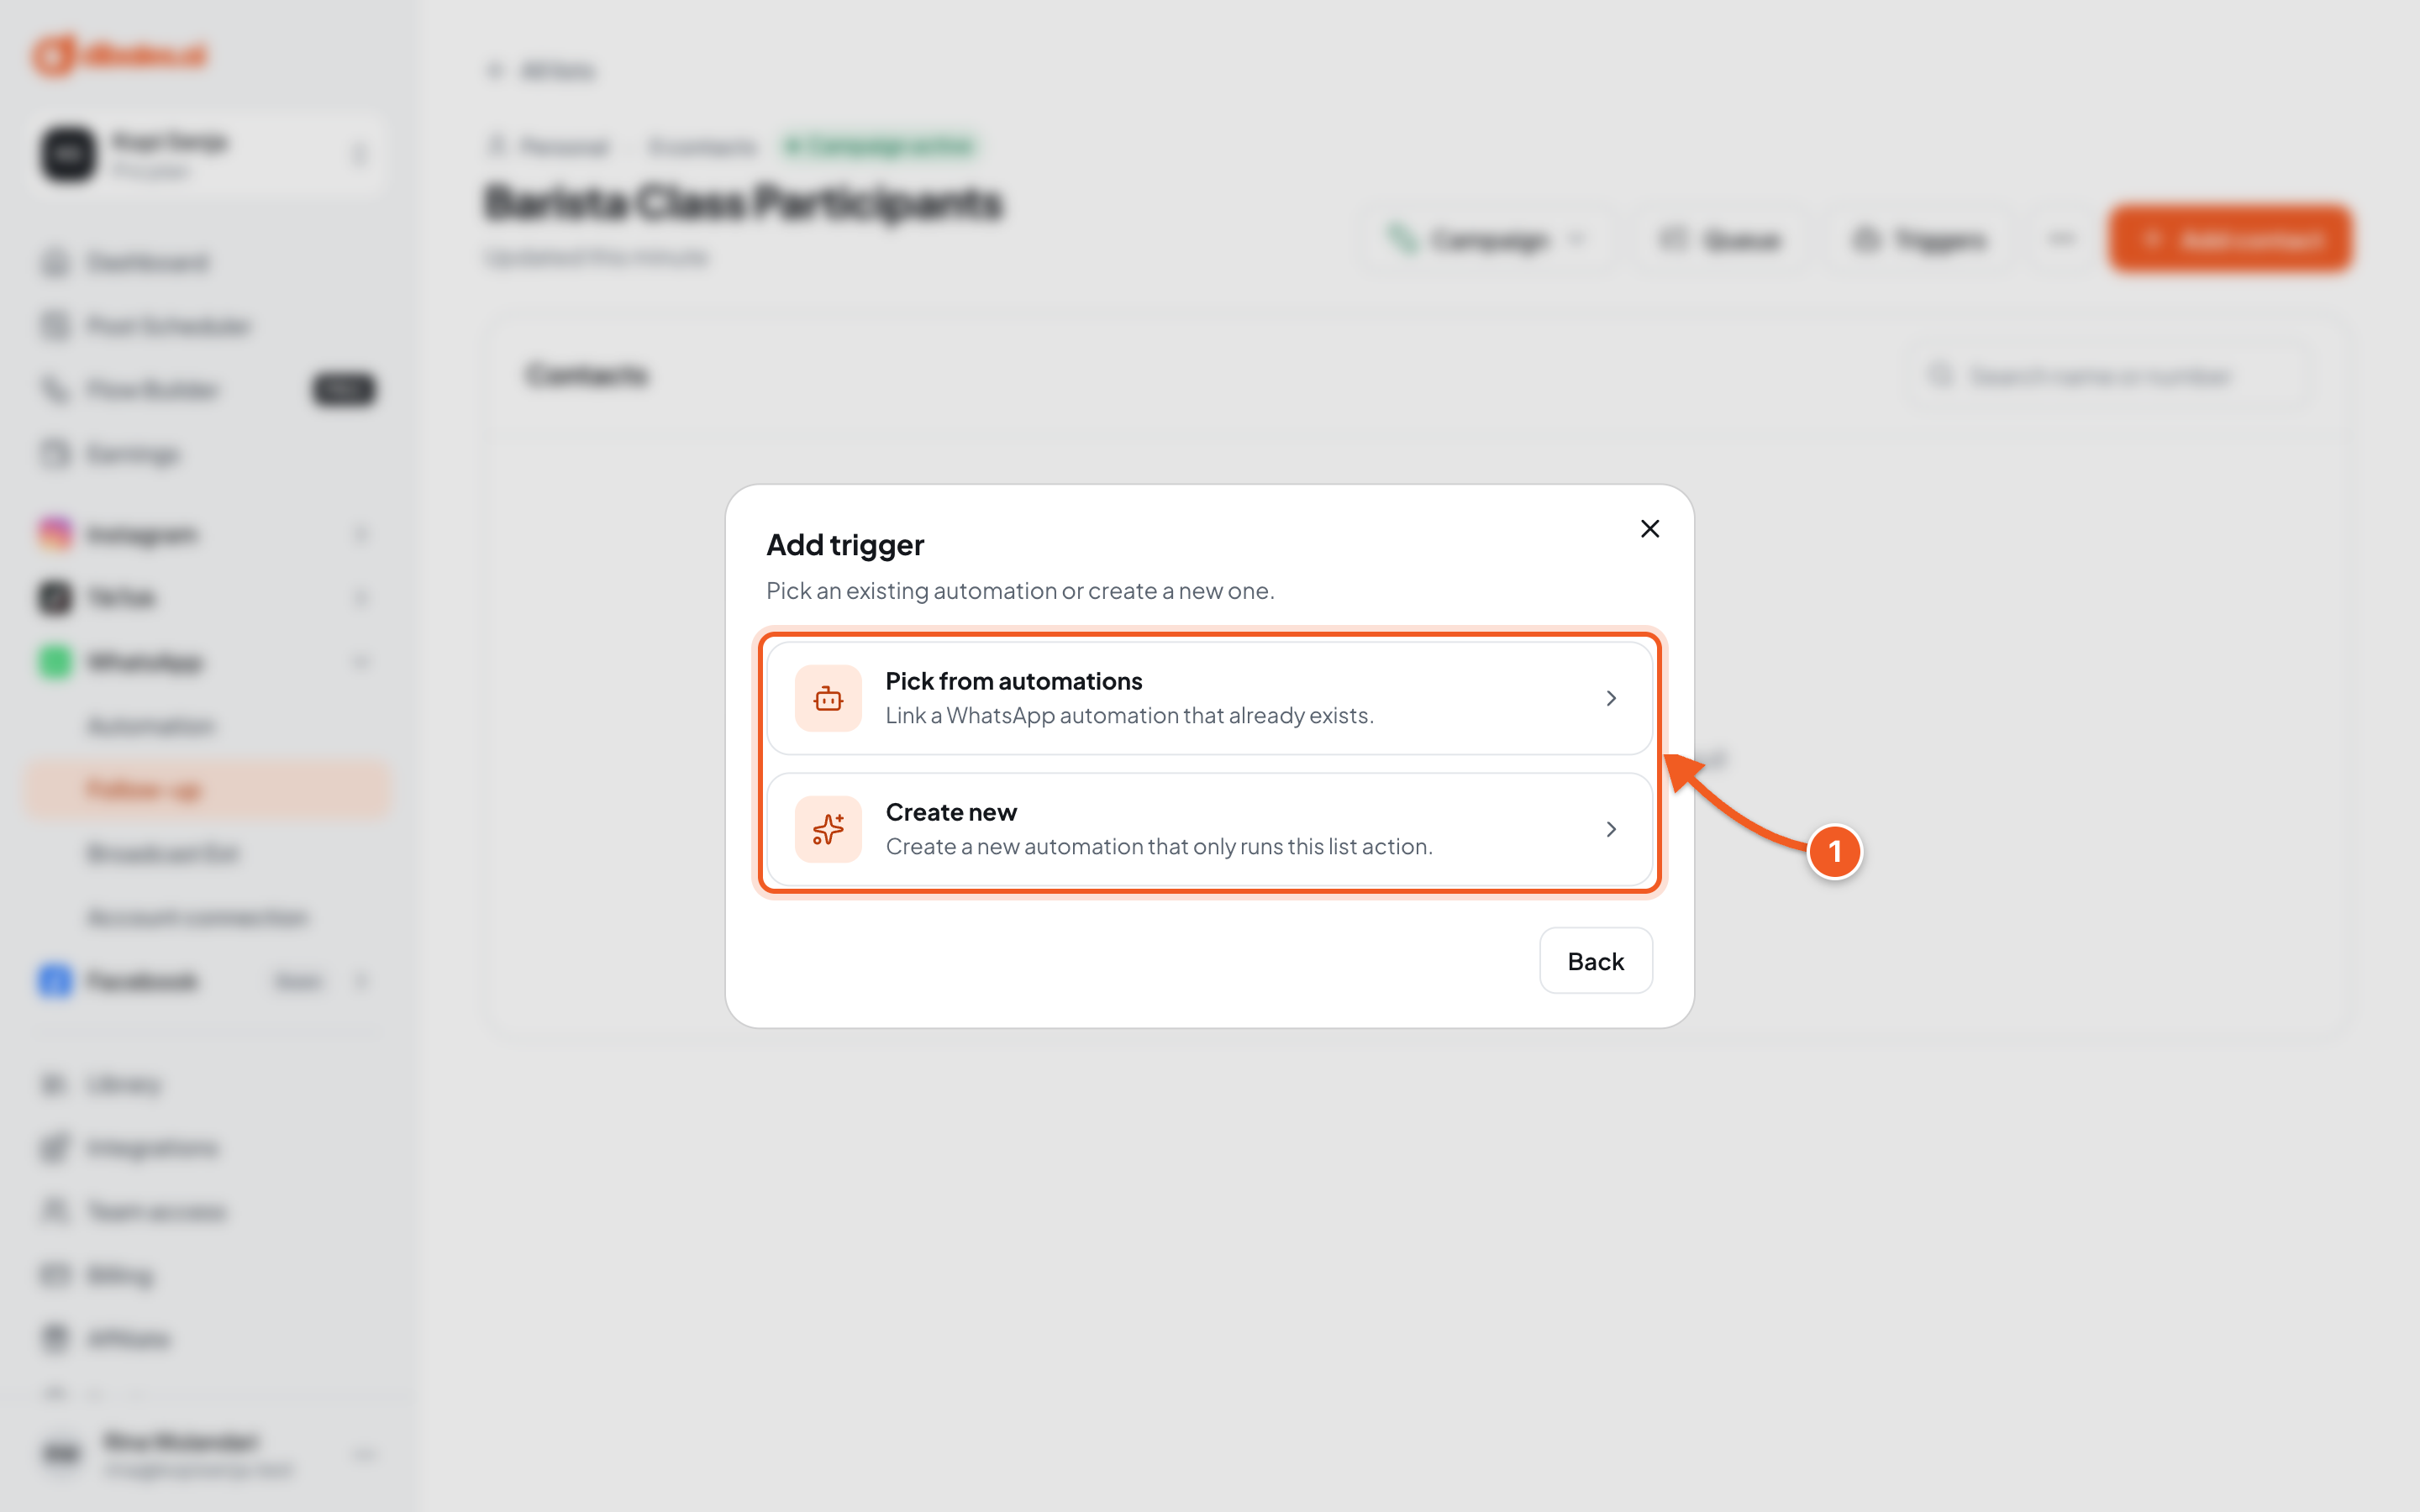
- Choose Create new to create a new automation that only runs this list action.
Use Pick from automations if you already have a WhatsApp Automation that also sends a reply, for example a PRICE automation that replies with the price list and adds the contact to the list at the same time.
3. Fill in the keyword
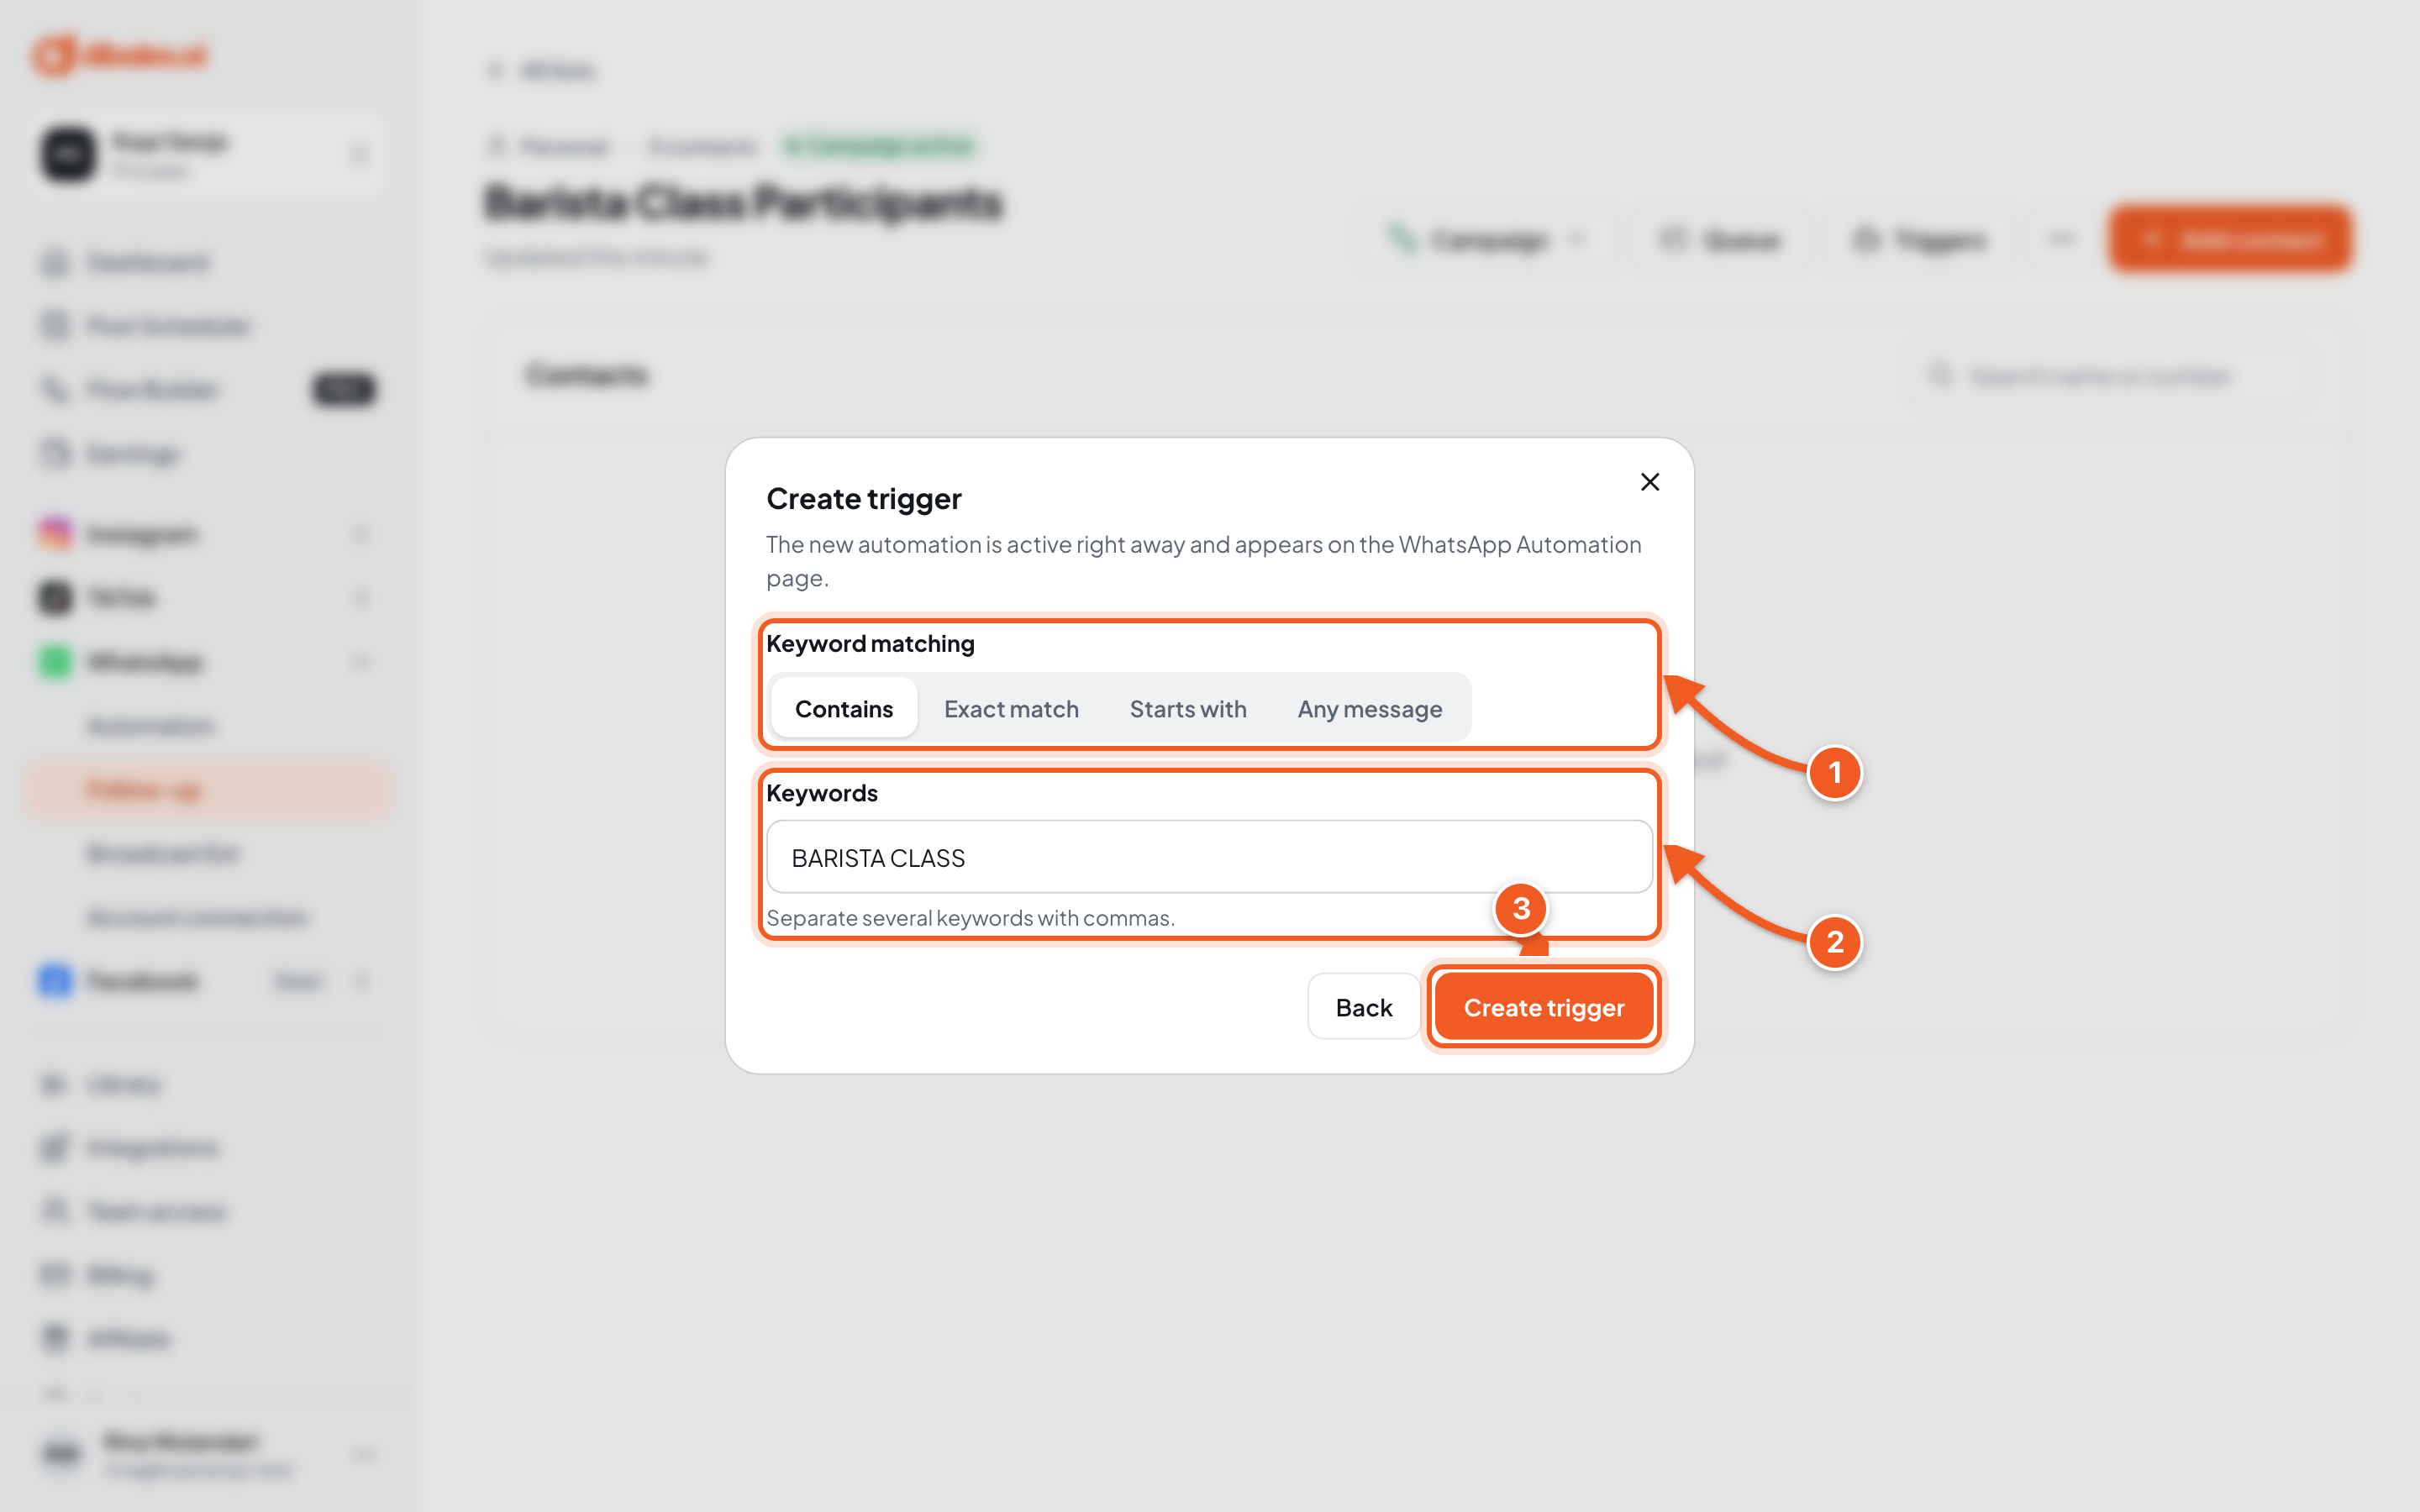
- Keyword matching:
- Contains: matches when the message contains the word anywhere.
- Exact match: matches only when the whole message is that word.
- Starts with: matches when the message starts with that word.
- Any message: every incoming message runs the trigger. Only one trigger like this per agent.
- Keywords: for example BARISTA CLASS. Separate several with commas. The same keyword can't be used by another automation.
- Click Create trigger.
4. Check the result
A Trigger created notice appears.
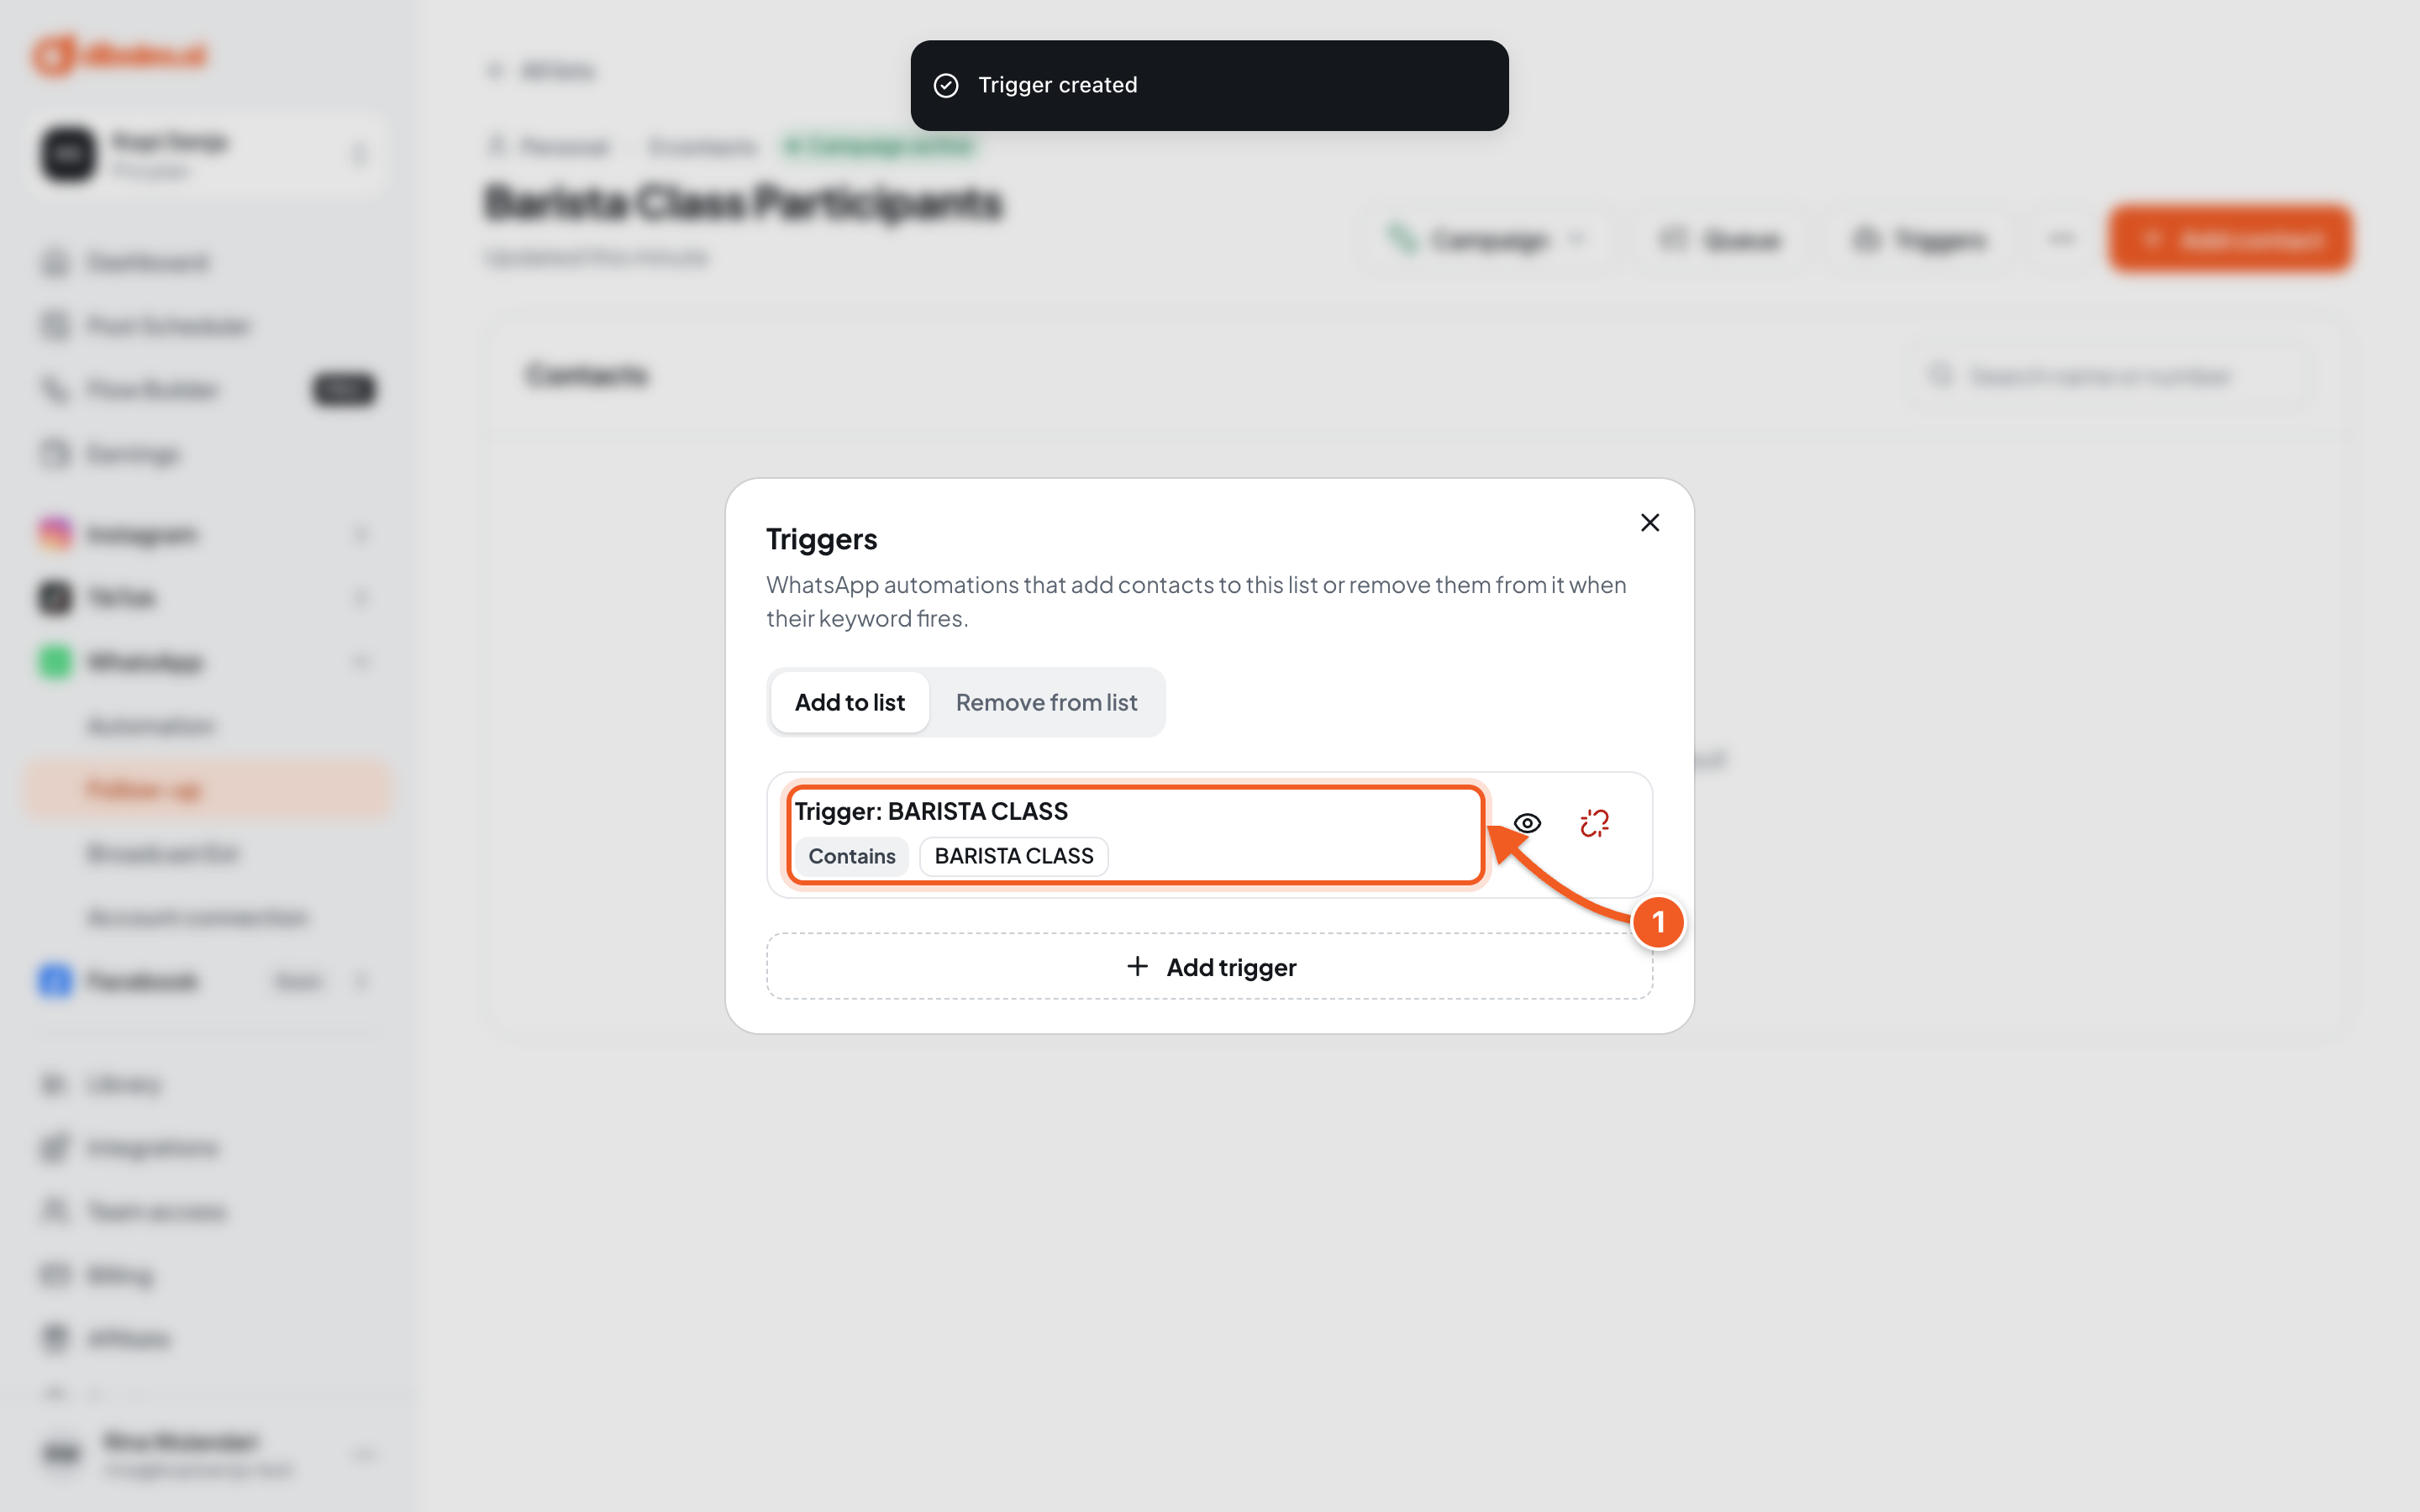
- The new trigger shows in the list with its rule and keywords, and it's active right away. It also shows on the WhatsApp › Automation page.
Click the eye icon to open its automation, or the unlink icon to detach the trigger from this list (you can delete its automation at the same time).
The trigger still works when the keyword is sent as a reply to your WhatsApp Story, because it matches the message content.
5. Try the trigger
- From another phone (not the number connected to the agent), send BARISTA CLASS to your WhatsApp. The agent's own number can't be used for testing.
- Open the Barista Class Participants list. That number shows up in the contacts table.
- Click Queue. The first step's message is Scheduled, then Sent and Read once it's opened on the test phone.
The queue and its statuses are explained in full in Test & Track the Queue.
Stop the follow-up once a contact has bought
The campaign runs until every step is done, or until the contact leaves the list. To stop it automatically:
- Open Triggers in the same list, choose the Remove from list tab, then Add trigger › Create new.
- Enter the keyword customers send once they've bought, for example PAID, then Create trigger.
You can also do it manually: in the list's contacts table, click ⋯ on the contact's row, then Remove from list, or Move to another list (for example a customers list). Pending deliveries in the old list are cancelled, then the contact follows the target list's campaign.
Troubleshooting
| Message | Fix |
|---|---|
| Another automation already uses this keyword. | Change the keyword, or use Pick from automations to link the existing automation. |
| This agent already has an any-message trigger. | Use another rule, or link the existing Any message automation with Pick from automations. |
| Triggers are not available for group lists. | Triggers only work with Personal lists. |
| WhatsApp is not active. | Connect your WhatsApp number first. |
Next step
Continue to Test & Track the Queue to test the trigger and campaign from another number.