
Build the Campaign
Build a WhatsApp Follow-up campaign: steps, delays, and messages, then turn it on.
A campaign is the series of messages sent automatically to every contact in the list. Each step sends one or more messages, after a set delay or at a set time.
No list yet? Create one first in Create a List. The example in this guide: the Barista Class Participants list.
1. Open the list's campaign
Open the list from WhatsApp › Follow-up, then click Campaign.
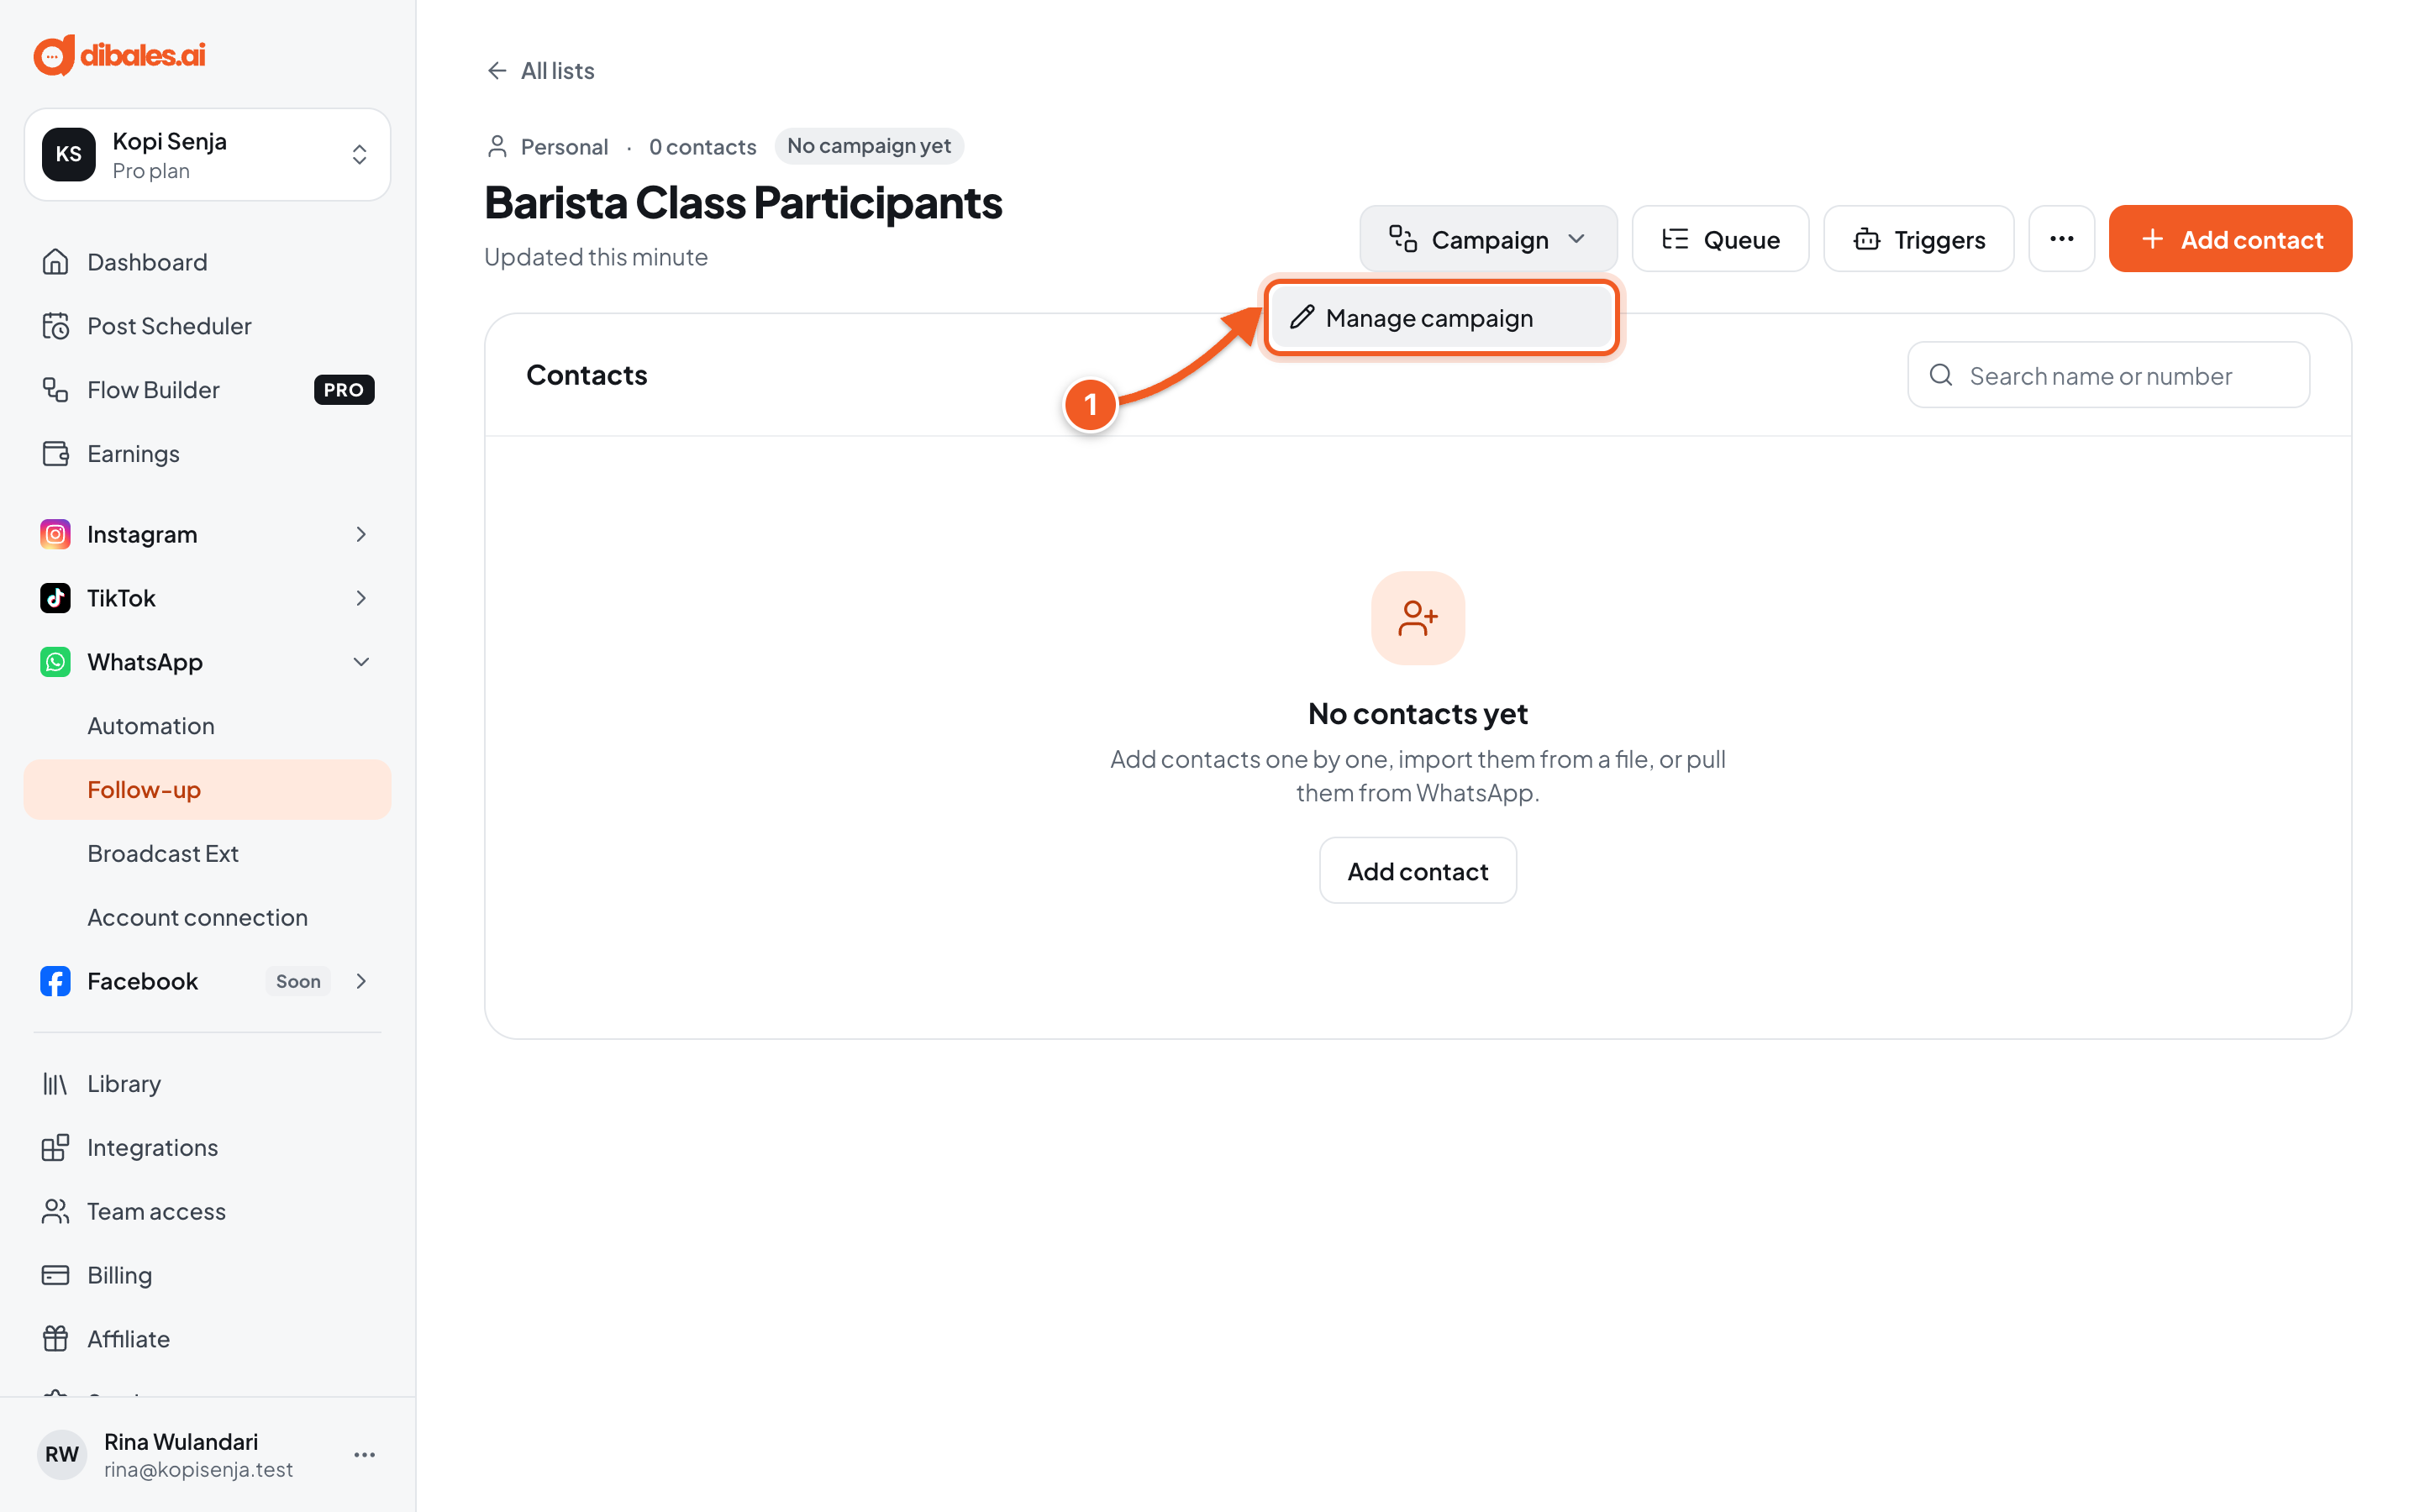
- Choose Manage campaign.
2. Add the first step
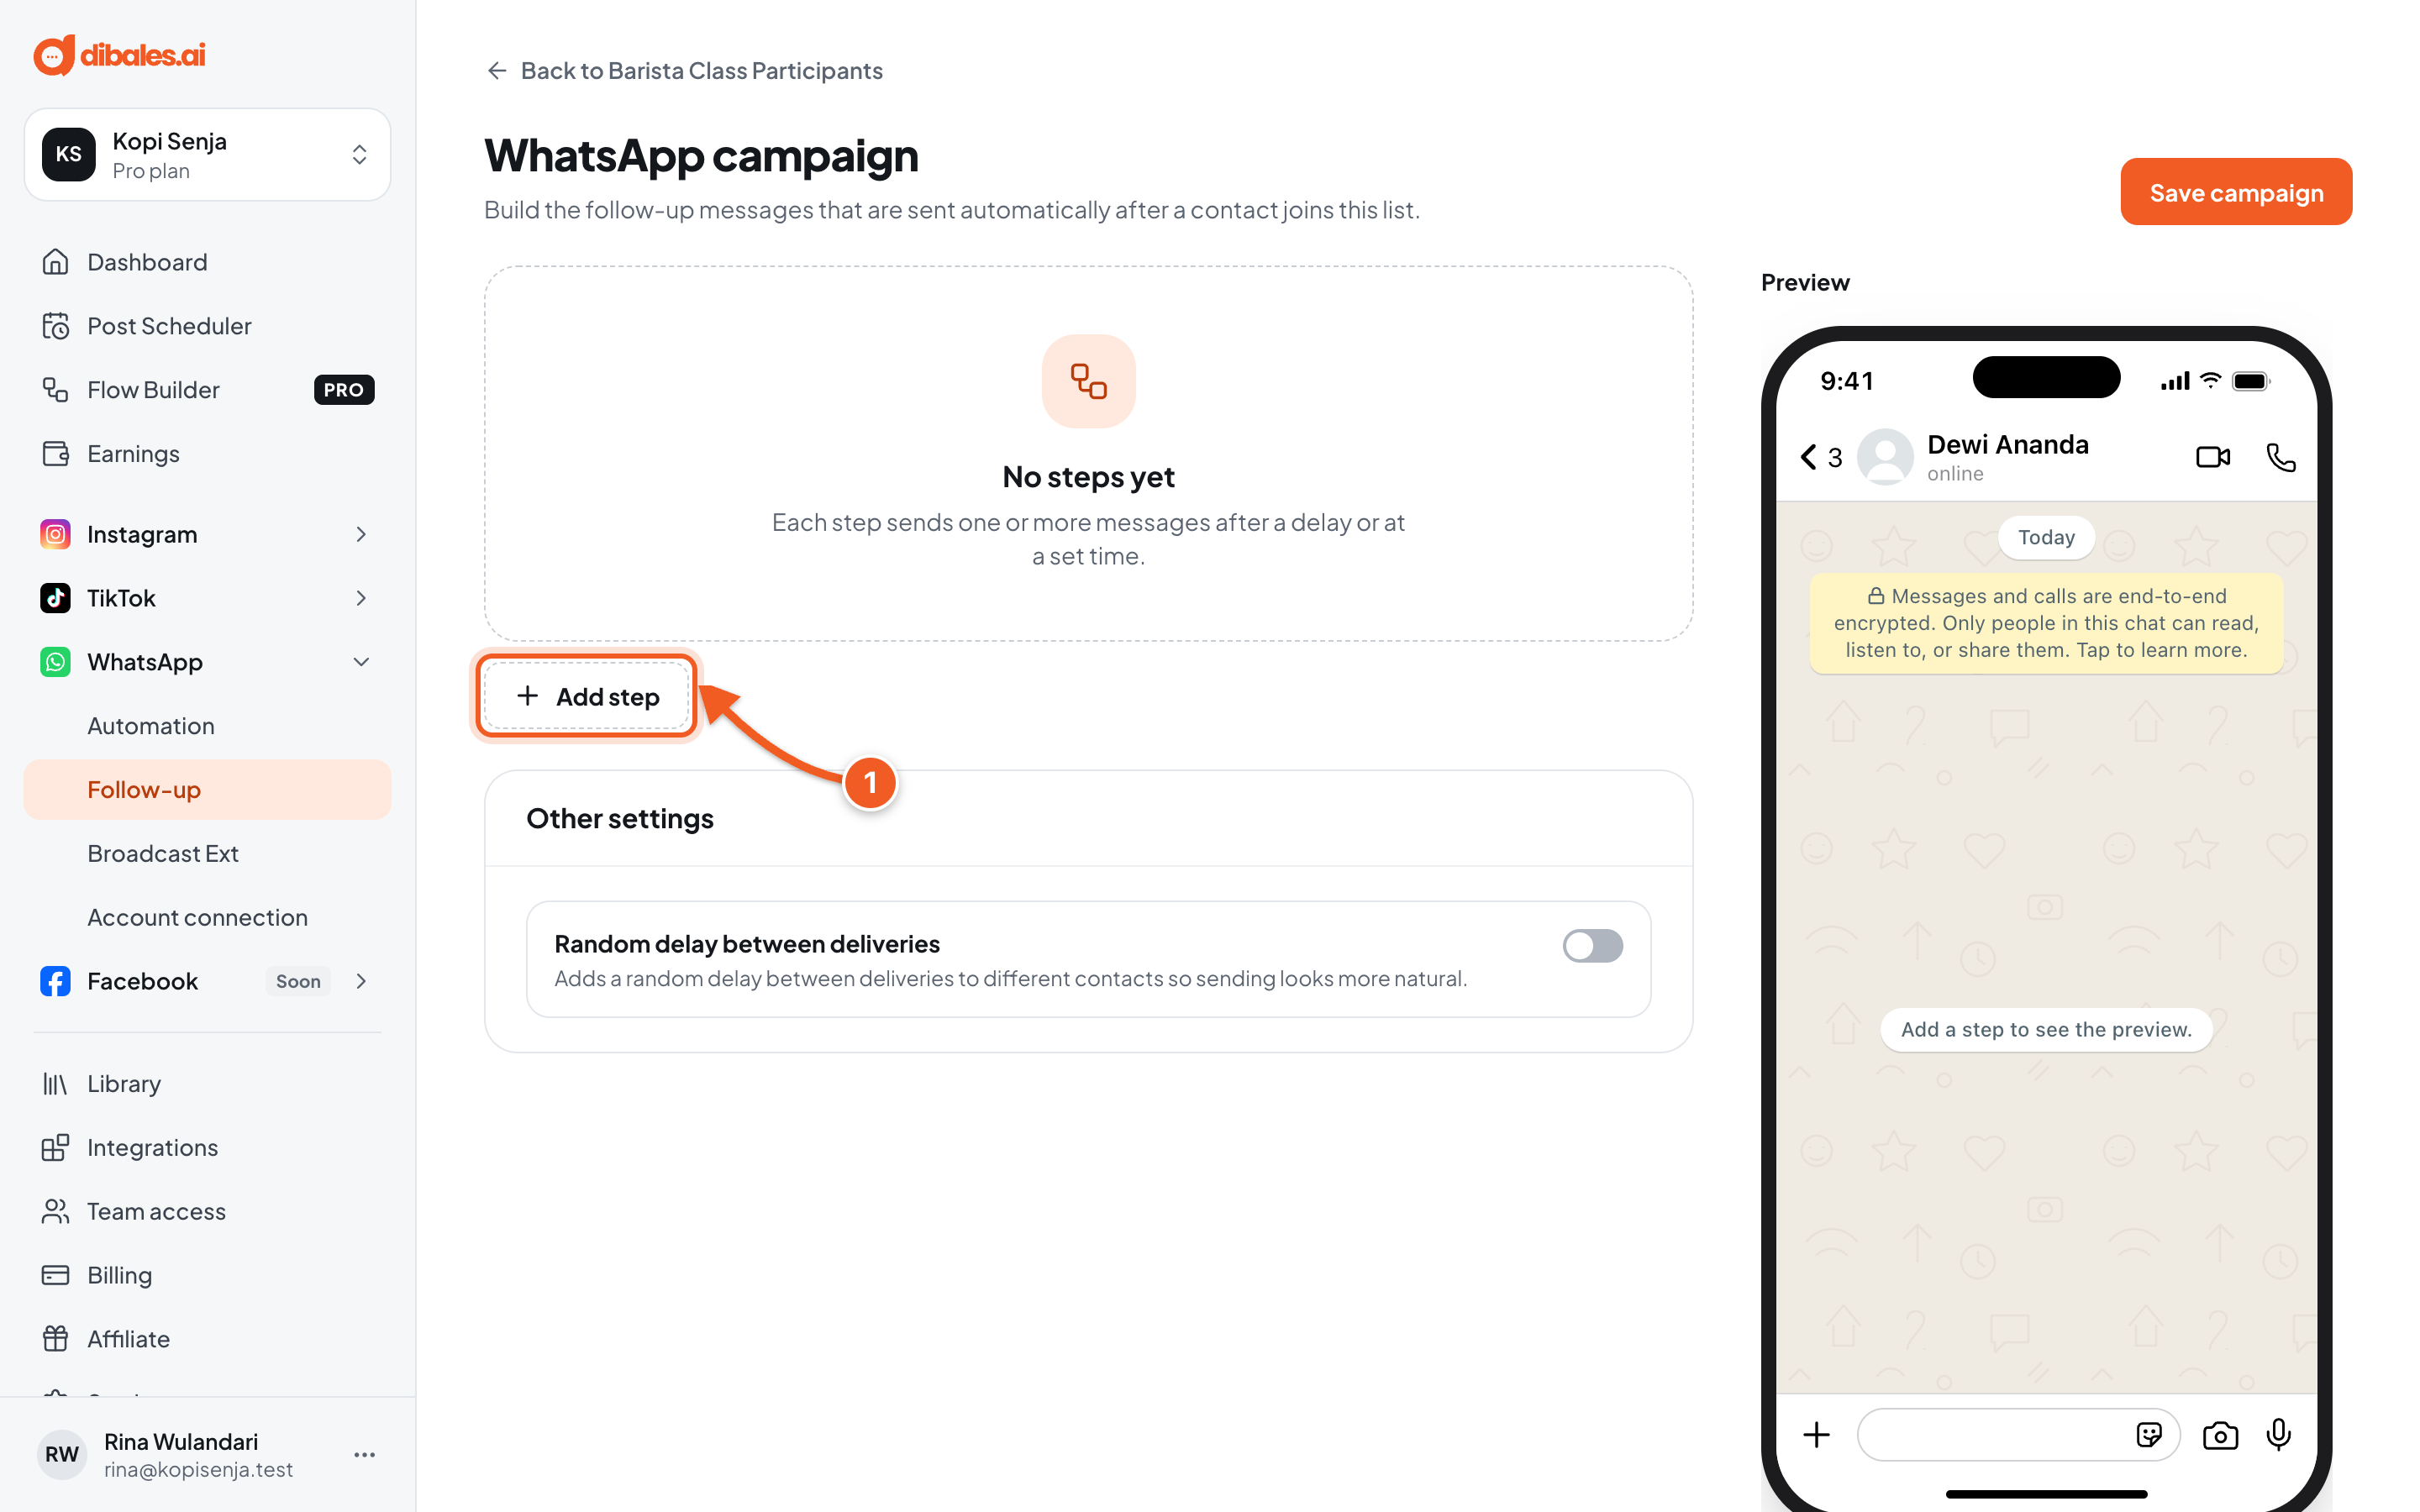
- Click Add step.
3. Fill in the step
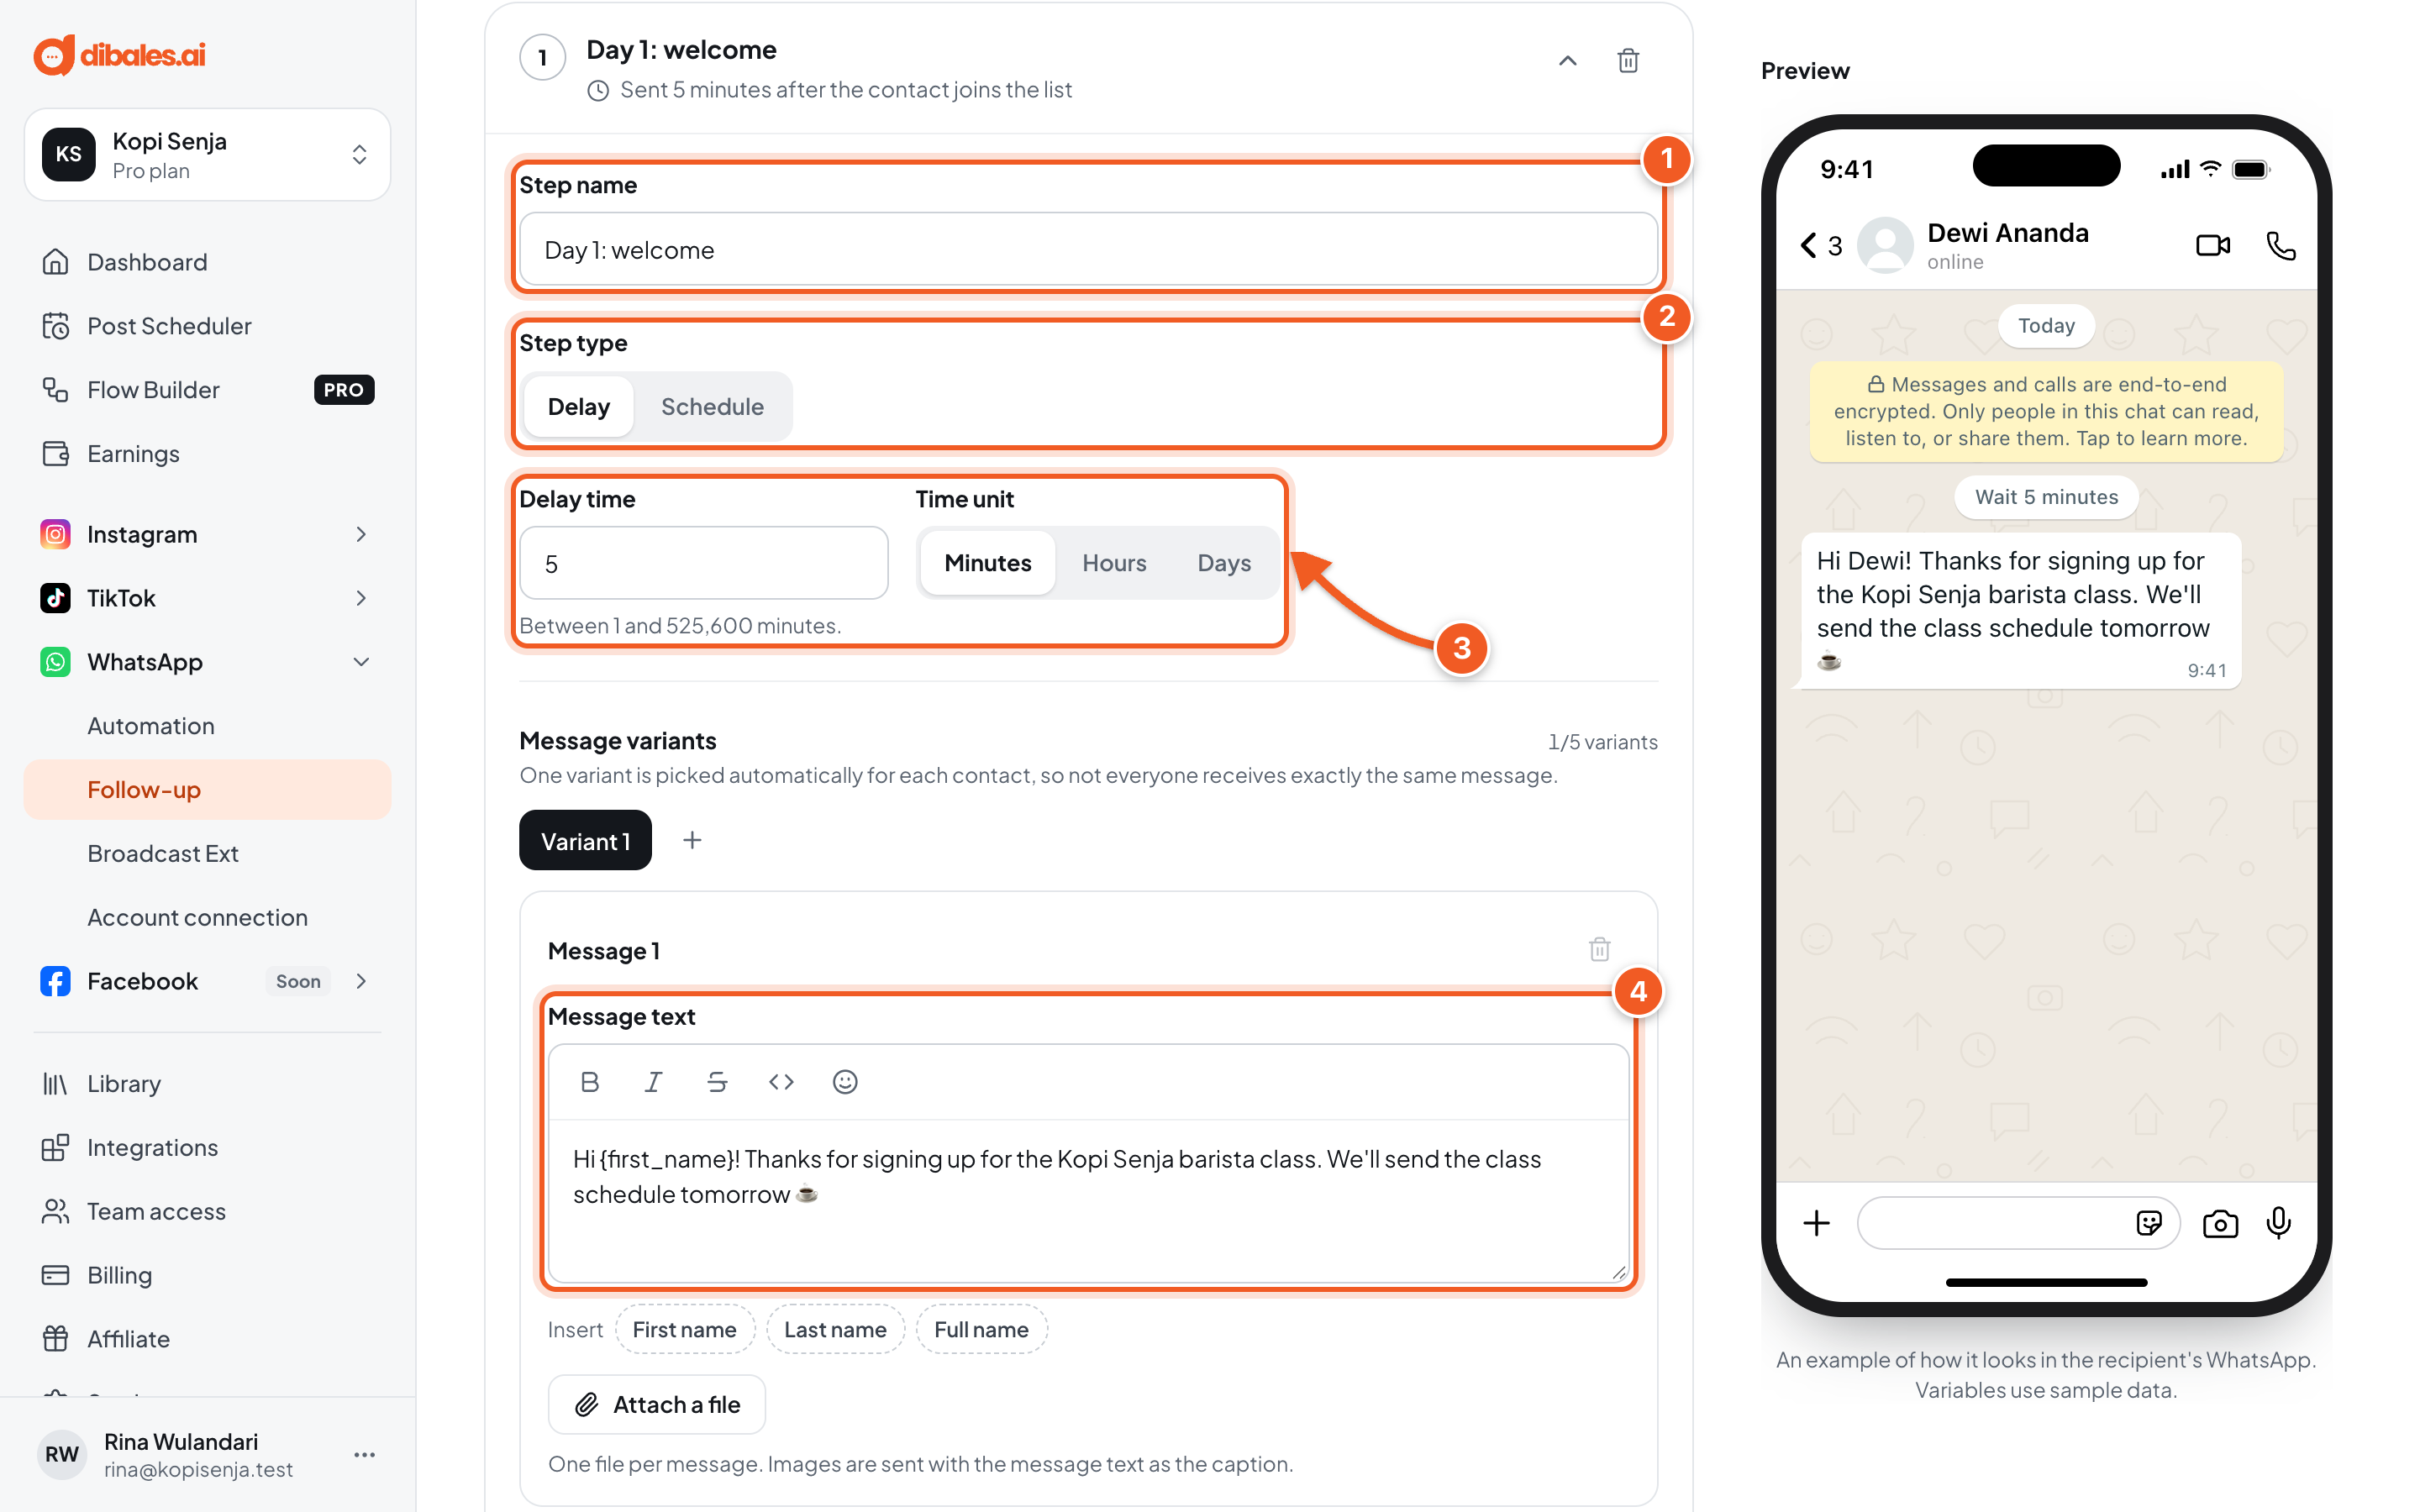
- Step name: just for you, for example Day 1: welcome.
- Step type:
- Delay: sent after a set delay. The first step counts from when the contact joins the list, the next ones from the previous step.
- Schedule: sent at a set date and time, for example a reminder the day before class. The time follows your device's time zone.
- Delay time and Time unit: for example 5 Minutes. You can also pick Hours or Days, up to 365 days.
- Message text: write the message. Click First name, Last name, or Full name under Insert to include the contact's name, for example
{first_name}.
The preview on the right shows the message as the recipient sees it in WhatsApp.
4. Add the next step
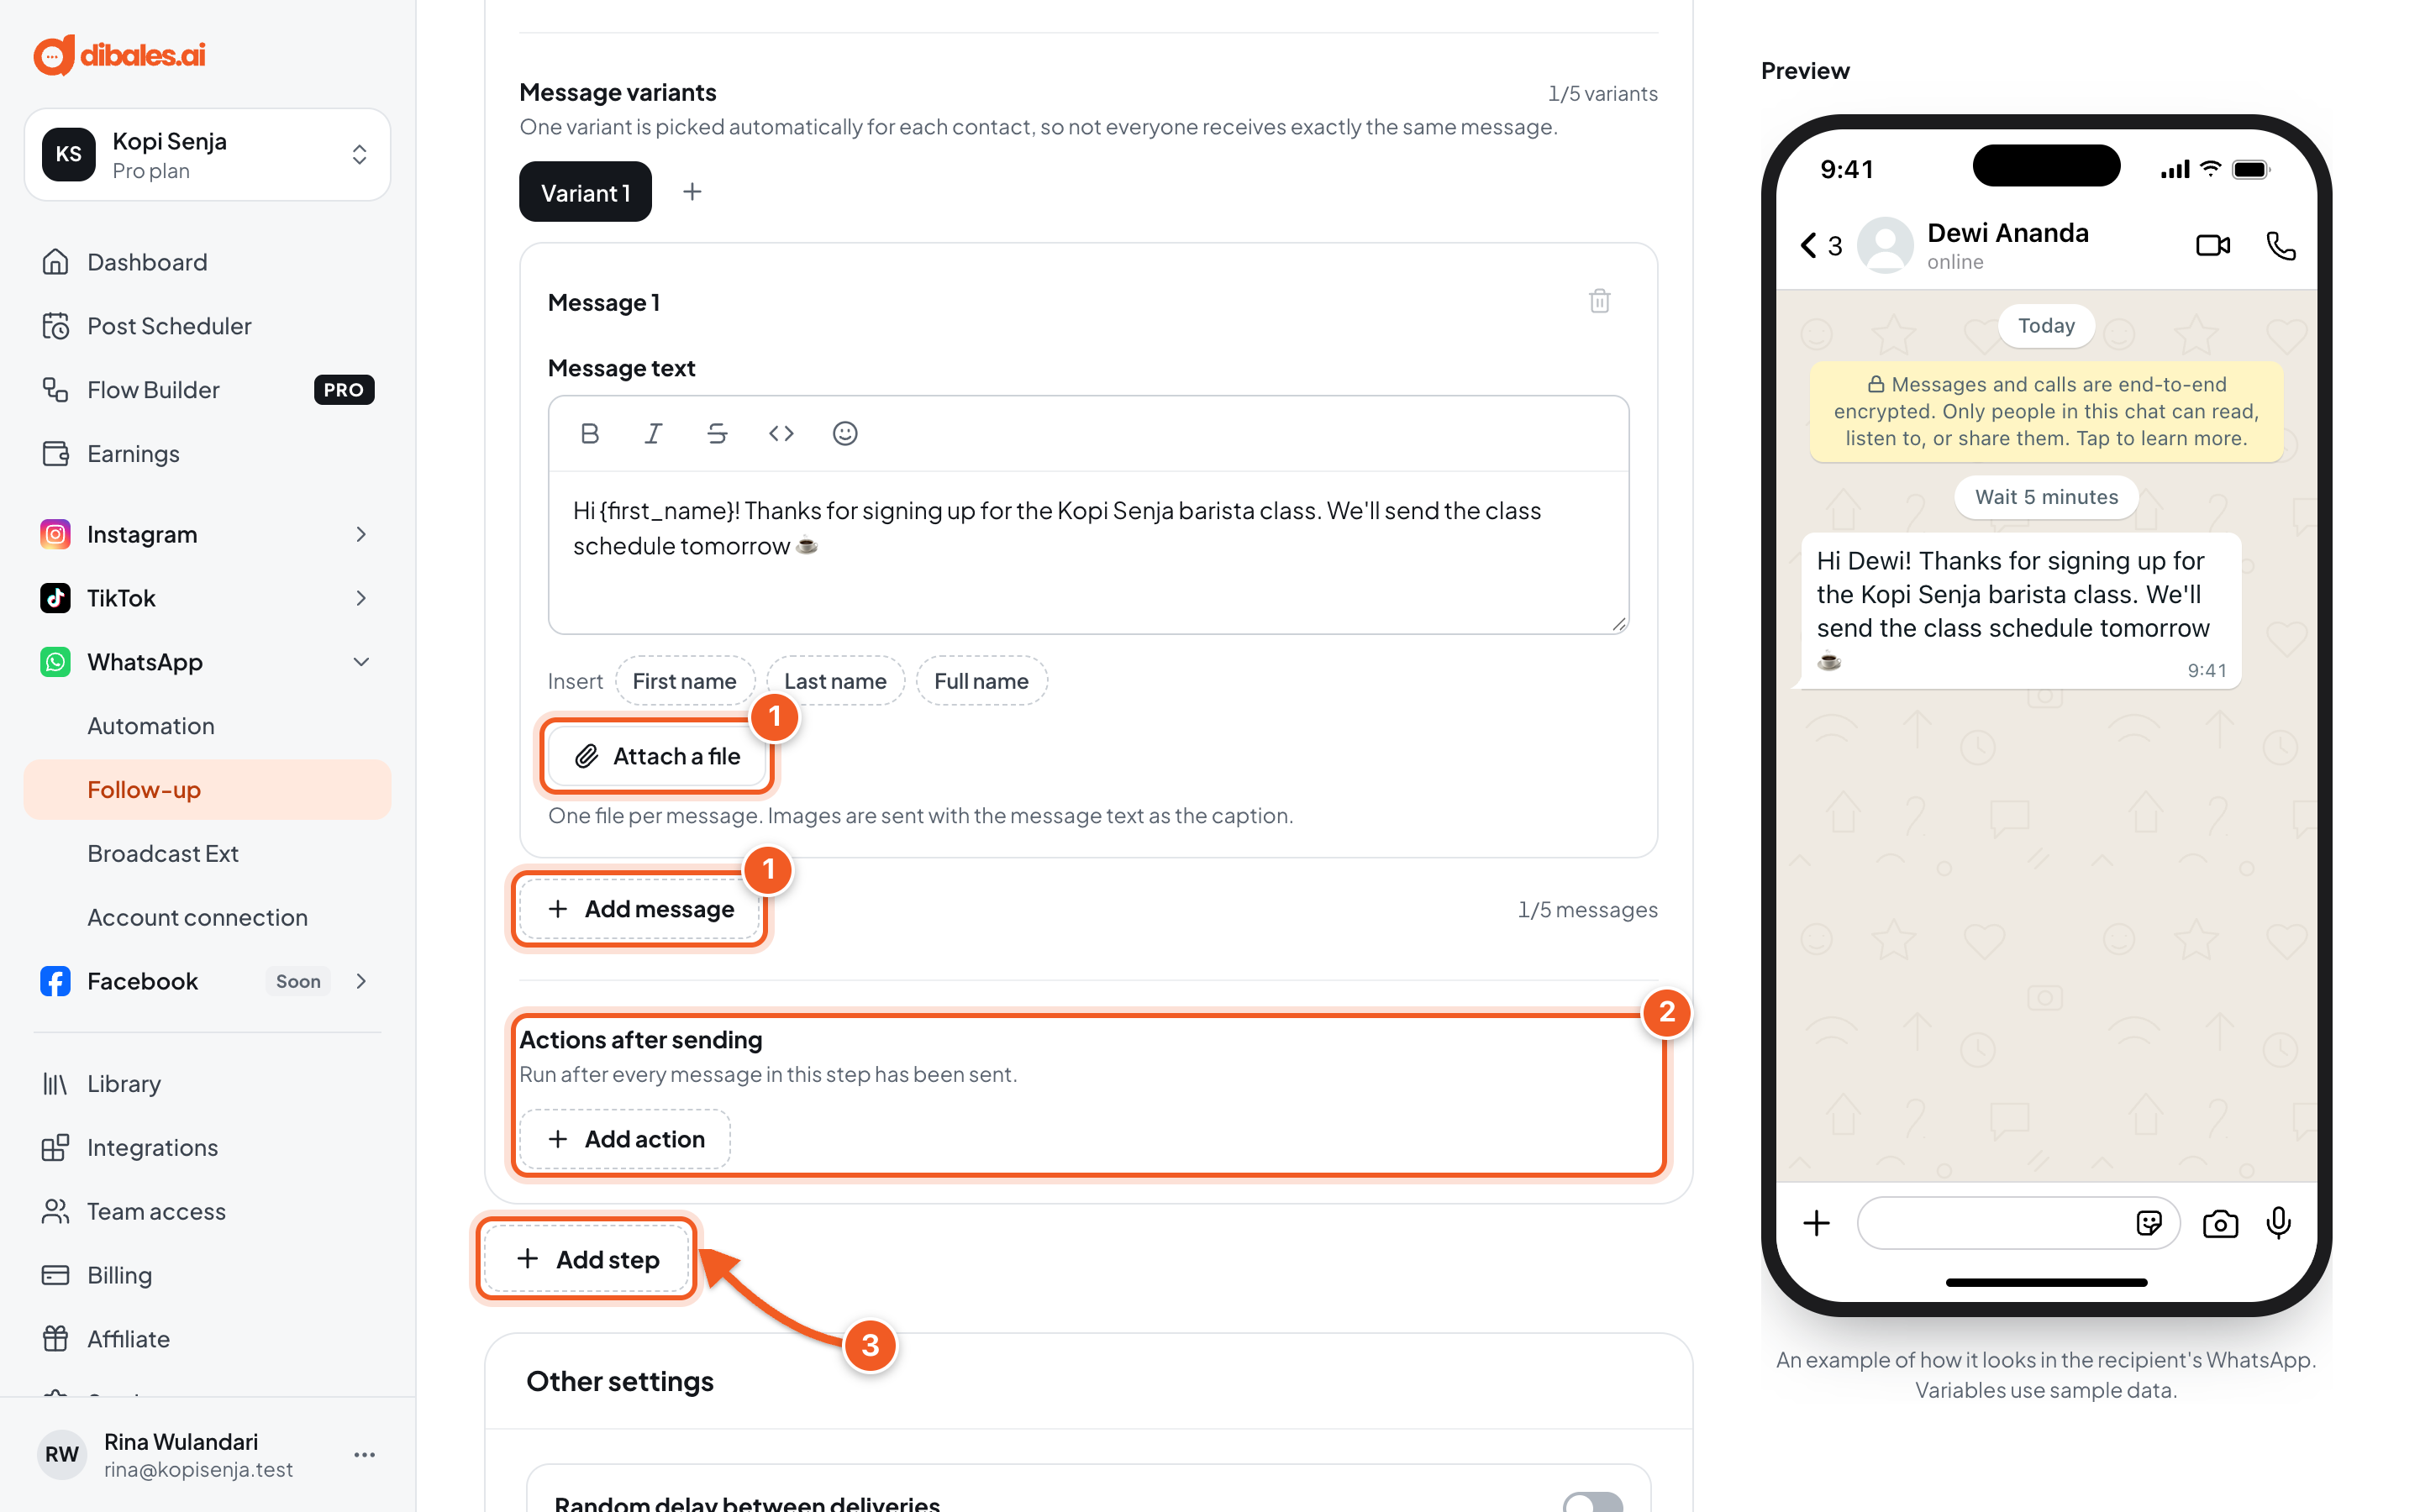
Scroll down in the same step.
- Attach a file adds one file per message, for example a PDF catalog. Images are sent with the message text as their caption. Add message adds another message in the same step (up to 5), so a long message can be split into several chats.
- Actions after sending (optional): see Optional settings.
- Click Add step for the next step, for example Day 2: class schedule with a 1-day delay. Repeat step 3 to fill it in.
When a new contact joins, the step with the nearest time is sent first. To keep the order, put Schedule steps before Delay steps.
5. Save and turn on the campaign
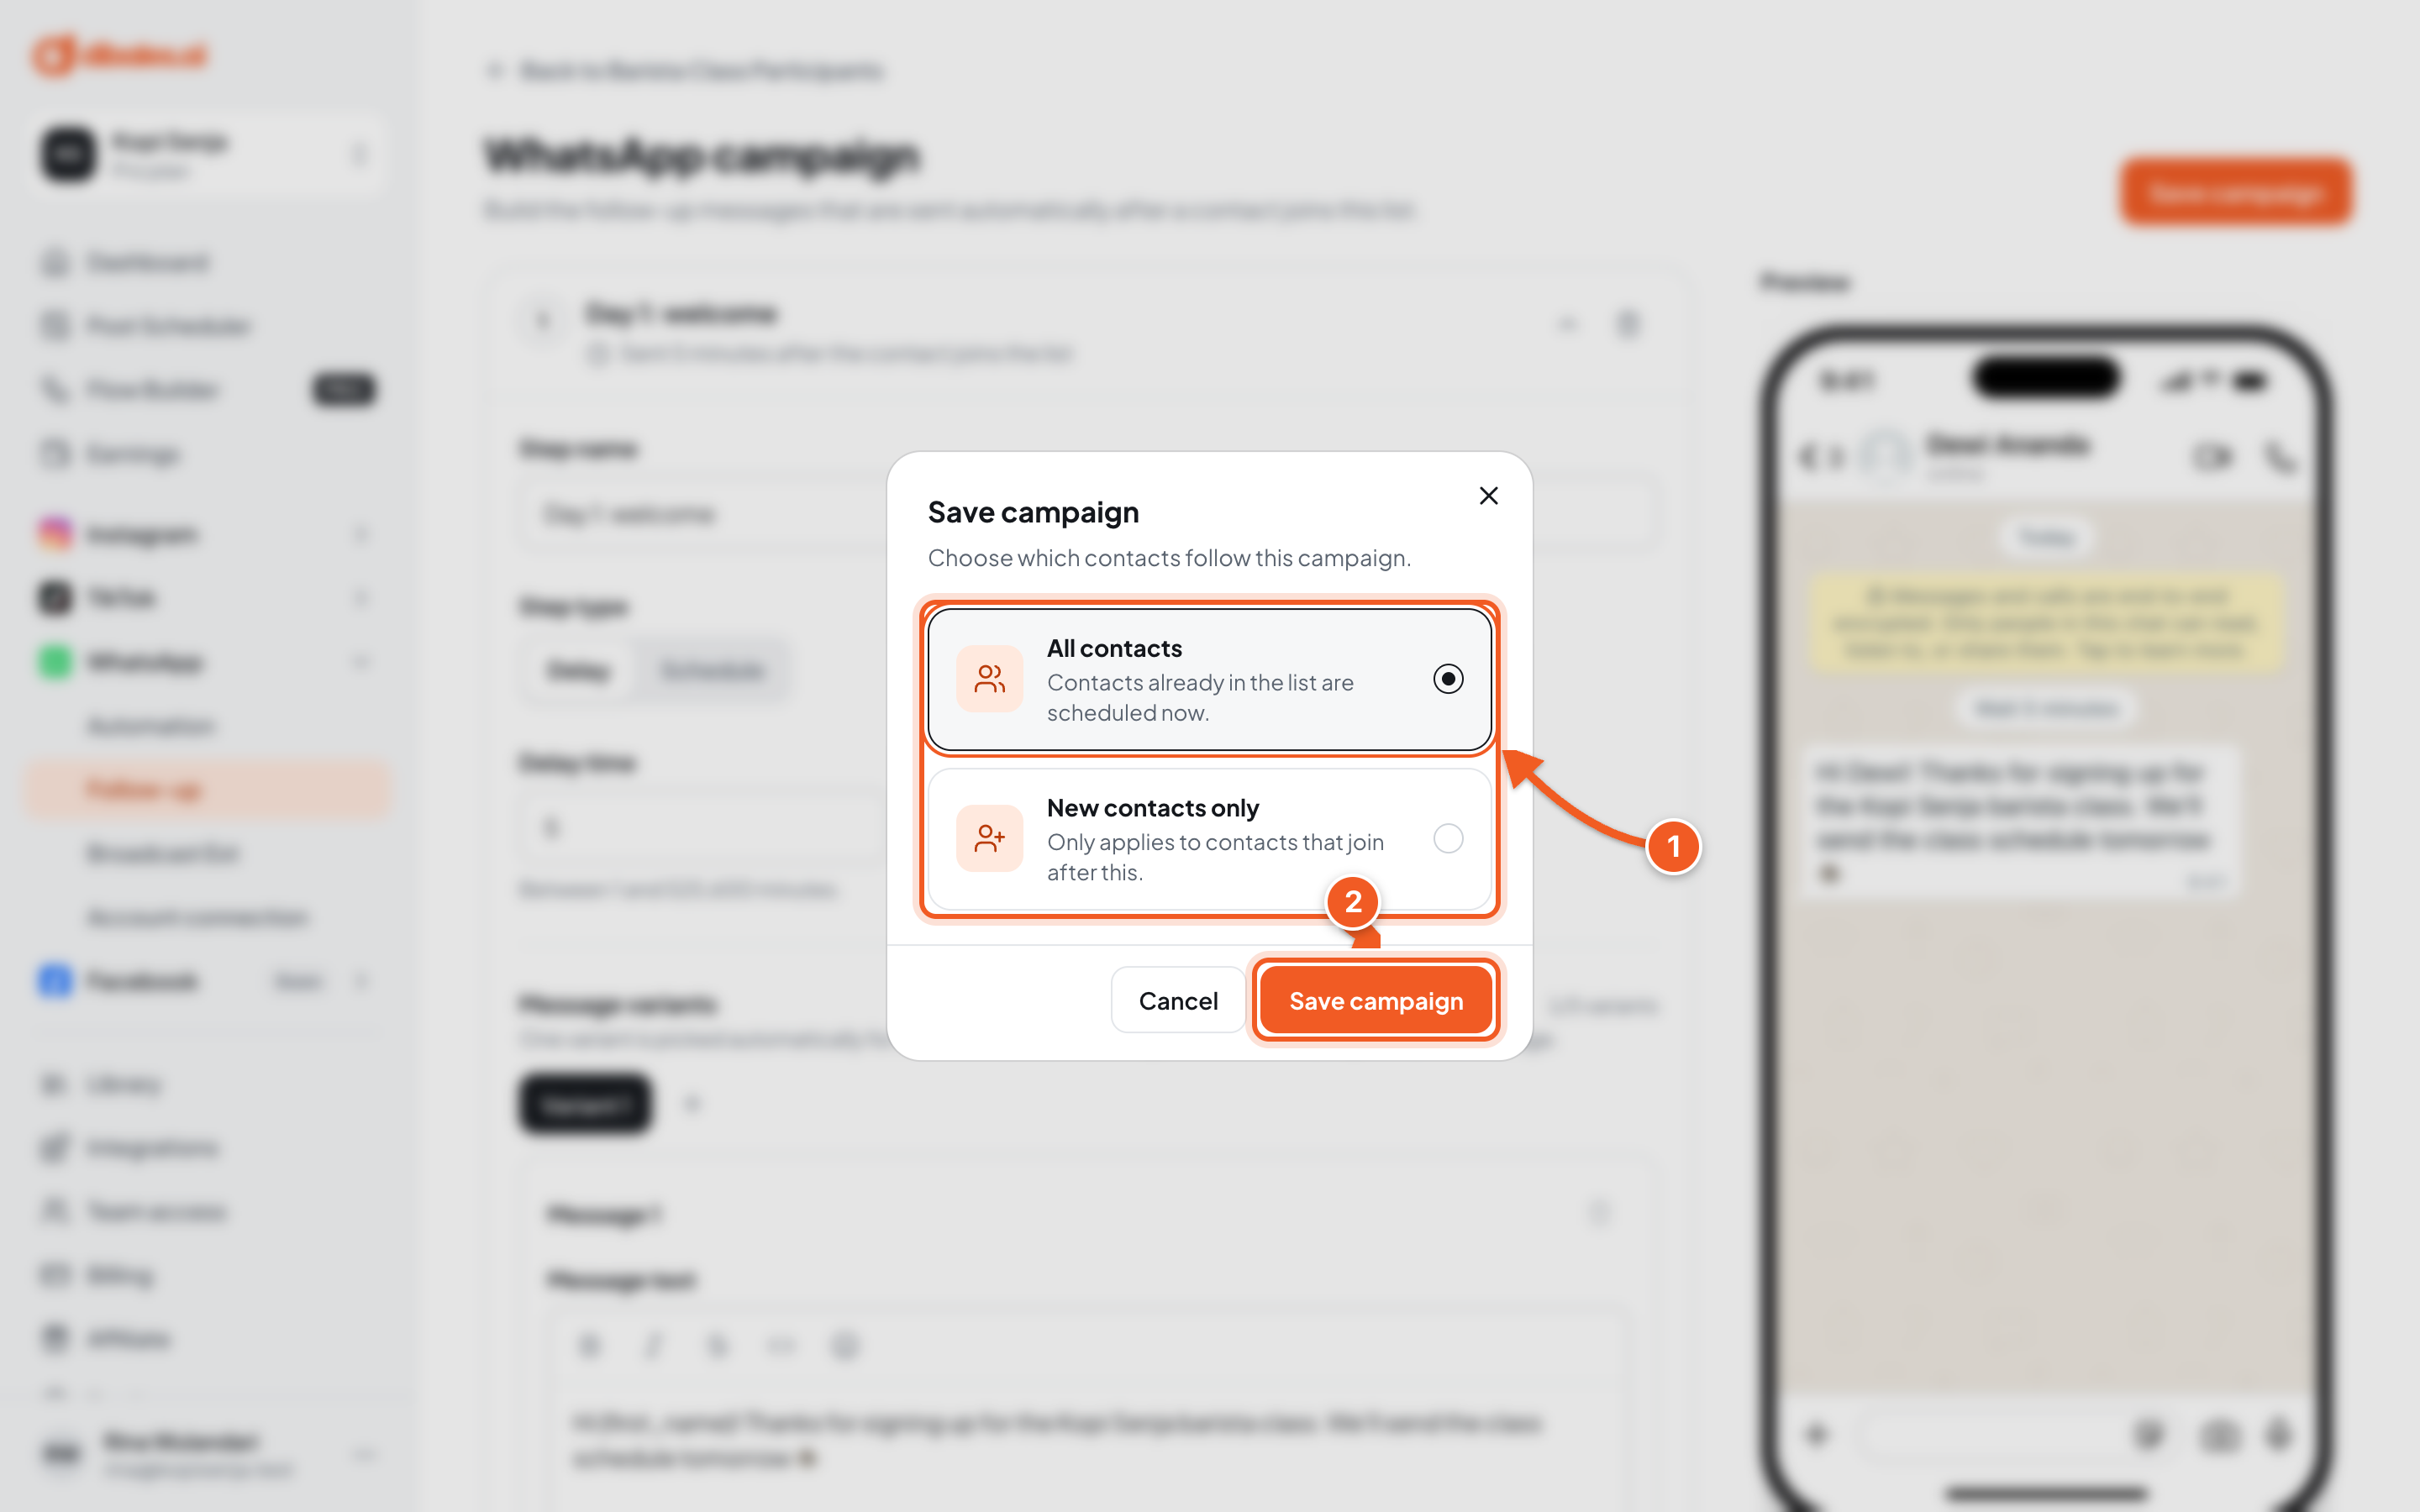
Click Save campaign at the top right.
-
Choose who follows this campaign:
- All contacts: contacts already in the list are scheduled now. If your list already has 300 contacts, all 300 start receiving the first step.
- New contacts only: only contacts who join after this. Existing contacts get nothing.
For a new, empty list, both choices do the same thing.
-
Click Save campaign.
6. Check the result
A Campaign saved notice appears, and you're back on the list page.
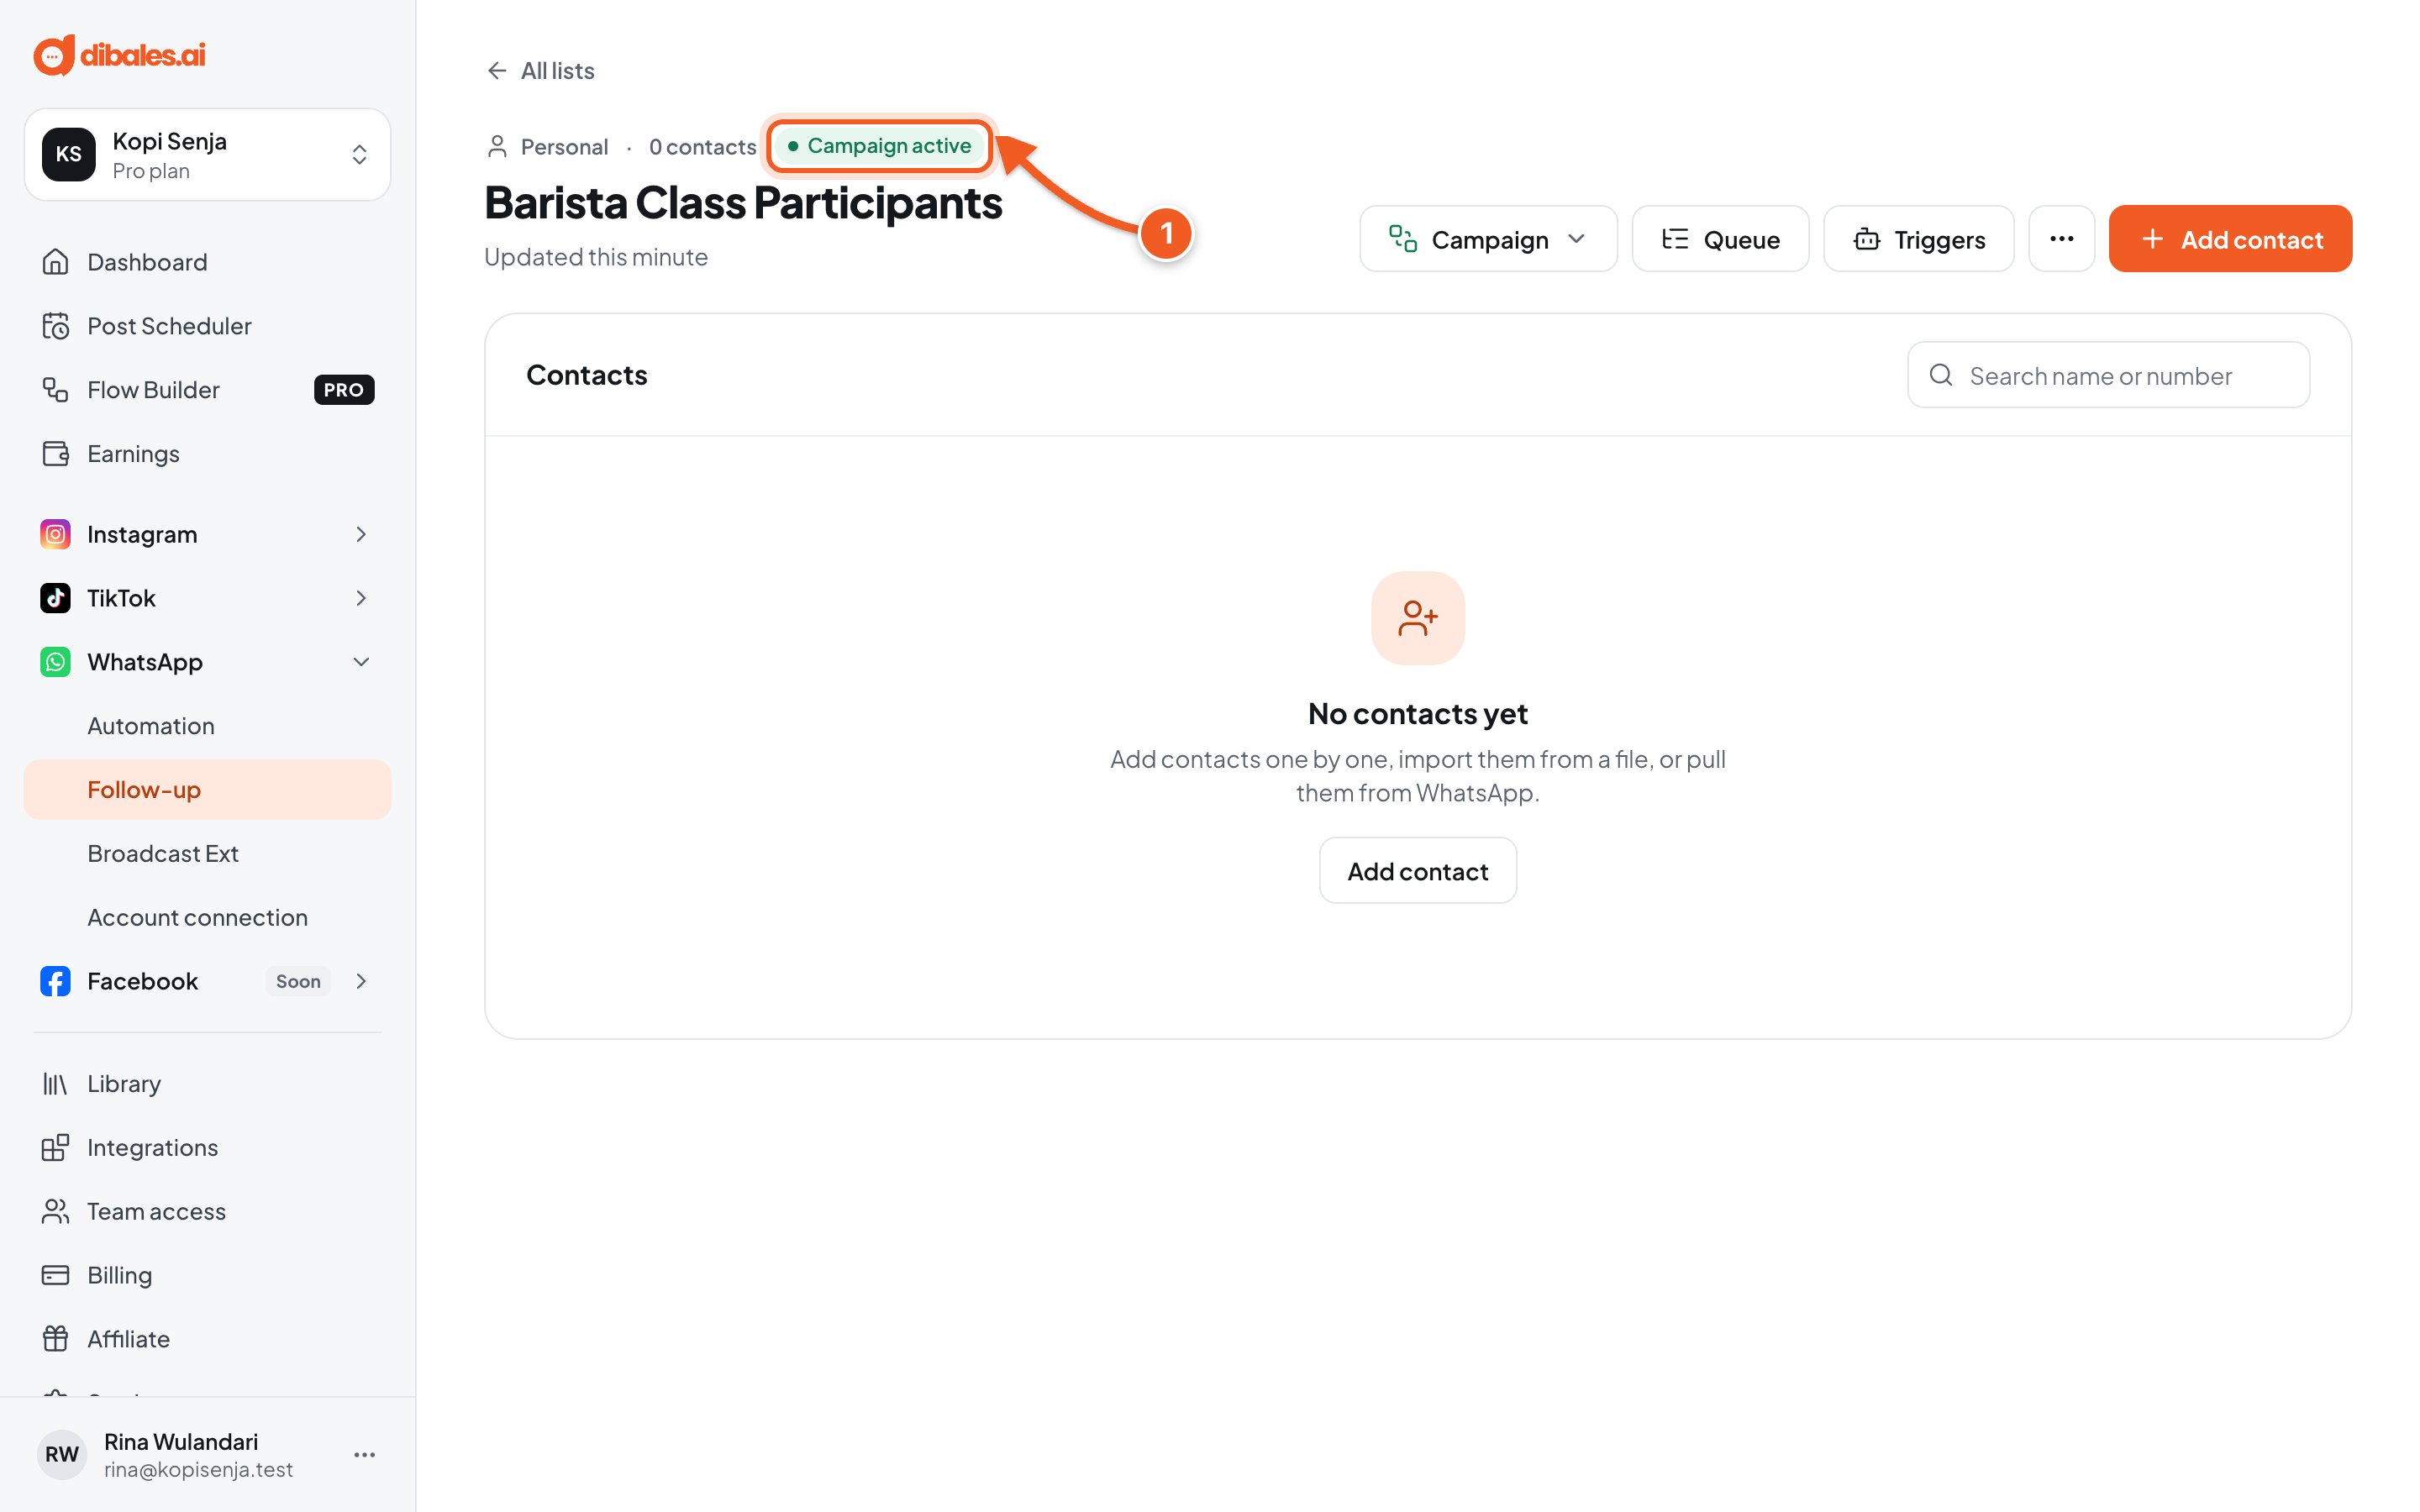
- The list's status changes to Campaign active. Every contact who joins the list from now on starts this campaign right away.
Optional settings
- Message variants: above the message, click the plus sign to create another variant. One variant is picked automatically for each contact, so not everyone gets exactly the same text.
- Actions after sending: run once every message in that step has been sent, for example Remove contact from list in the last step so contacts don't get repeat messages, or Save contact to list for another list.
- Random delay between deliveries in Other settings at the bottom: adds a random delay between deliveries to different contacts, so they look more natural.
Stopping the campaign
Click Campaign › Stop campaign. The status becomes Campaign stopped, and deliveries that come due while it's stopped are cancelled. Click Campaign › Start campaign to run it again.
Tips so it doesn't feel spammy: keep the wording light and personal, leave reasonable gaps between messages, and make sure every message has a clear purpose (education, a call to action, or clarification).
Troubleshooting
| Message | Fix |
|---|---|
| This agent's subscription is not active, so the campaign cannot be saved. | Renew your plan in Billing, then save again. |
| Some fields still need fixing. | Open the step marked Some fields need fixing and complete the fields marked in red, for example an empty message. |
| The campaign was not saved. Try again. | Try saving again in a little while. |
| WhatsApp is not connected. | Connect your WhatsApp number first in Connect Your Accounts. |
Next step
The campaign is active, but the list is still empty. Continue to Set Up Triggers so contacts join automatically.