
Team & Settings
Invite team members to help manage an agent, then set the agent's name, description, and photo.
This guide is for the new dibales.ai dashboard. Still on the old layout? See Team Access and Settings.
Before you start
- You're the agent's owner. Only owners can manage team access. If you're only a member, the Team access page shows You do not own an agent yet. Access to agents shared with you is managed by their owners.
- The Google email of the person you want to invite.
Team access
An agent's owner can invite other people to help manage their agents, for example a store admin or a content team. There are only two roles:
| Role | Can | Can't |
|---|---|---|
| Owner | Everything, including managing team access | - |
| Member | Manage automations, account connections, scheduled posts, integrations, and the profile of shared agents | See Earnings or withdraw, delete agents, manage team access, or see other members |
1. Open Team access
In the sidebar, click Team access. On a phone, open the menu first with the ☰ icon at the top right.
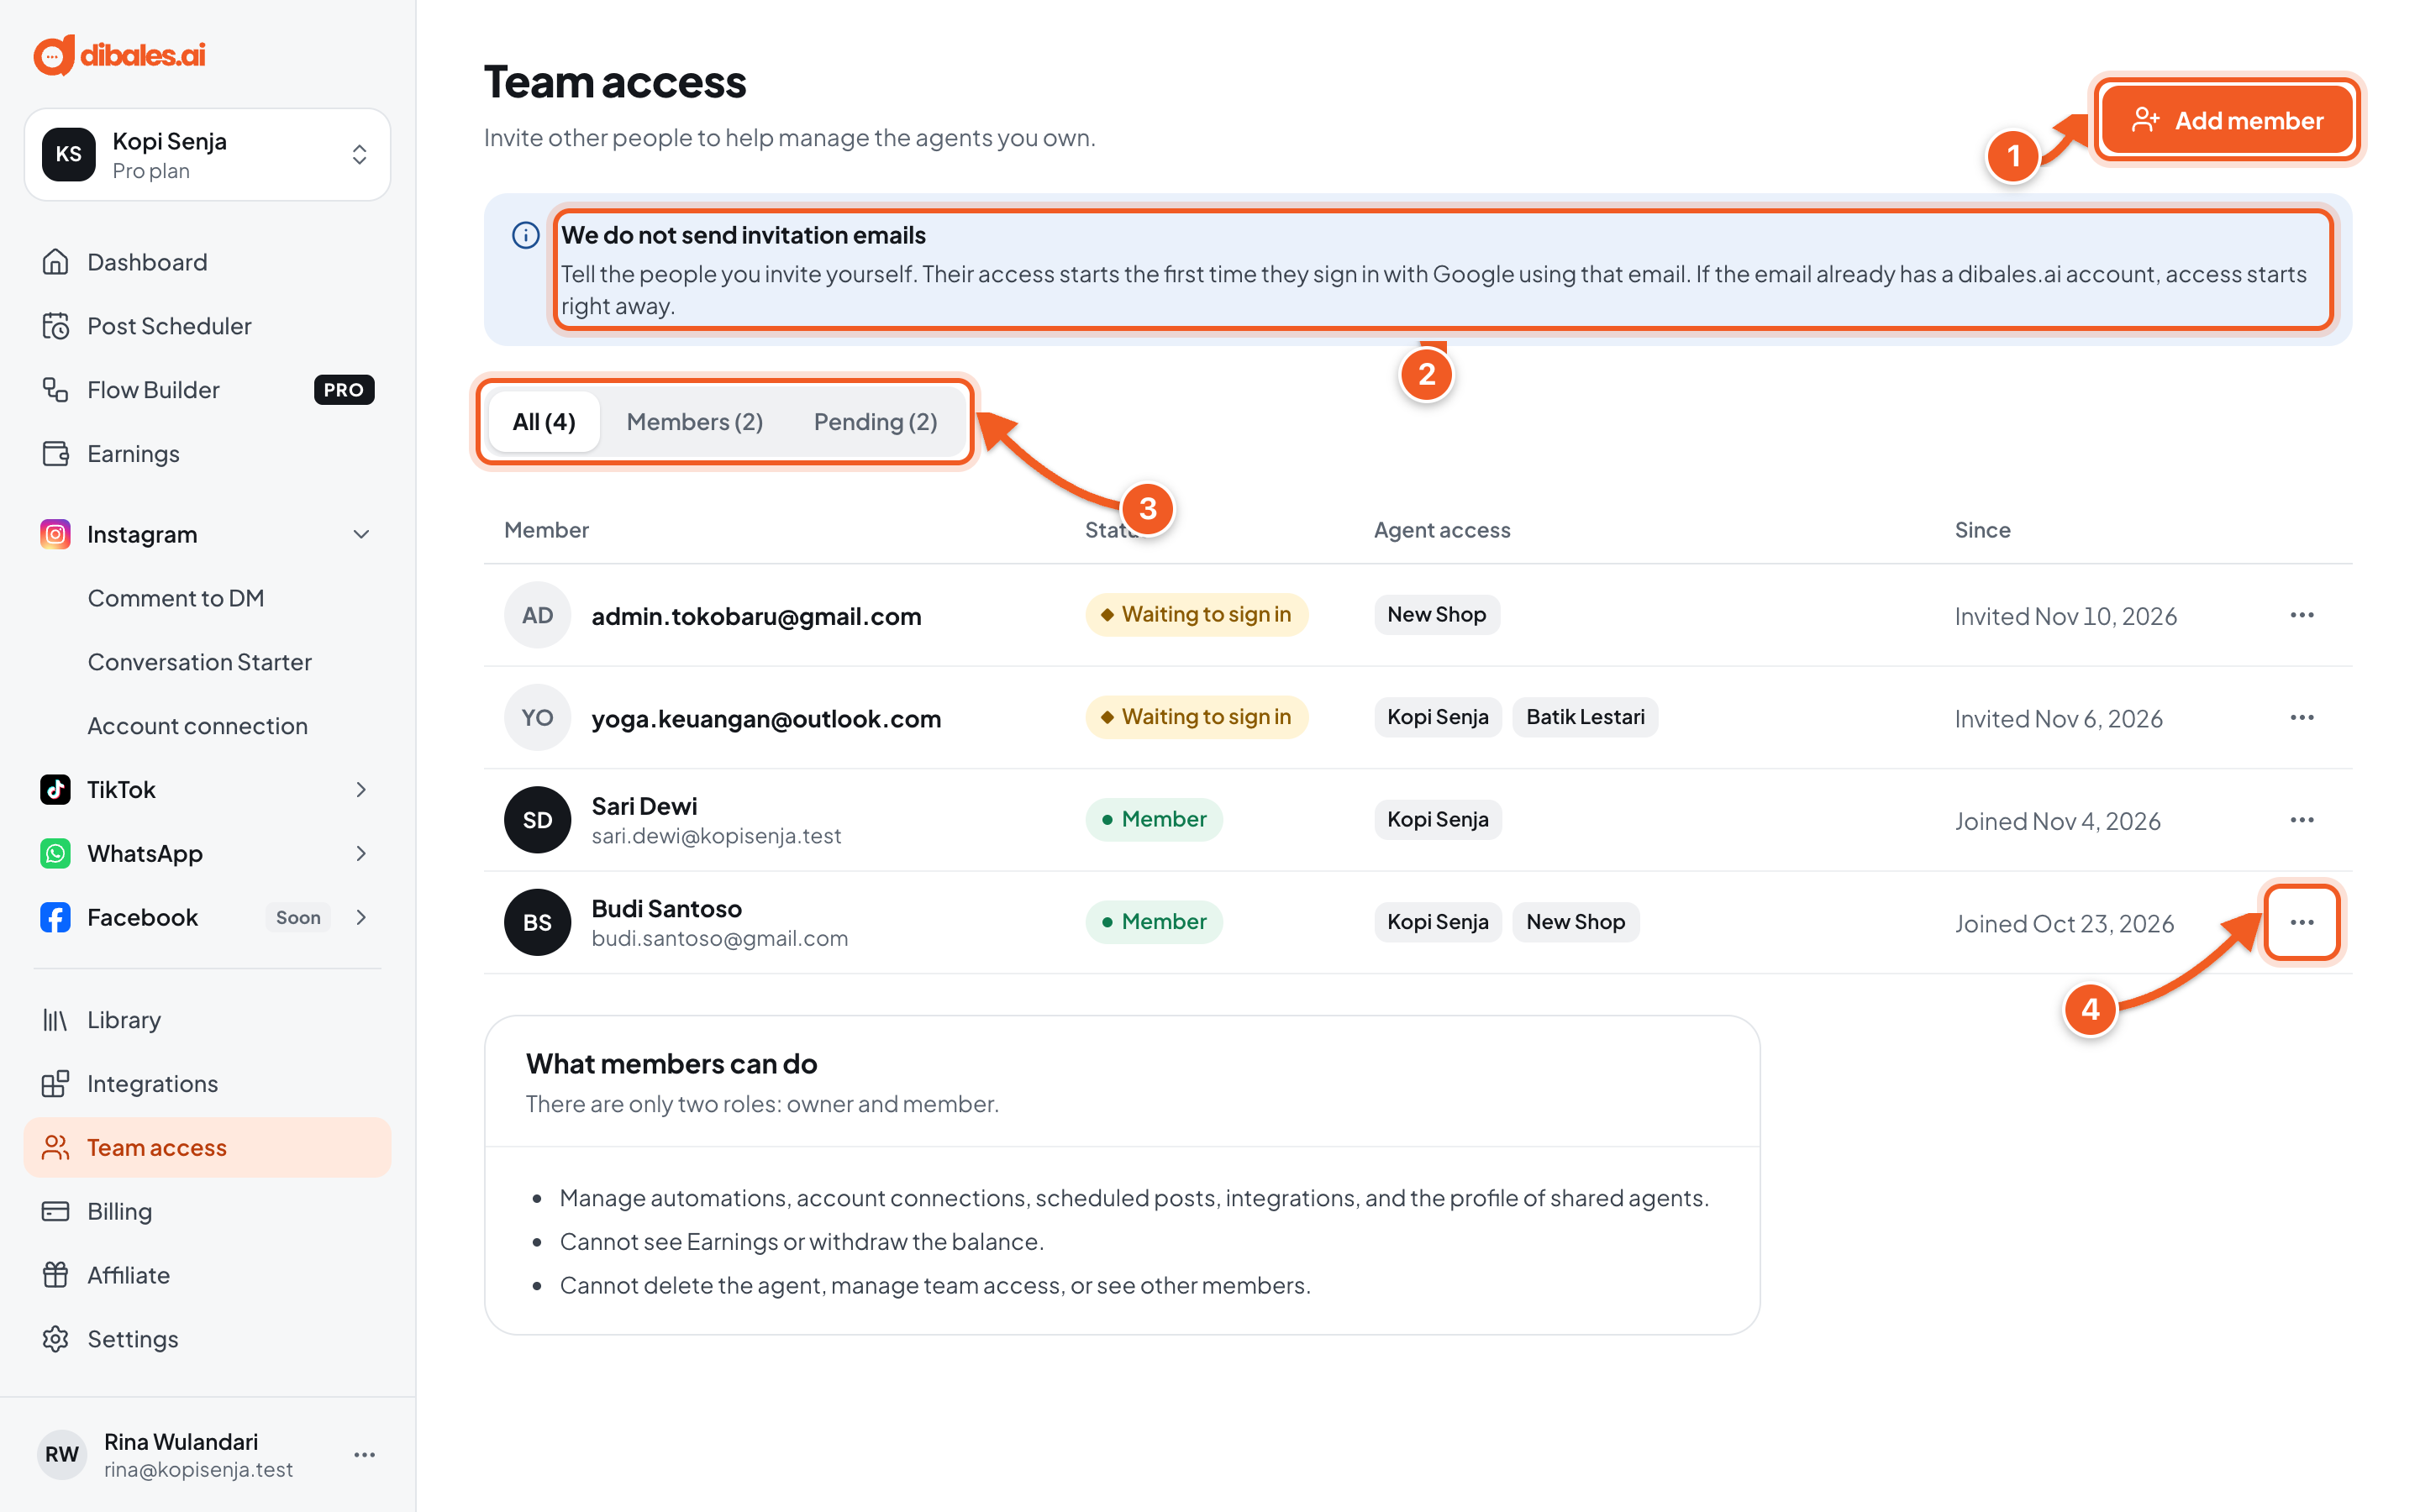
- Add member: invites someone new.
- We do not send invitation emails: tell the people you invite yourself. Their access starts the first time they sign in with Google using that email. If the email already has a dibales.ai account, access starts right away.
- Filter the list: All, Members (signed in), or Pending (not signed in yet).
- The ⋯ icon on each row: Edit access to change the shared agents, Remove member, or Revoke invitation for a pending invitation. A removed member loses access to every agent you shared, and isn't notified.
2. Invite a member
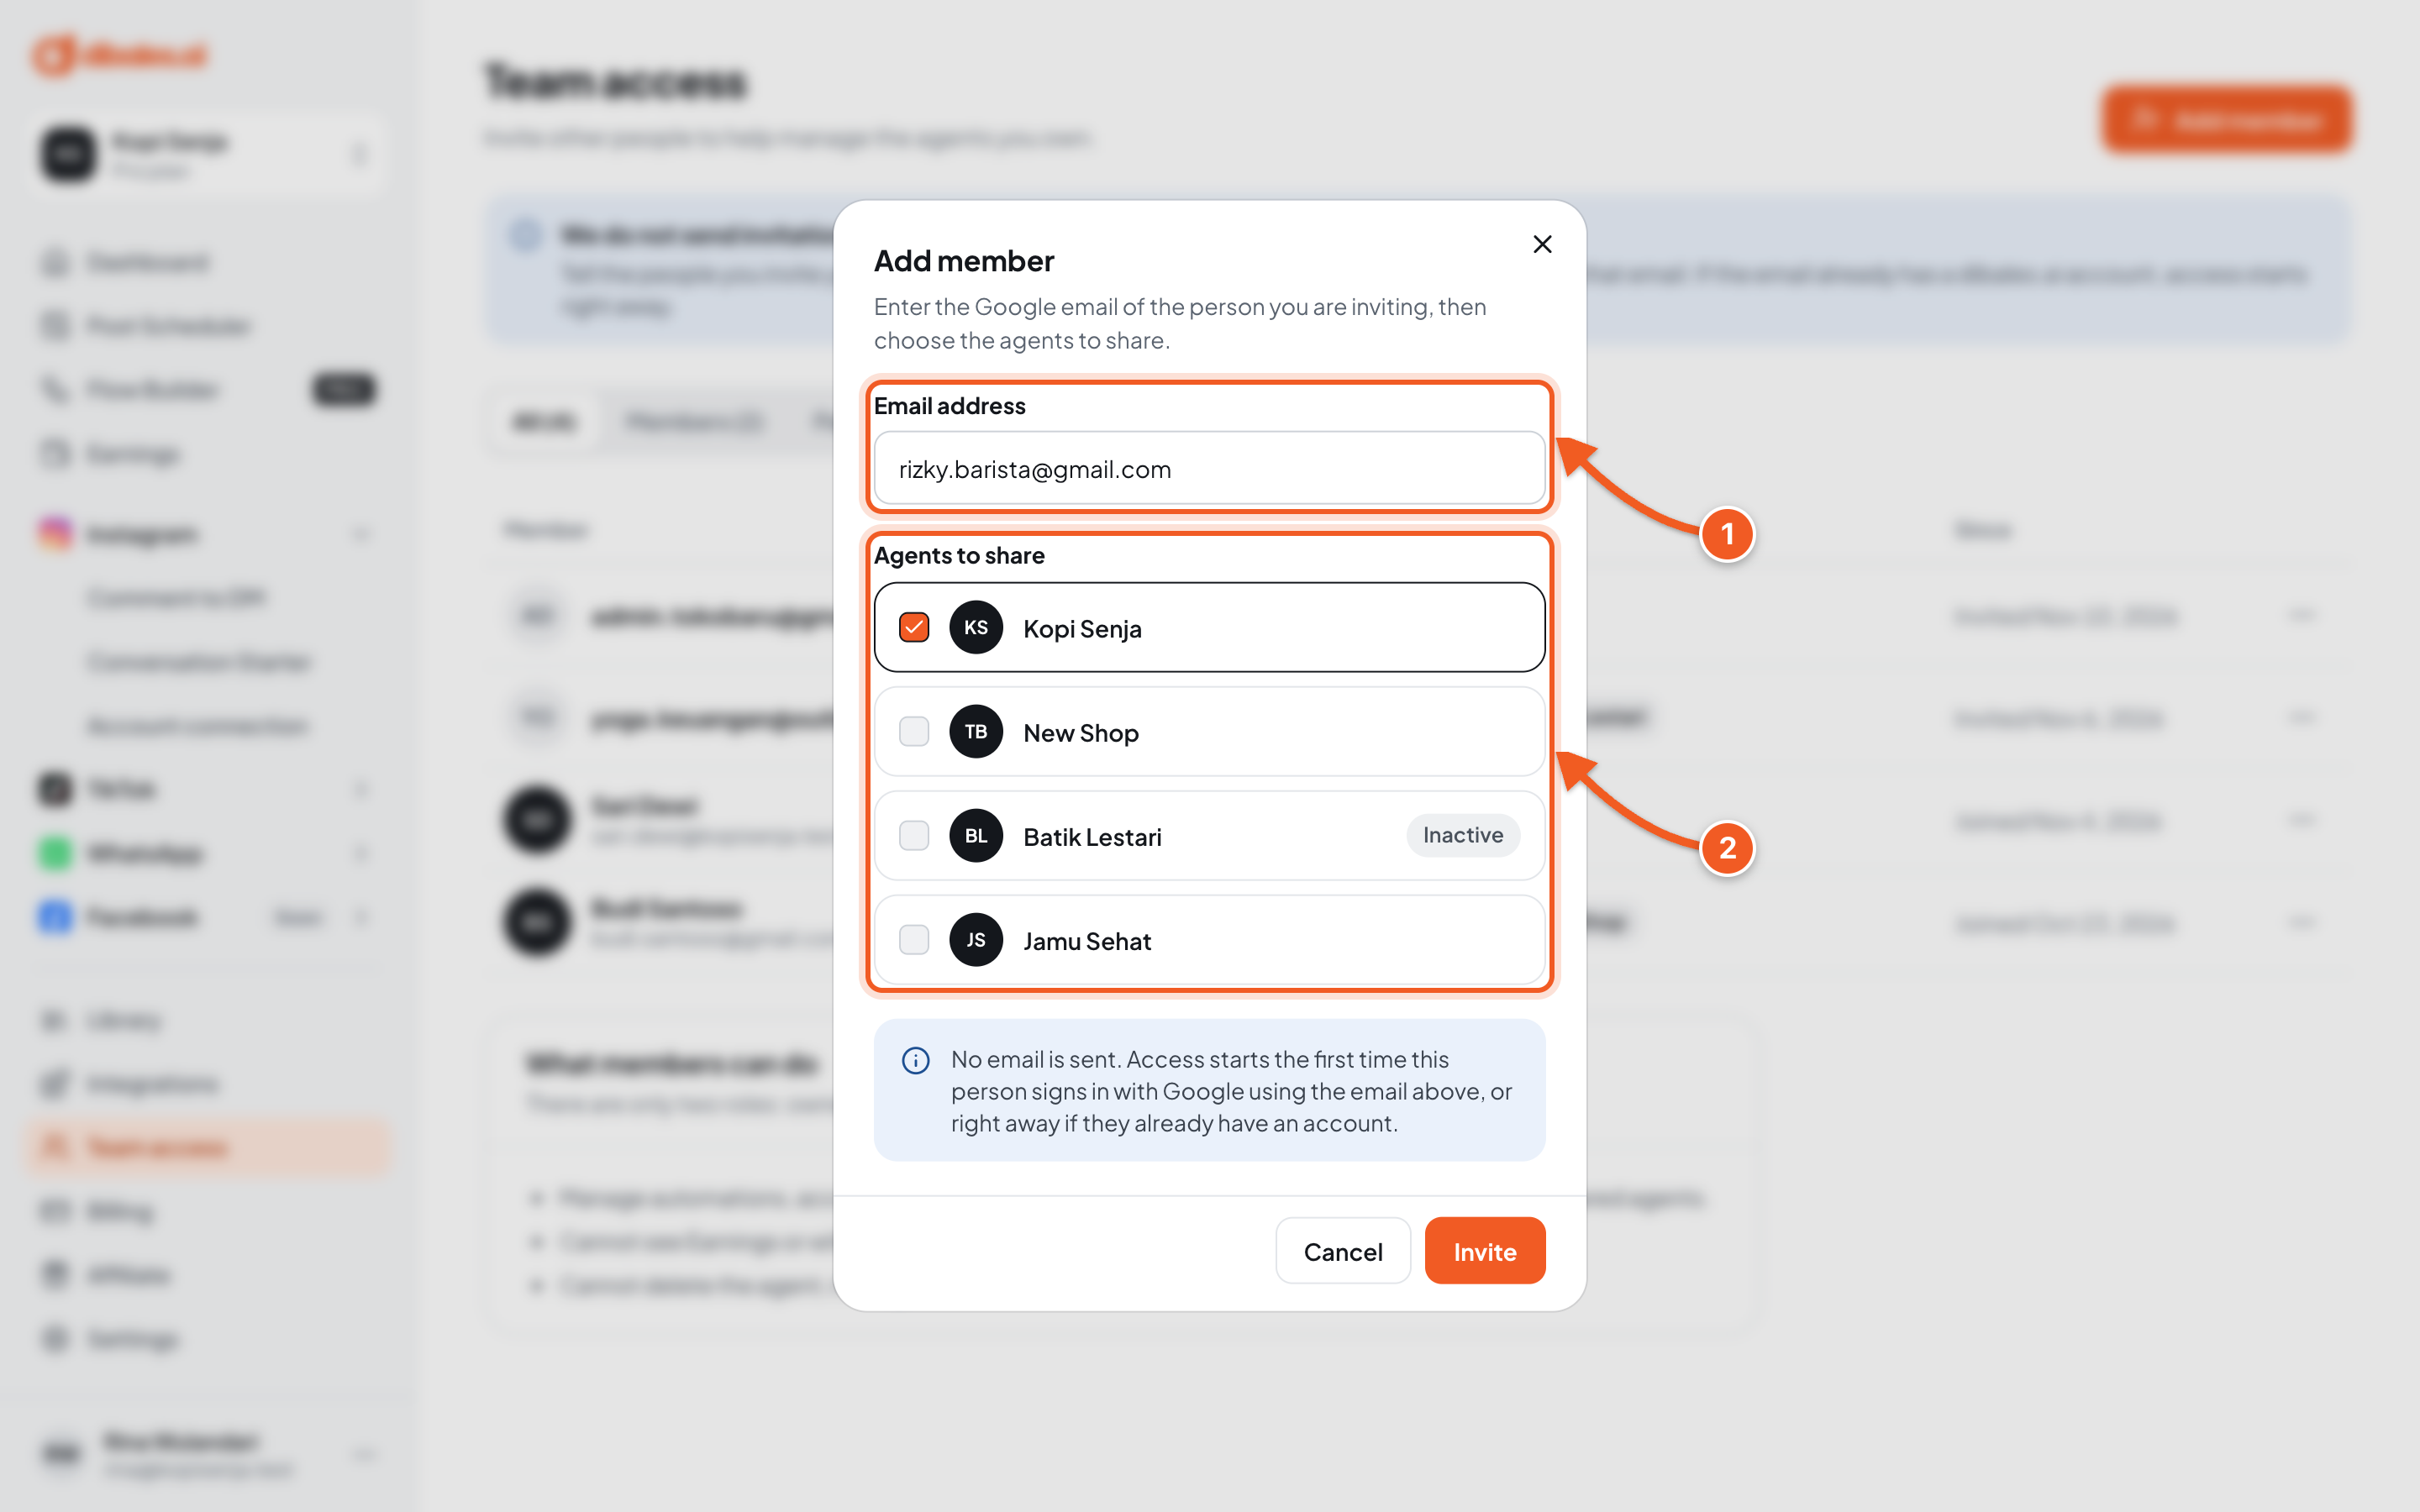
- Email address: the Google email of the person you're inviting.
- Agents to share: tick the agents they may manage, at least one.
Click Invite. You can only share agents you own.
3. Check the result
- If the email already has a dibales.ai account, you'll see … already has an account and got access right away. The person shows up under the Members filter right away.
- If not, you'll see Invitation saved. Ask … to sign in with Google. The person stays under Pending until they sign in with Google using that email.
- Once signed in, members can pick the shared agent with the agent name at the top left.
Agent settings
In the sidebar, click Settings to manage the profile of the agent you have open.
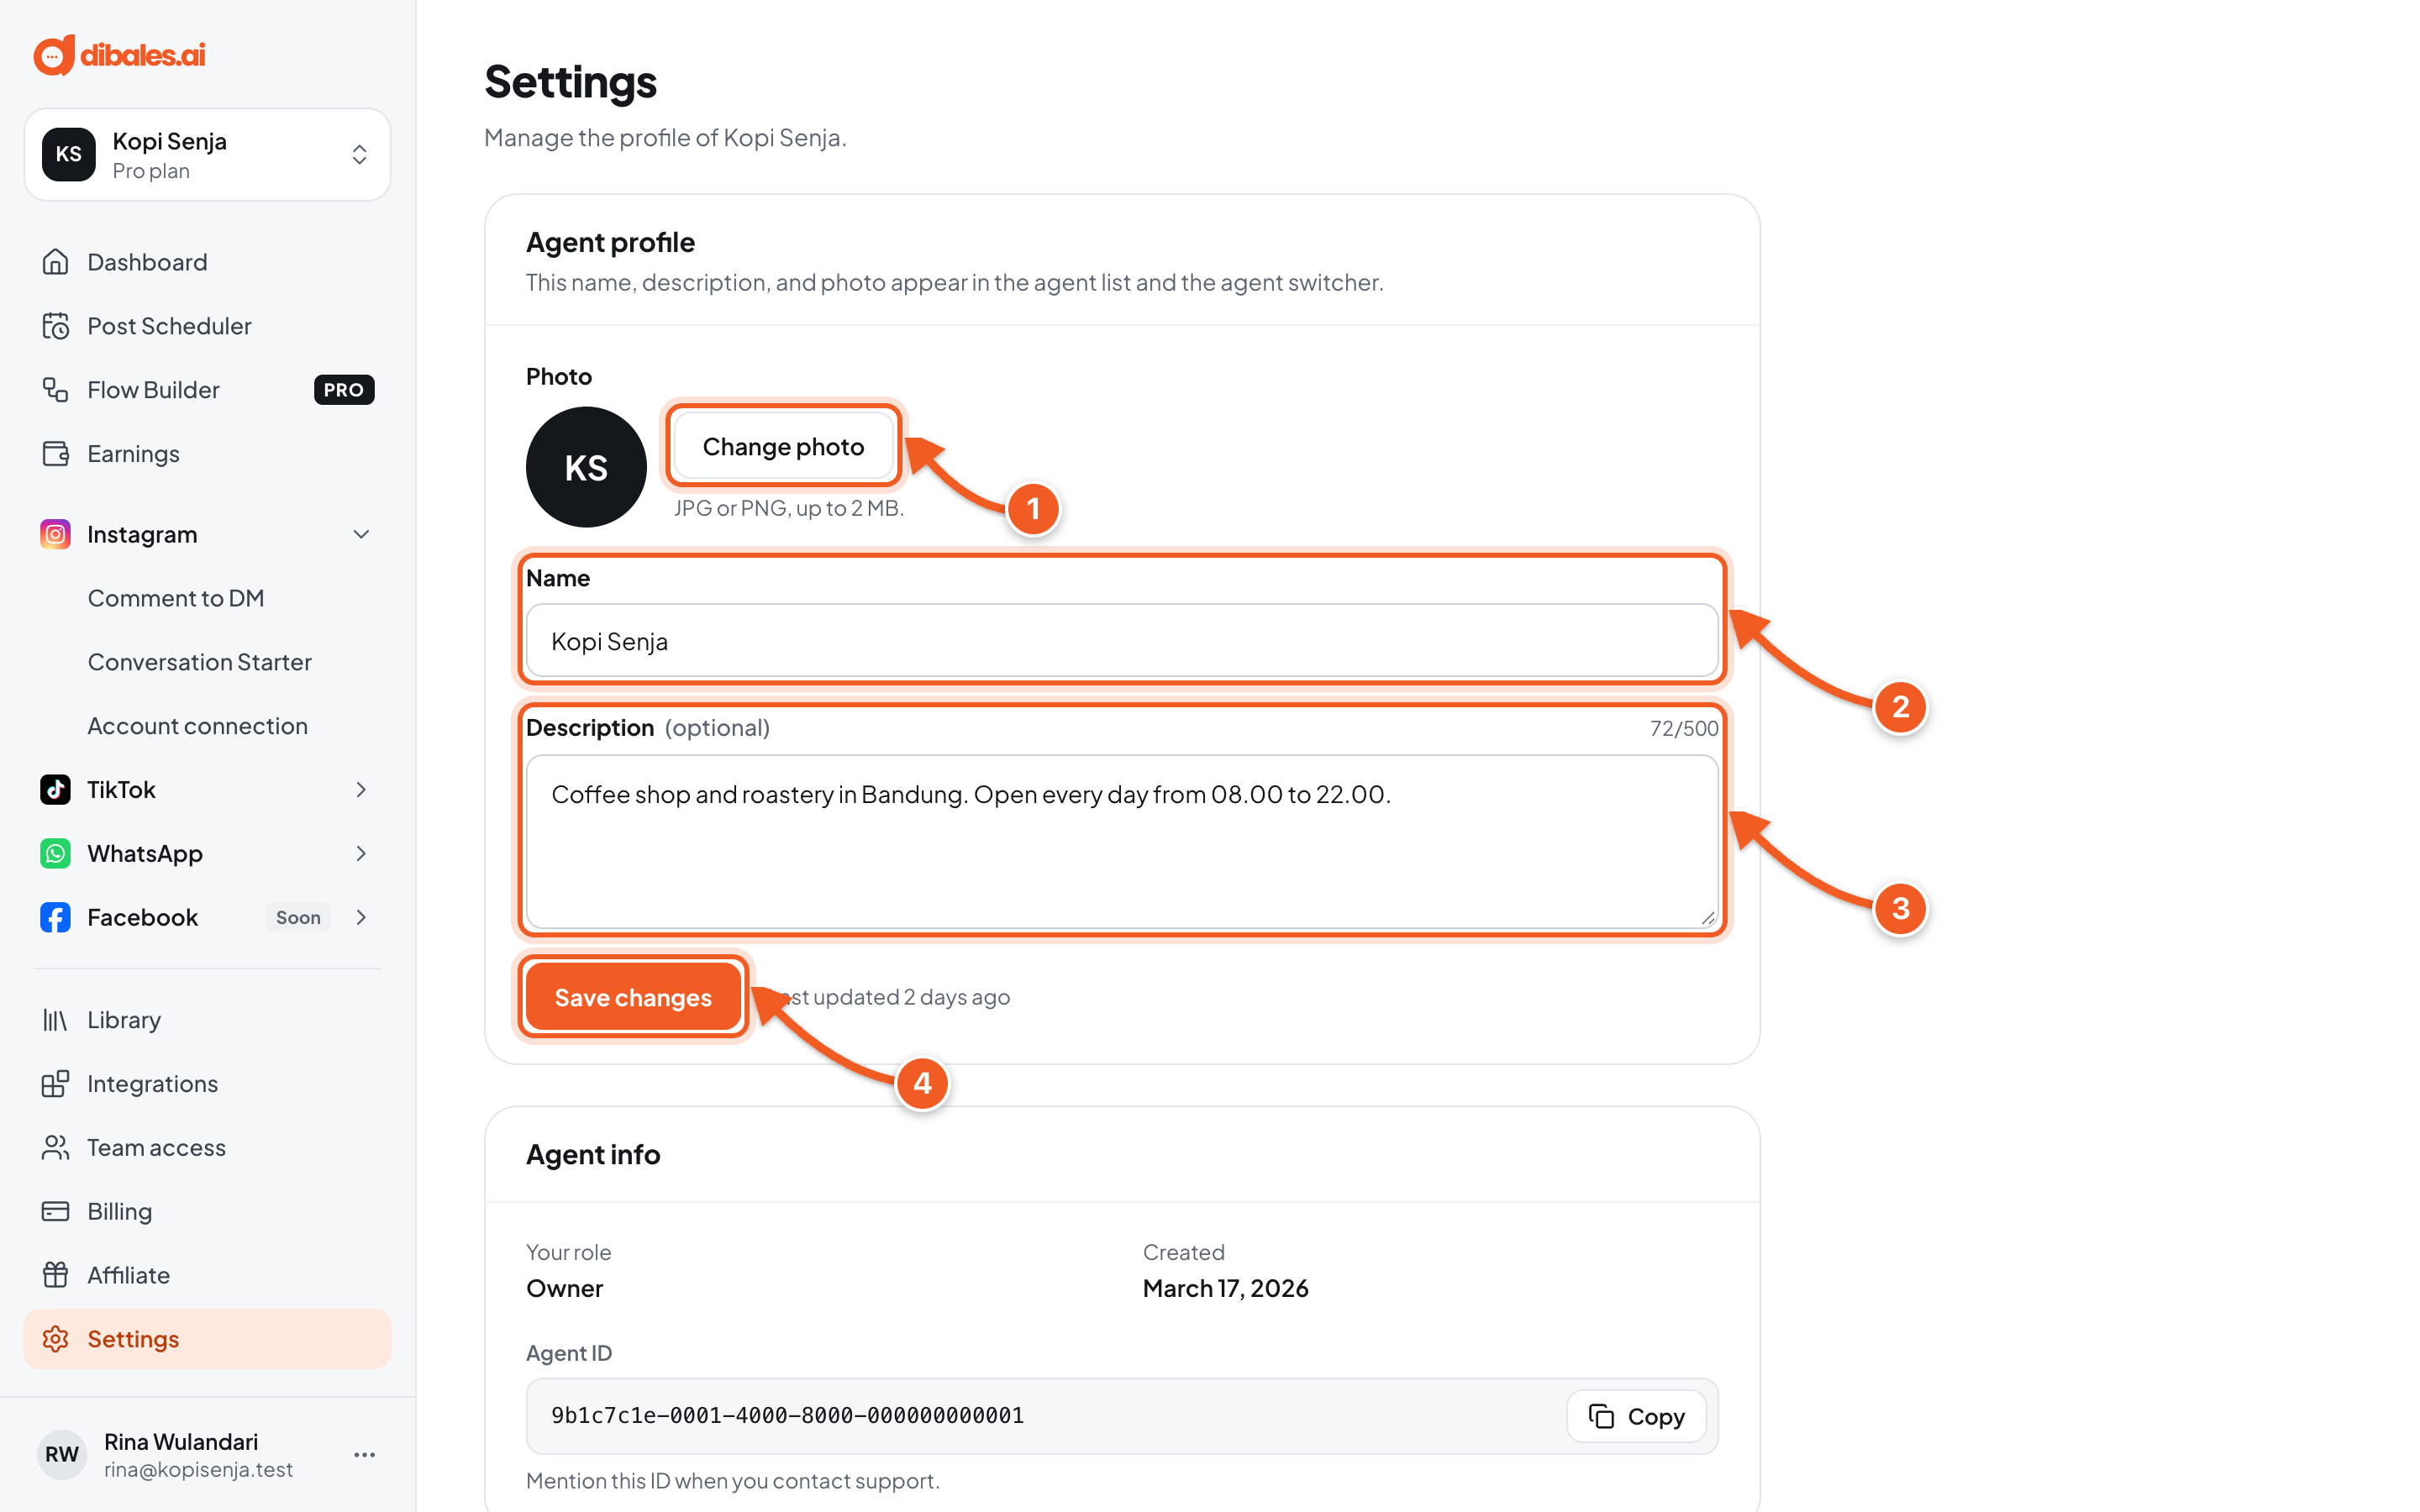
- Change photo: the agent photo, JPG or PNG, up to 2 MB. Click Cancel if you change your mind.
- Name: the agent name, for example your store name.
- Description (optional): briefly describe the business this agent serves.
- Save changes: the new name, description, and photo are saved once you click this button.
This name, description, and photo appear in the agent list and the agent switcher.
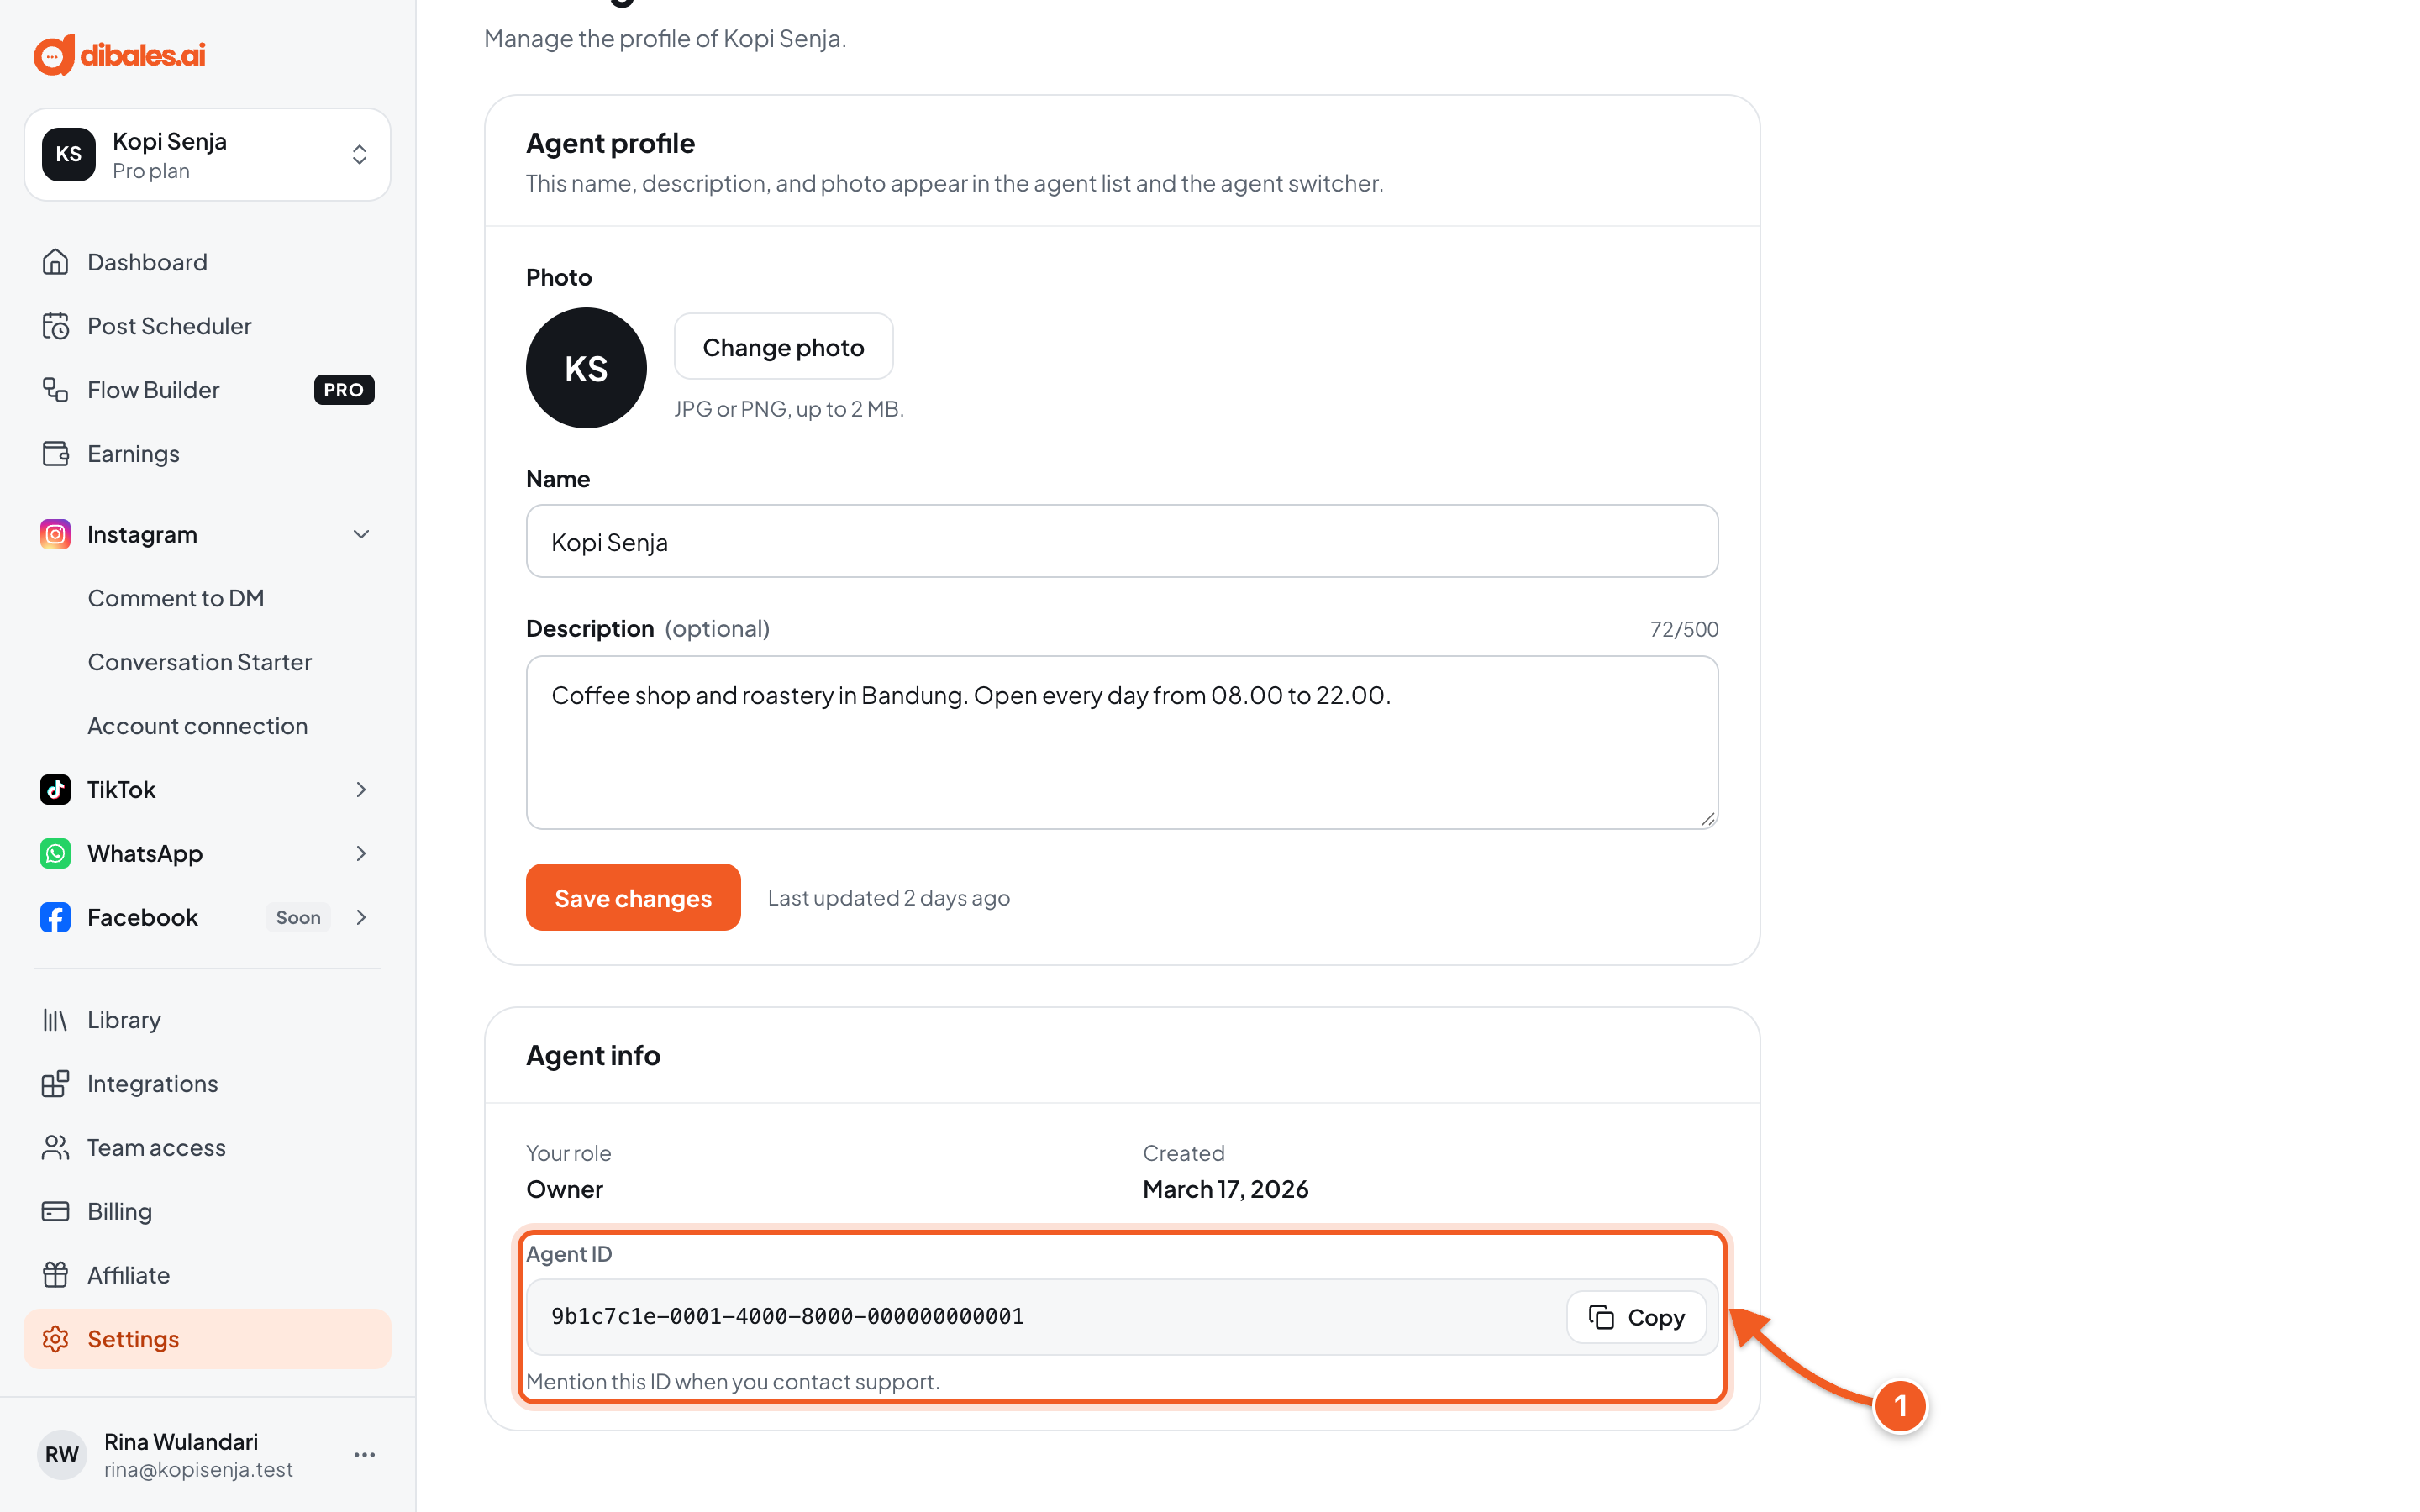
- The Agent info section shows your role (Owner or Team member), when the agent was created, and the Agent ID. Click Copy and mention this ID when you contact support.
After you click Save changes, the new name and photo show up right away in the agent switcher at the top left.
Troubleshooting
| Problem | Fix |
|---|---|
| You cannot invite yourself. | Enter someone else's email. |
| Select at least one agent. | Tick at least one agent under Agents to share. |
| You can only share agents you own. | Agents shared with you can't be shared again. Ask their owner to invite. |
| This email is already invited and still pending. | The invitation already exists. The agents you picked are added to it. Ask the person to sign in with Google. |
| A member doesn't see the agent after signing in | Make sure they sign in with Google using exactly the same email as the invitation. |
| The photo must be a JPG or PNG, up to … | Choose a JPG or PNG photo of up to 2 MB. |
| Name is required, up to … characters. | Enter the agent name, and shorten it if it's too long. |