Sign Up & Log In
Sign in with Google, choose a plan or use a voucher, and your first agent is ready to use.
This guide is for the new dibales.ai dashboard. Still on the old layout? See Sign Up & Log In.
Before you start
- A Google account you want to use for dibales.ai. If you already bought a plan through a checkout page, use the Google account with the same email.
- A regular browser such as Chrome or Safari, on a phone or computer.
- A voucher code (optional), if you have one. Voucher codes are usually sent by email with the subject Kode Voucher Akses Platform dibales.ai (dibales.ai platform access voucher code).
1. Sign in
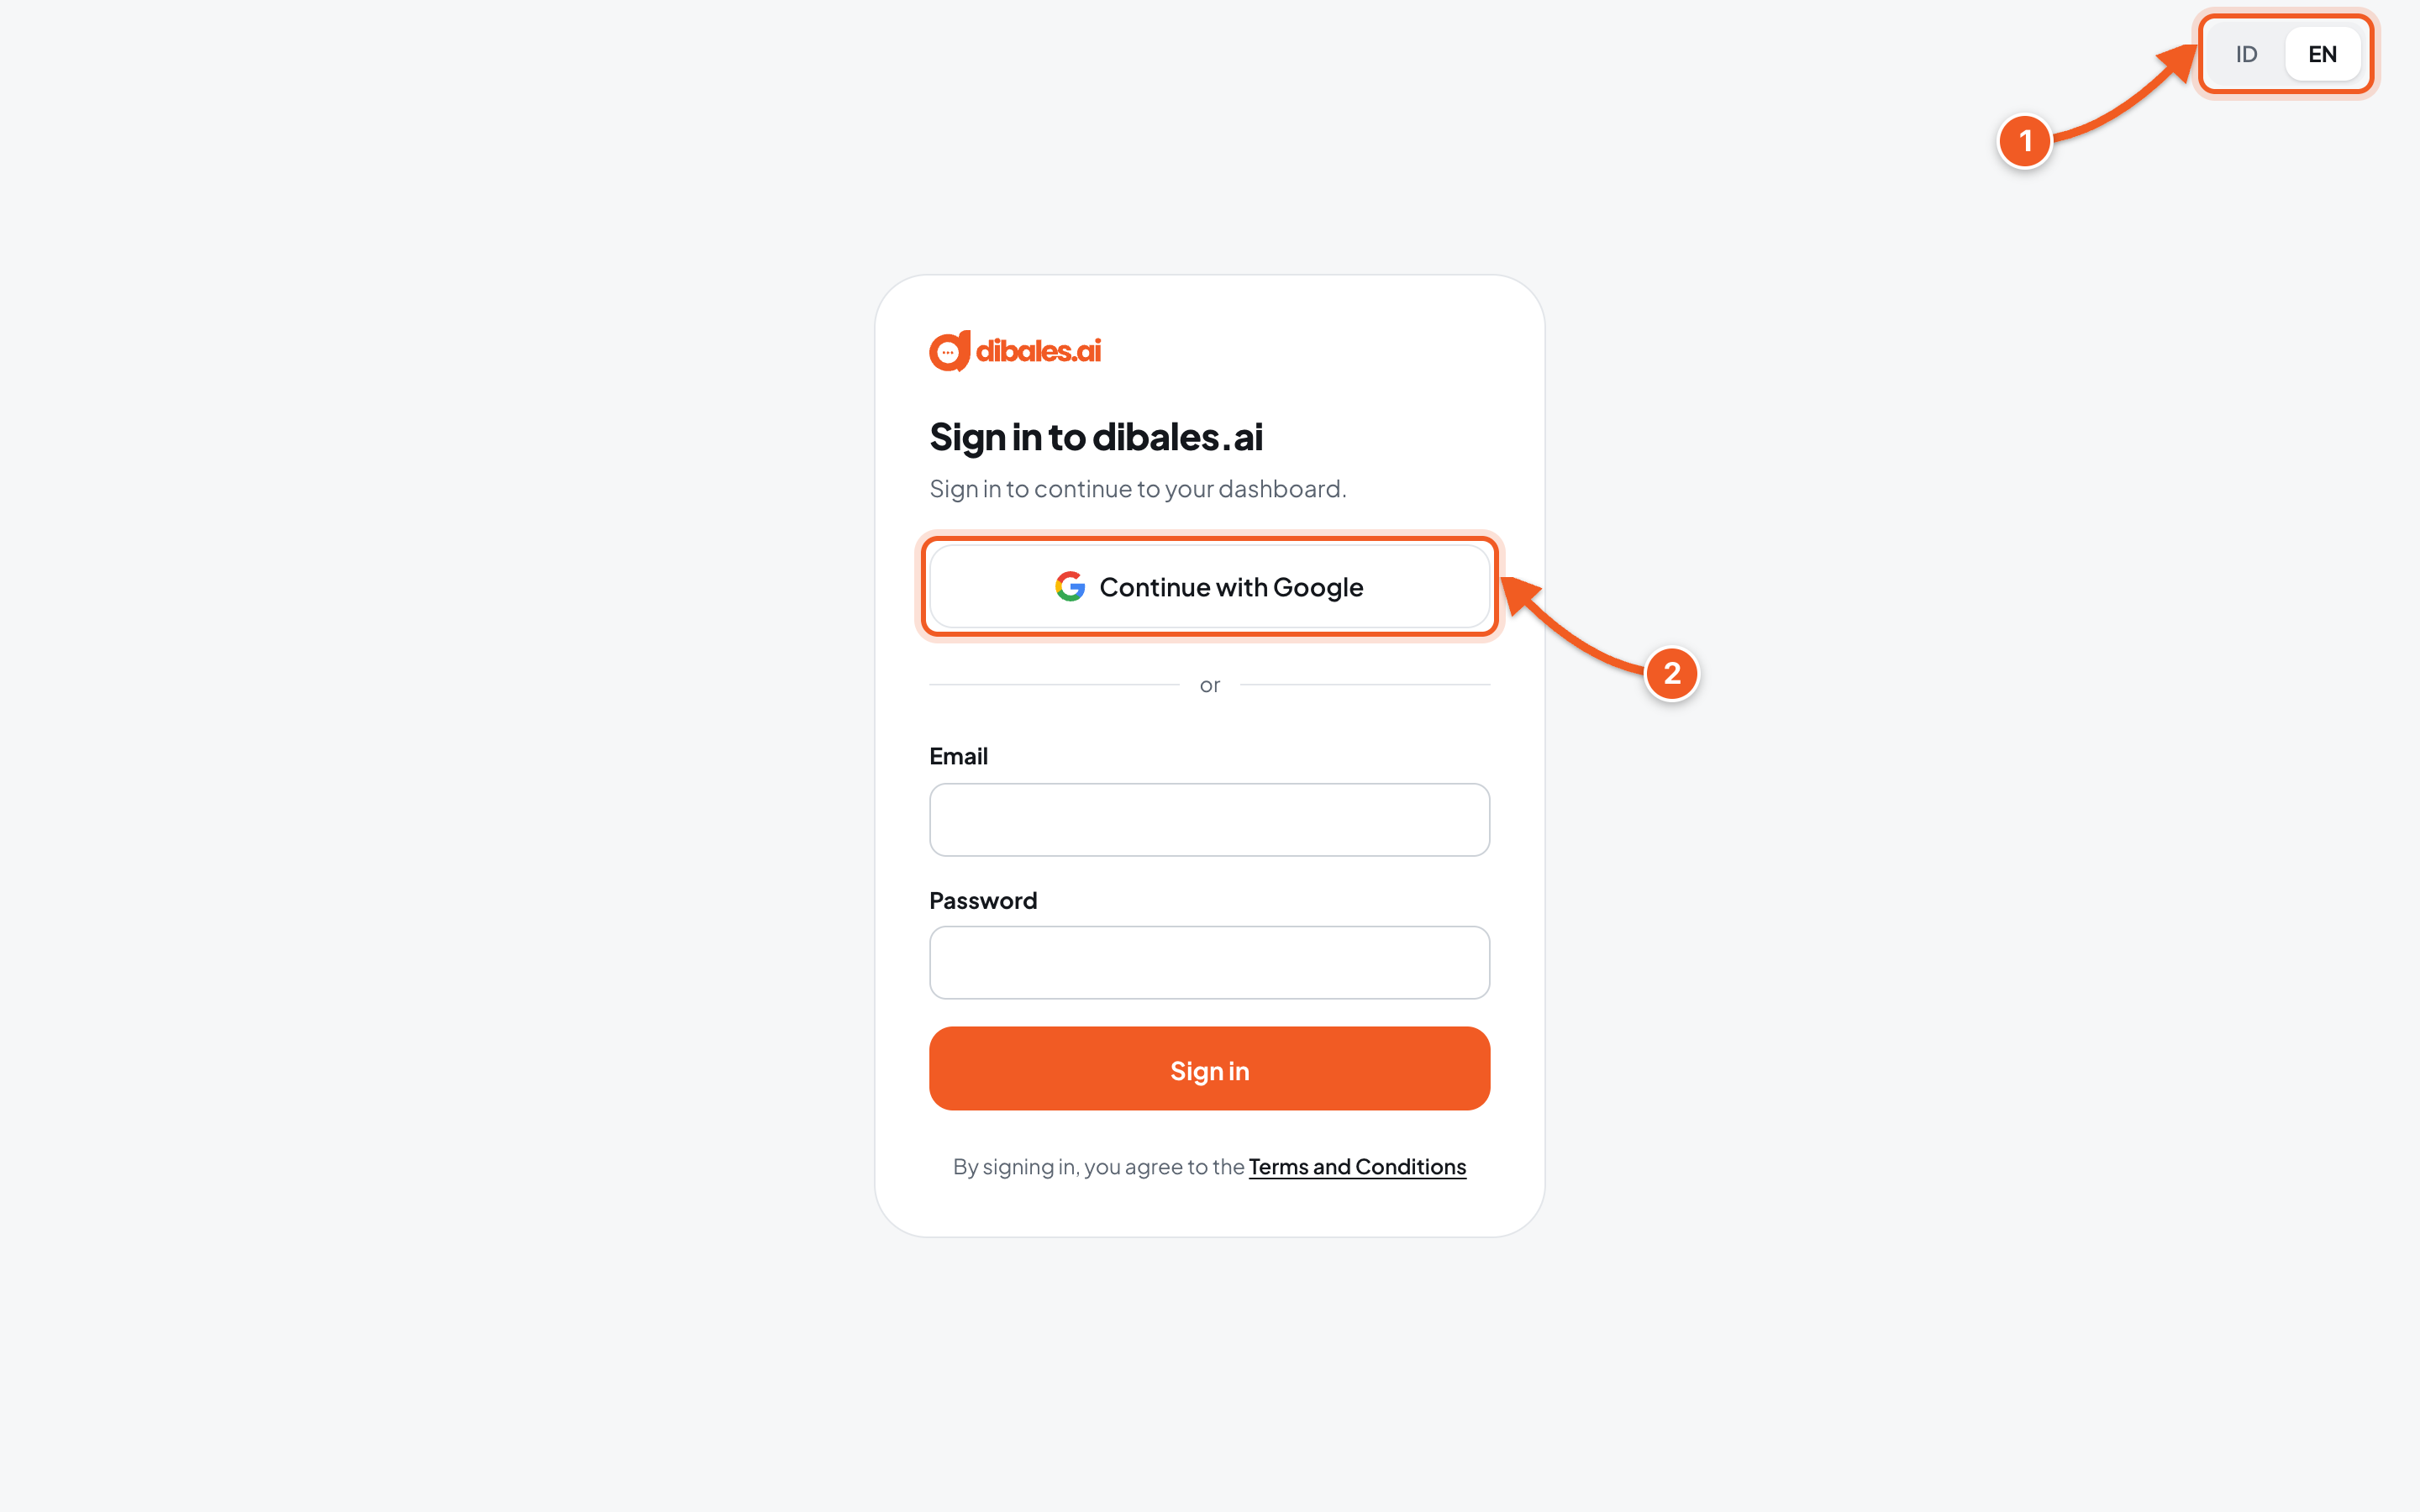
- Choose the dashboard language, ID or EN, at the top right. You can switch it again at any time.
- Click Continue with Google, then choose the Google account you want to use.
Open the link in a browser such as Chrome or Safari. Google sign-in doesn't work from in-app browsers, for example when you open a link from Instagram.
💡 The email and password fields are only for special accounts from the dibales.ai team. To sign up, use Google.
2. Get to know dibales.ai
New accounts are greeted with a few short slides. Click Next until the last slide.
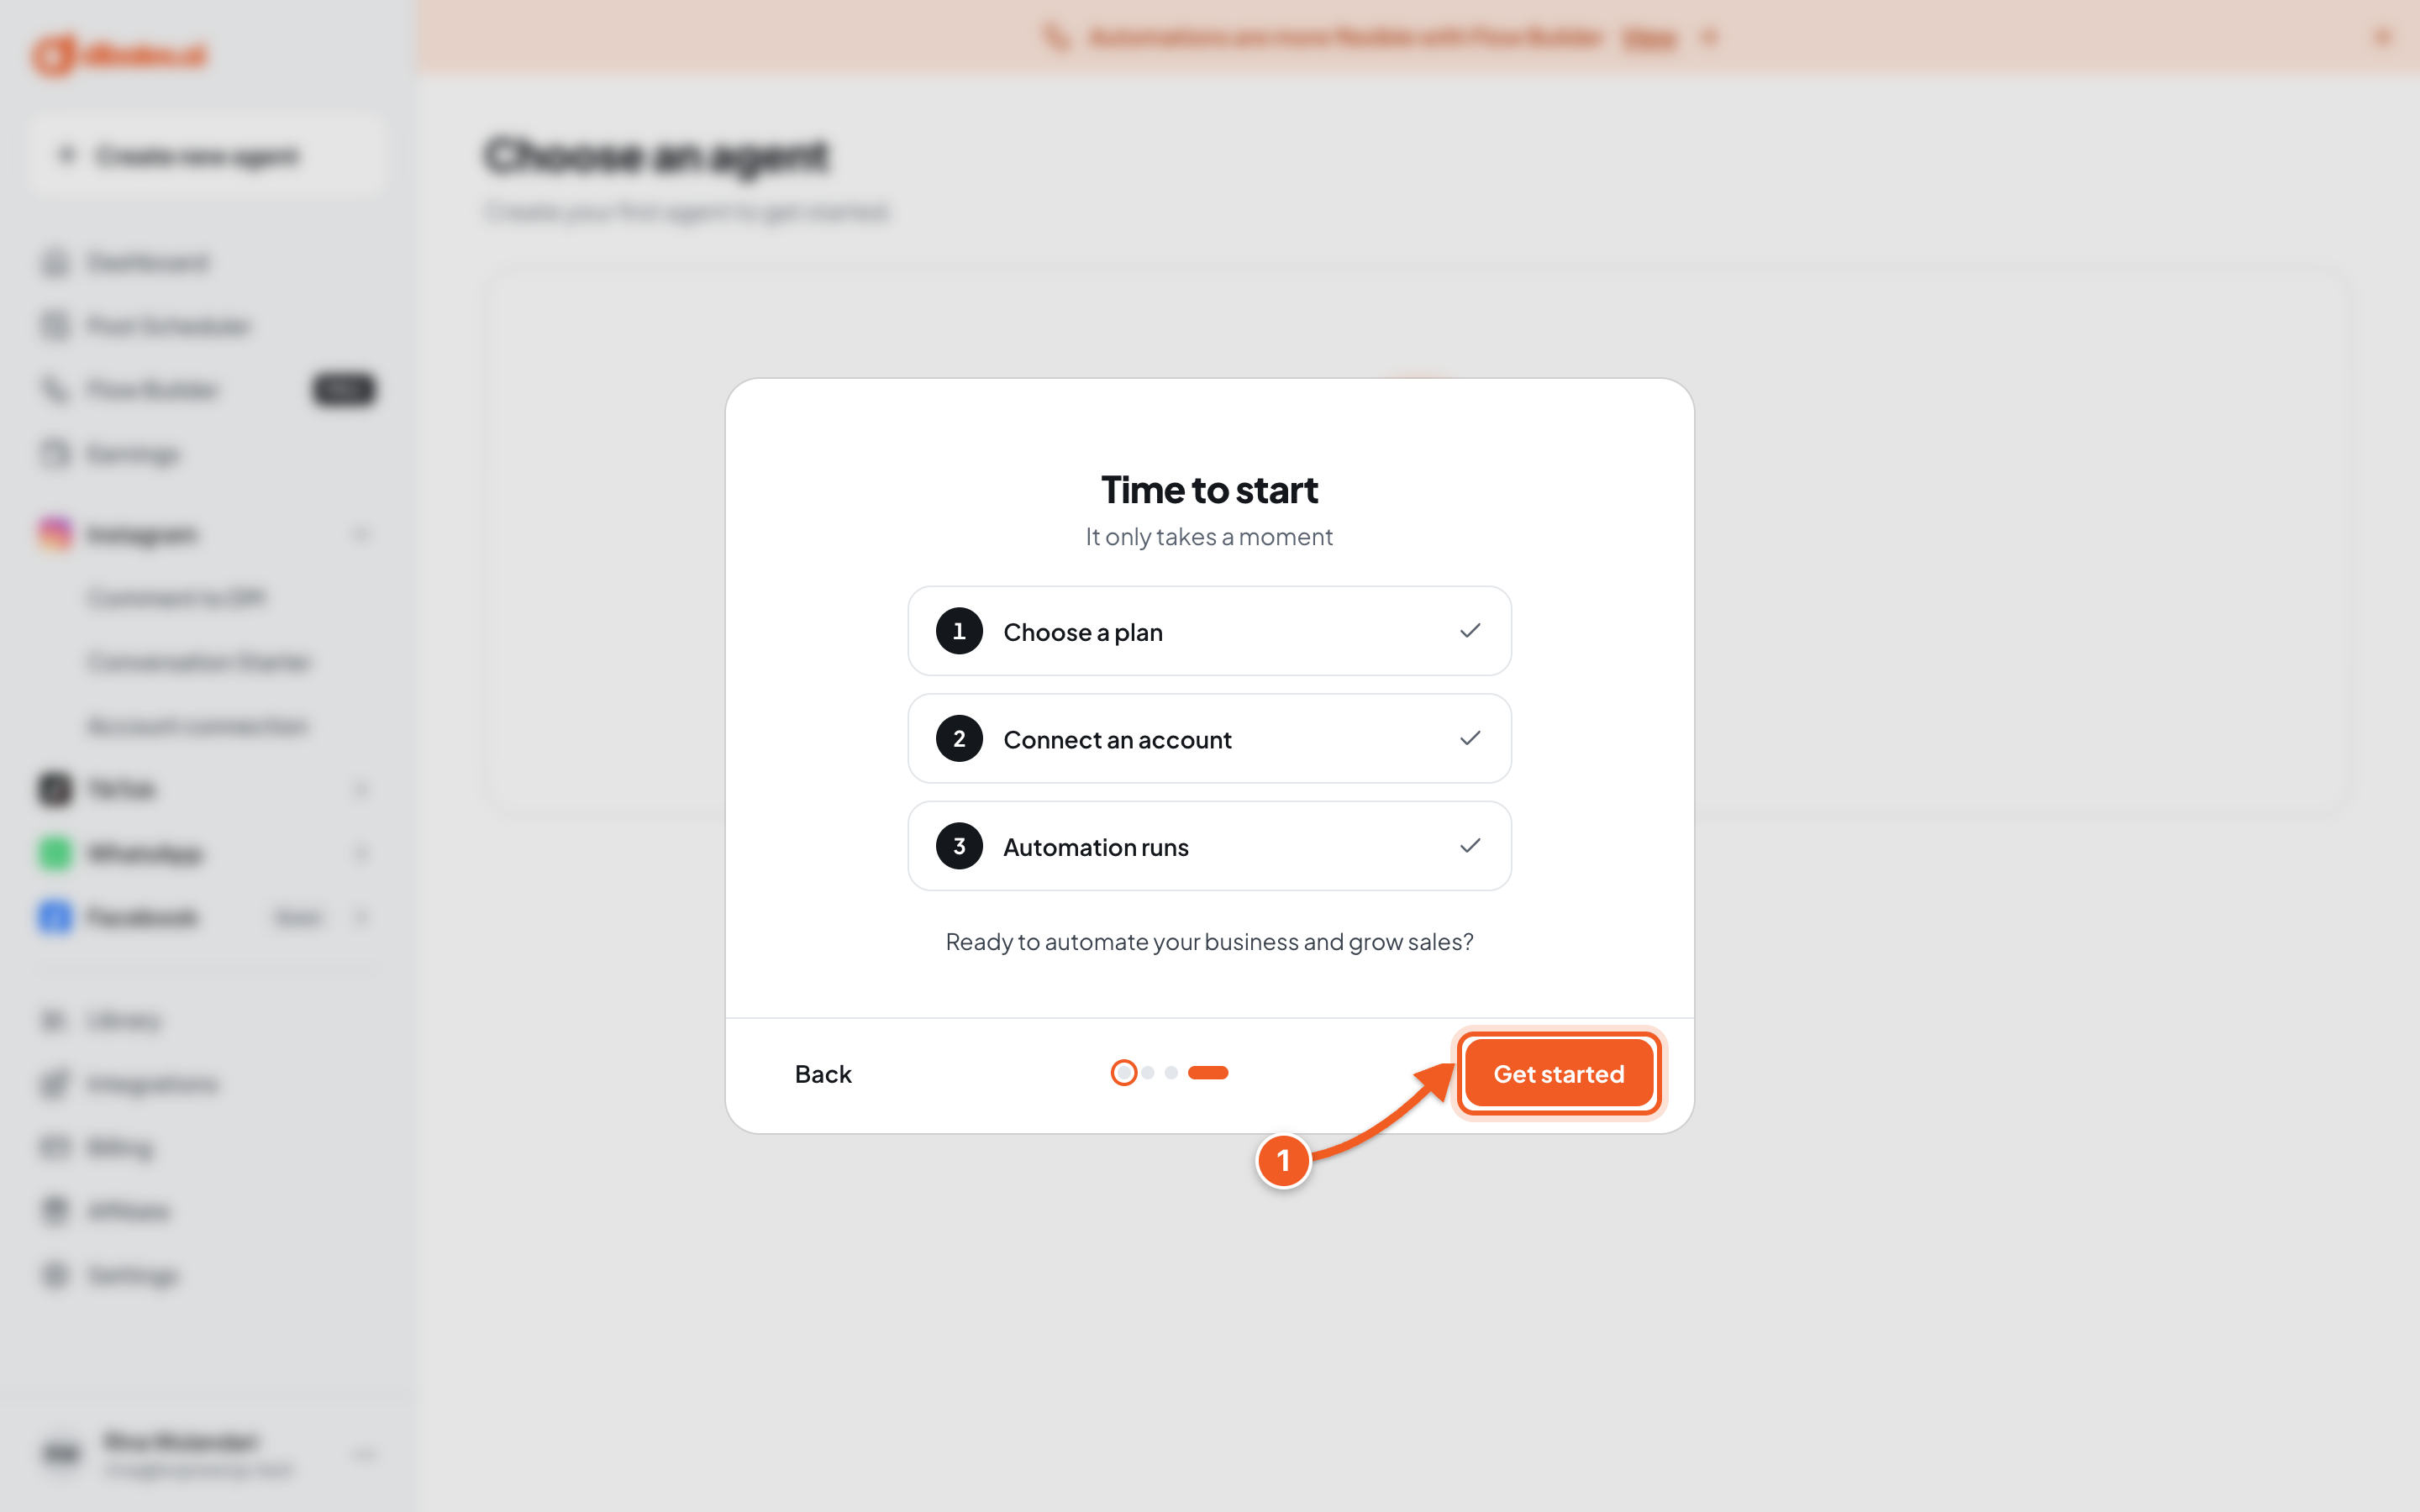
- Click Get started
3. Choose a plan
The Get started dialog opens. On a phone, it slides up from the bottom of the screen.
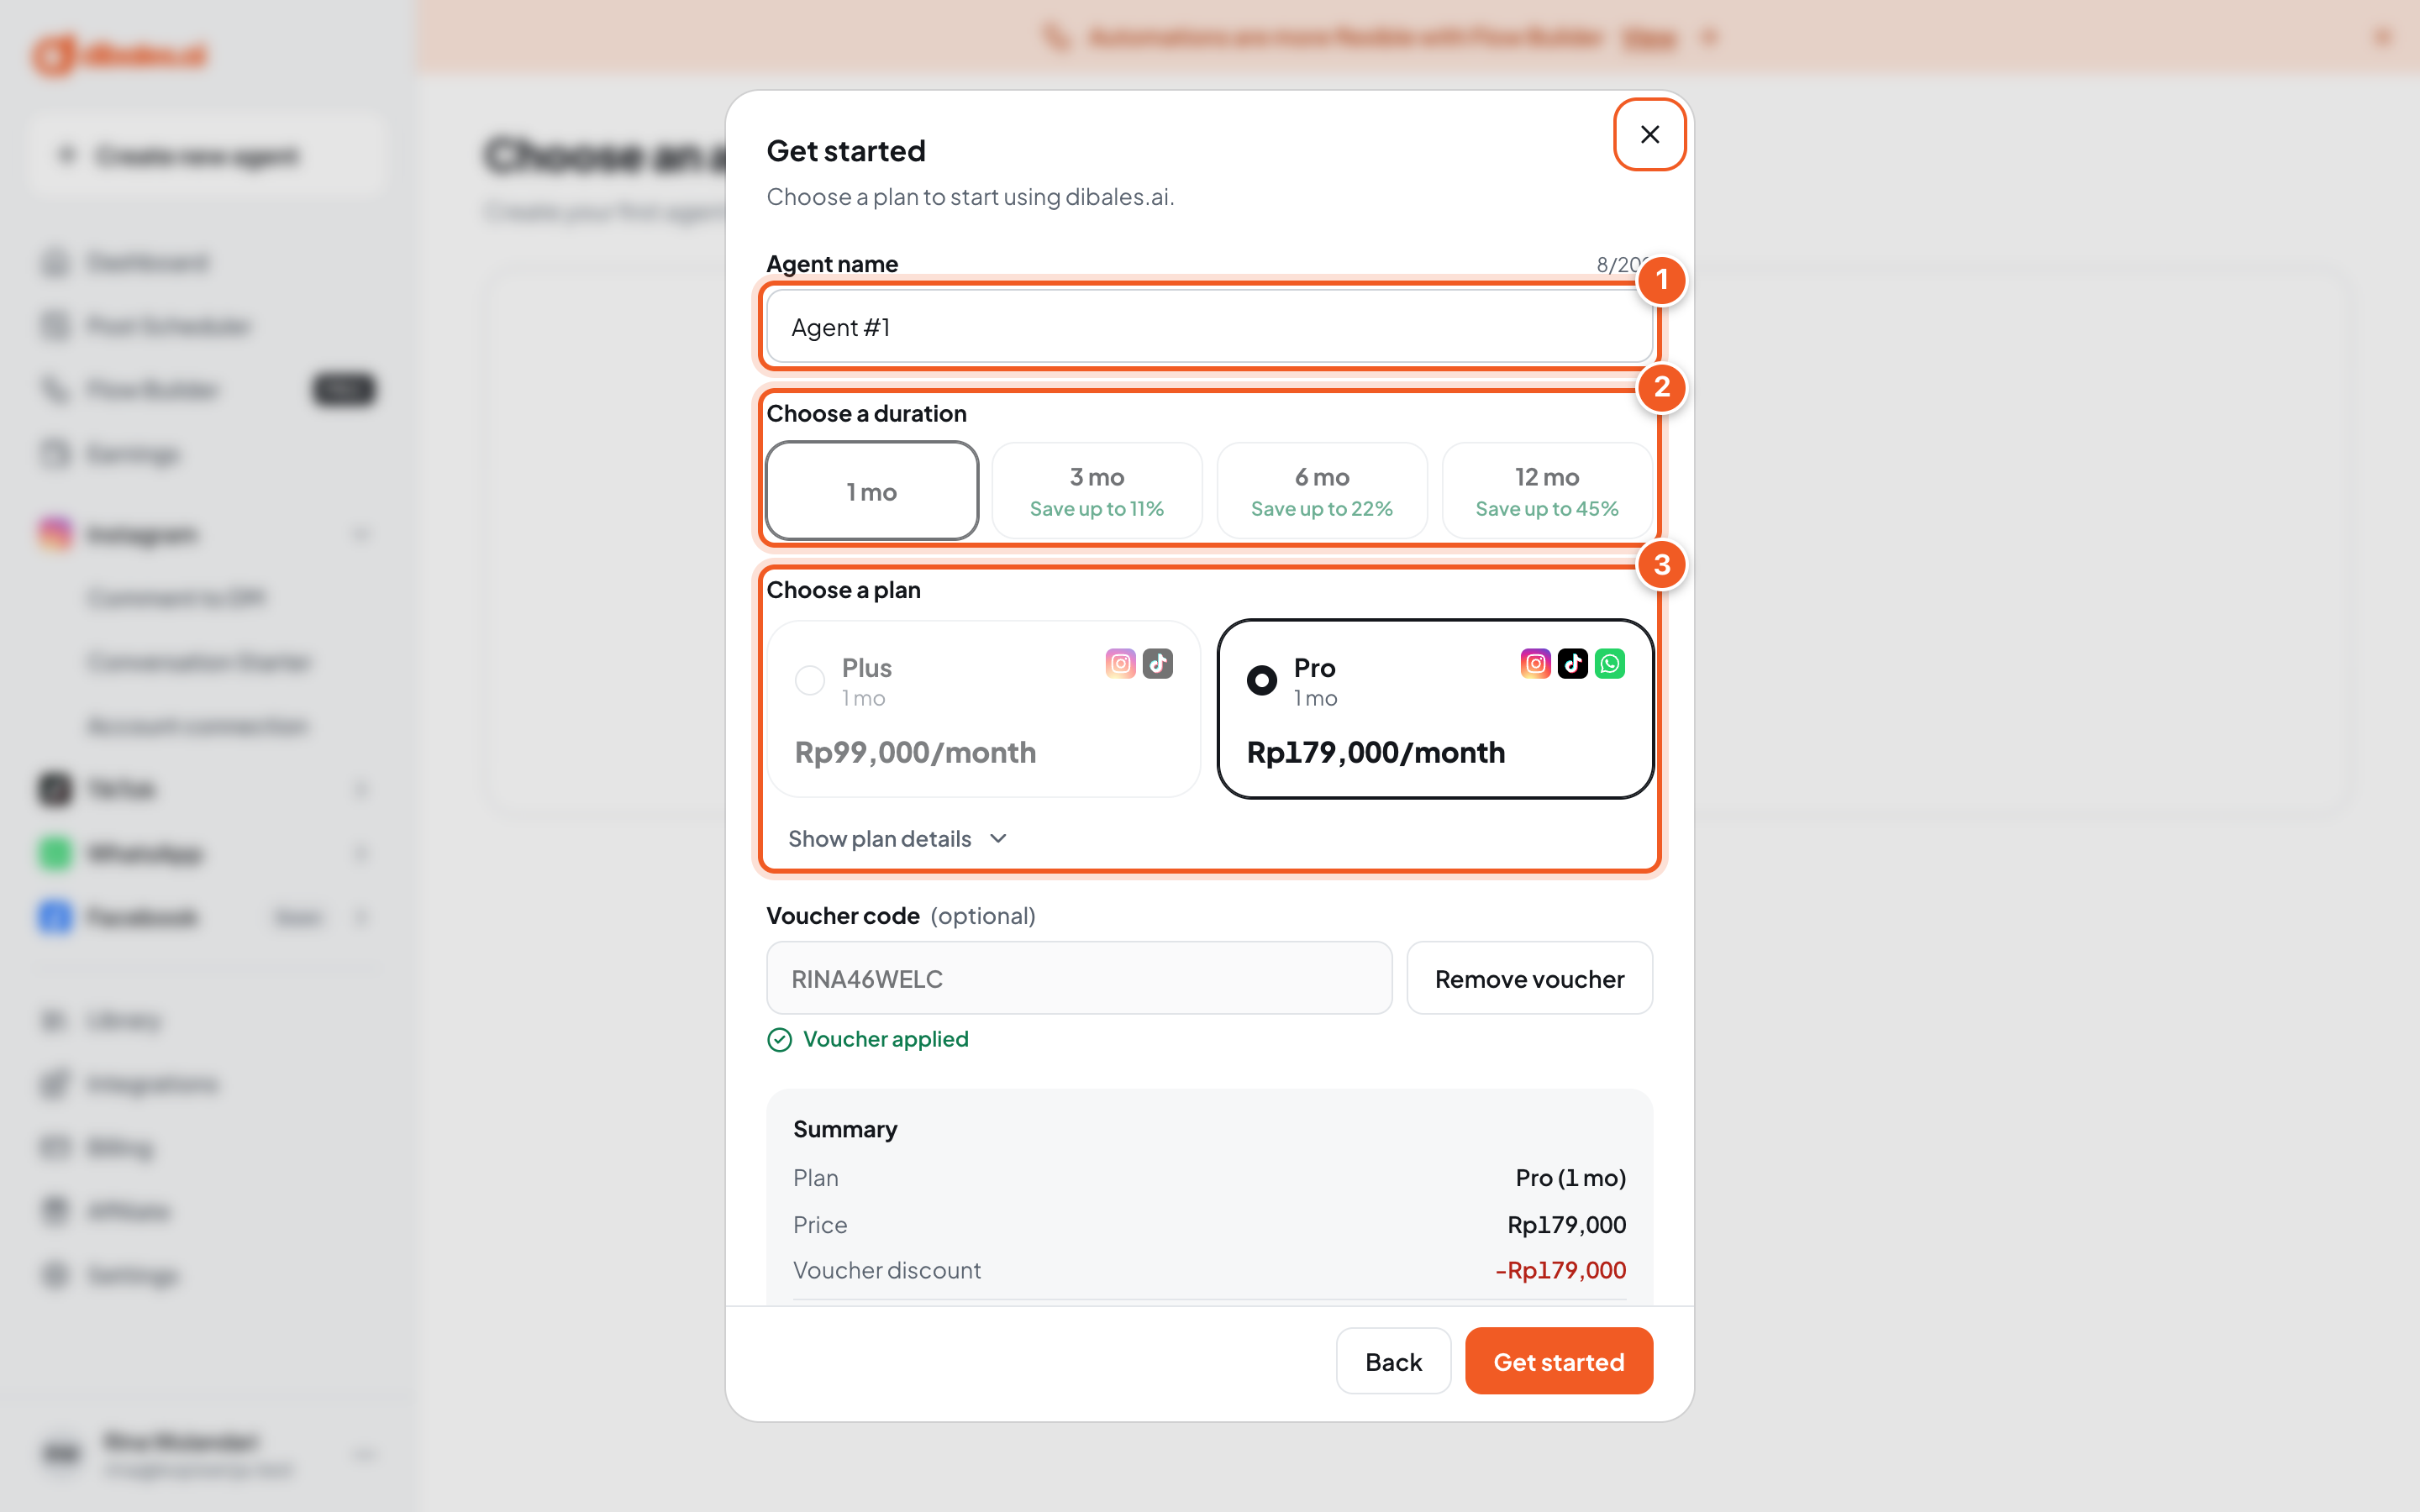
- Agent name: the business or brand you manage, for example Toko Rina. One agent can connect one Instagram account, one TikTok account, and one WhatsApp number.
- Choose a duration: 1, 3, 6, or 12 months. The longer the duration, the more you save. The savings percentage is shown on each duration option.
- Choose a plan: Plus for Instagram and TikTok, or Pro for Instagram, TikTok, and WhatsApp. Compare the features with Show plan details.
4. Use a voucher and accept the terms
Scroll down in the dialog.
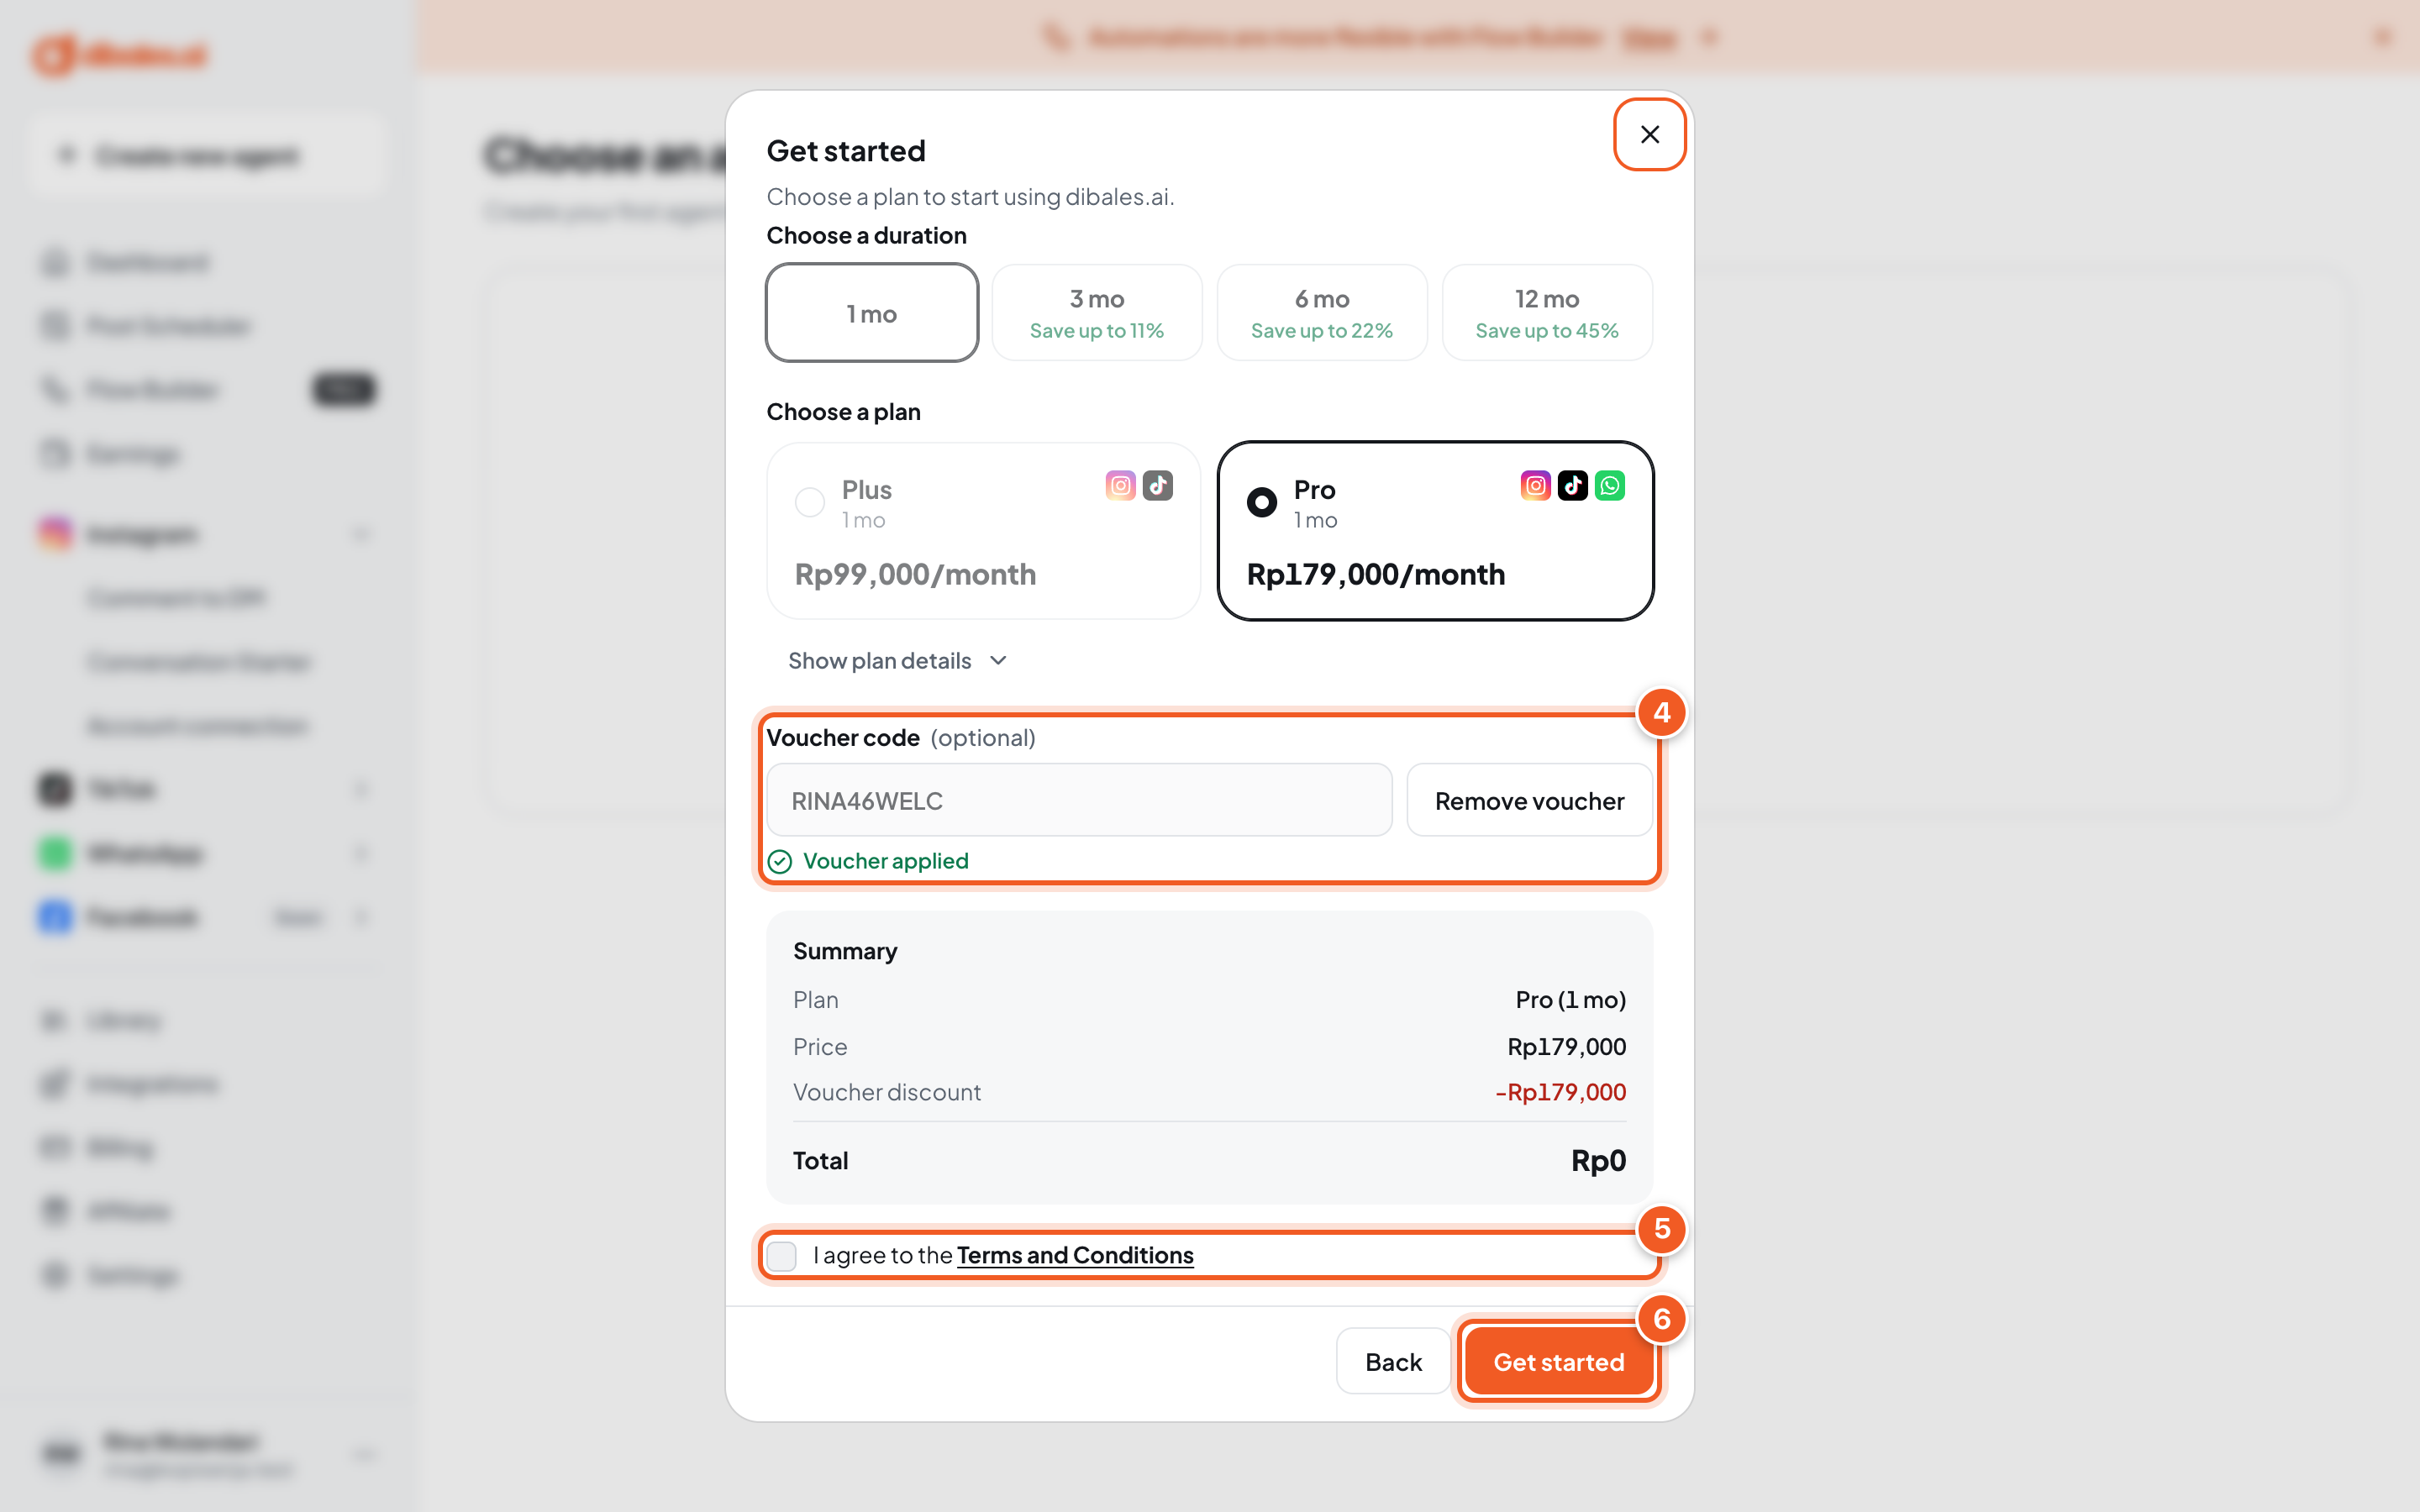
- Voucher code (optional): type the code, then click Apply. If it works, Voucher applied appears, and the Summary below shows the discount. A full-access voucher brings the total to Rp0. Some vouchers already include their plan, so the plan and duration follow the voucher. Some vouchers also ask for a phone number for validation.
- Tick I agree to the Terms and Conditions.
- Click Get started.
💡 Already bought through Lynk? After you sign in, the dashboard shows Payment received with your purchase. Click Claim, then you'll see Transactions claimed and Your new agent has been created. You don't need to choose a plan again.
💡 Already bought a plan through a checkout page before signing in? Sign in with the Google account that uses the same email as your checkout. The voucher code is filled in automatically, so the total is Rp0.
5. Read the terms and conditions
When you tick the agreement box, the Terms and Conditions dialog opens. The terms text is currently shown in Indonesian.
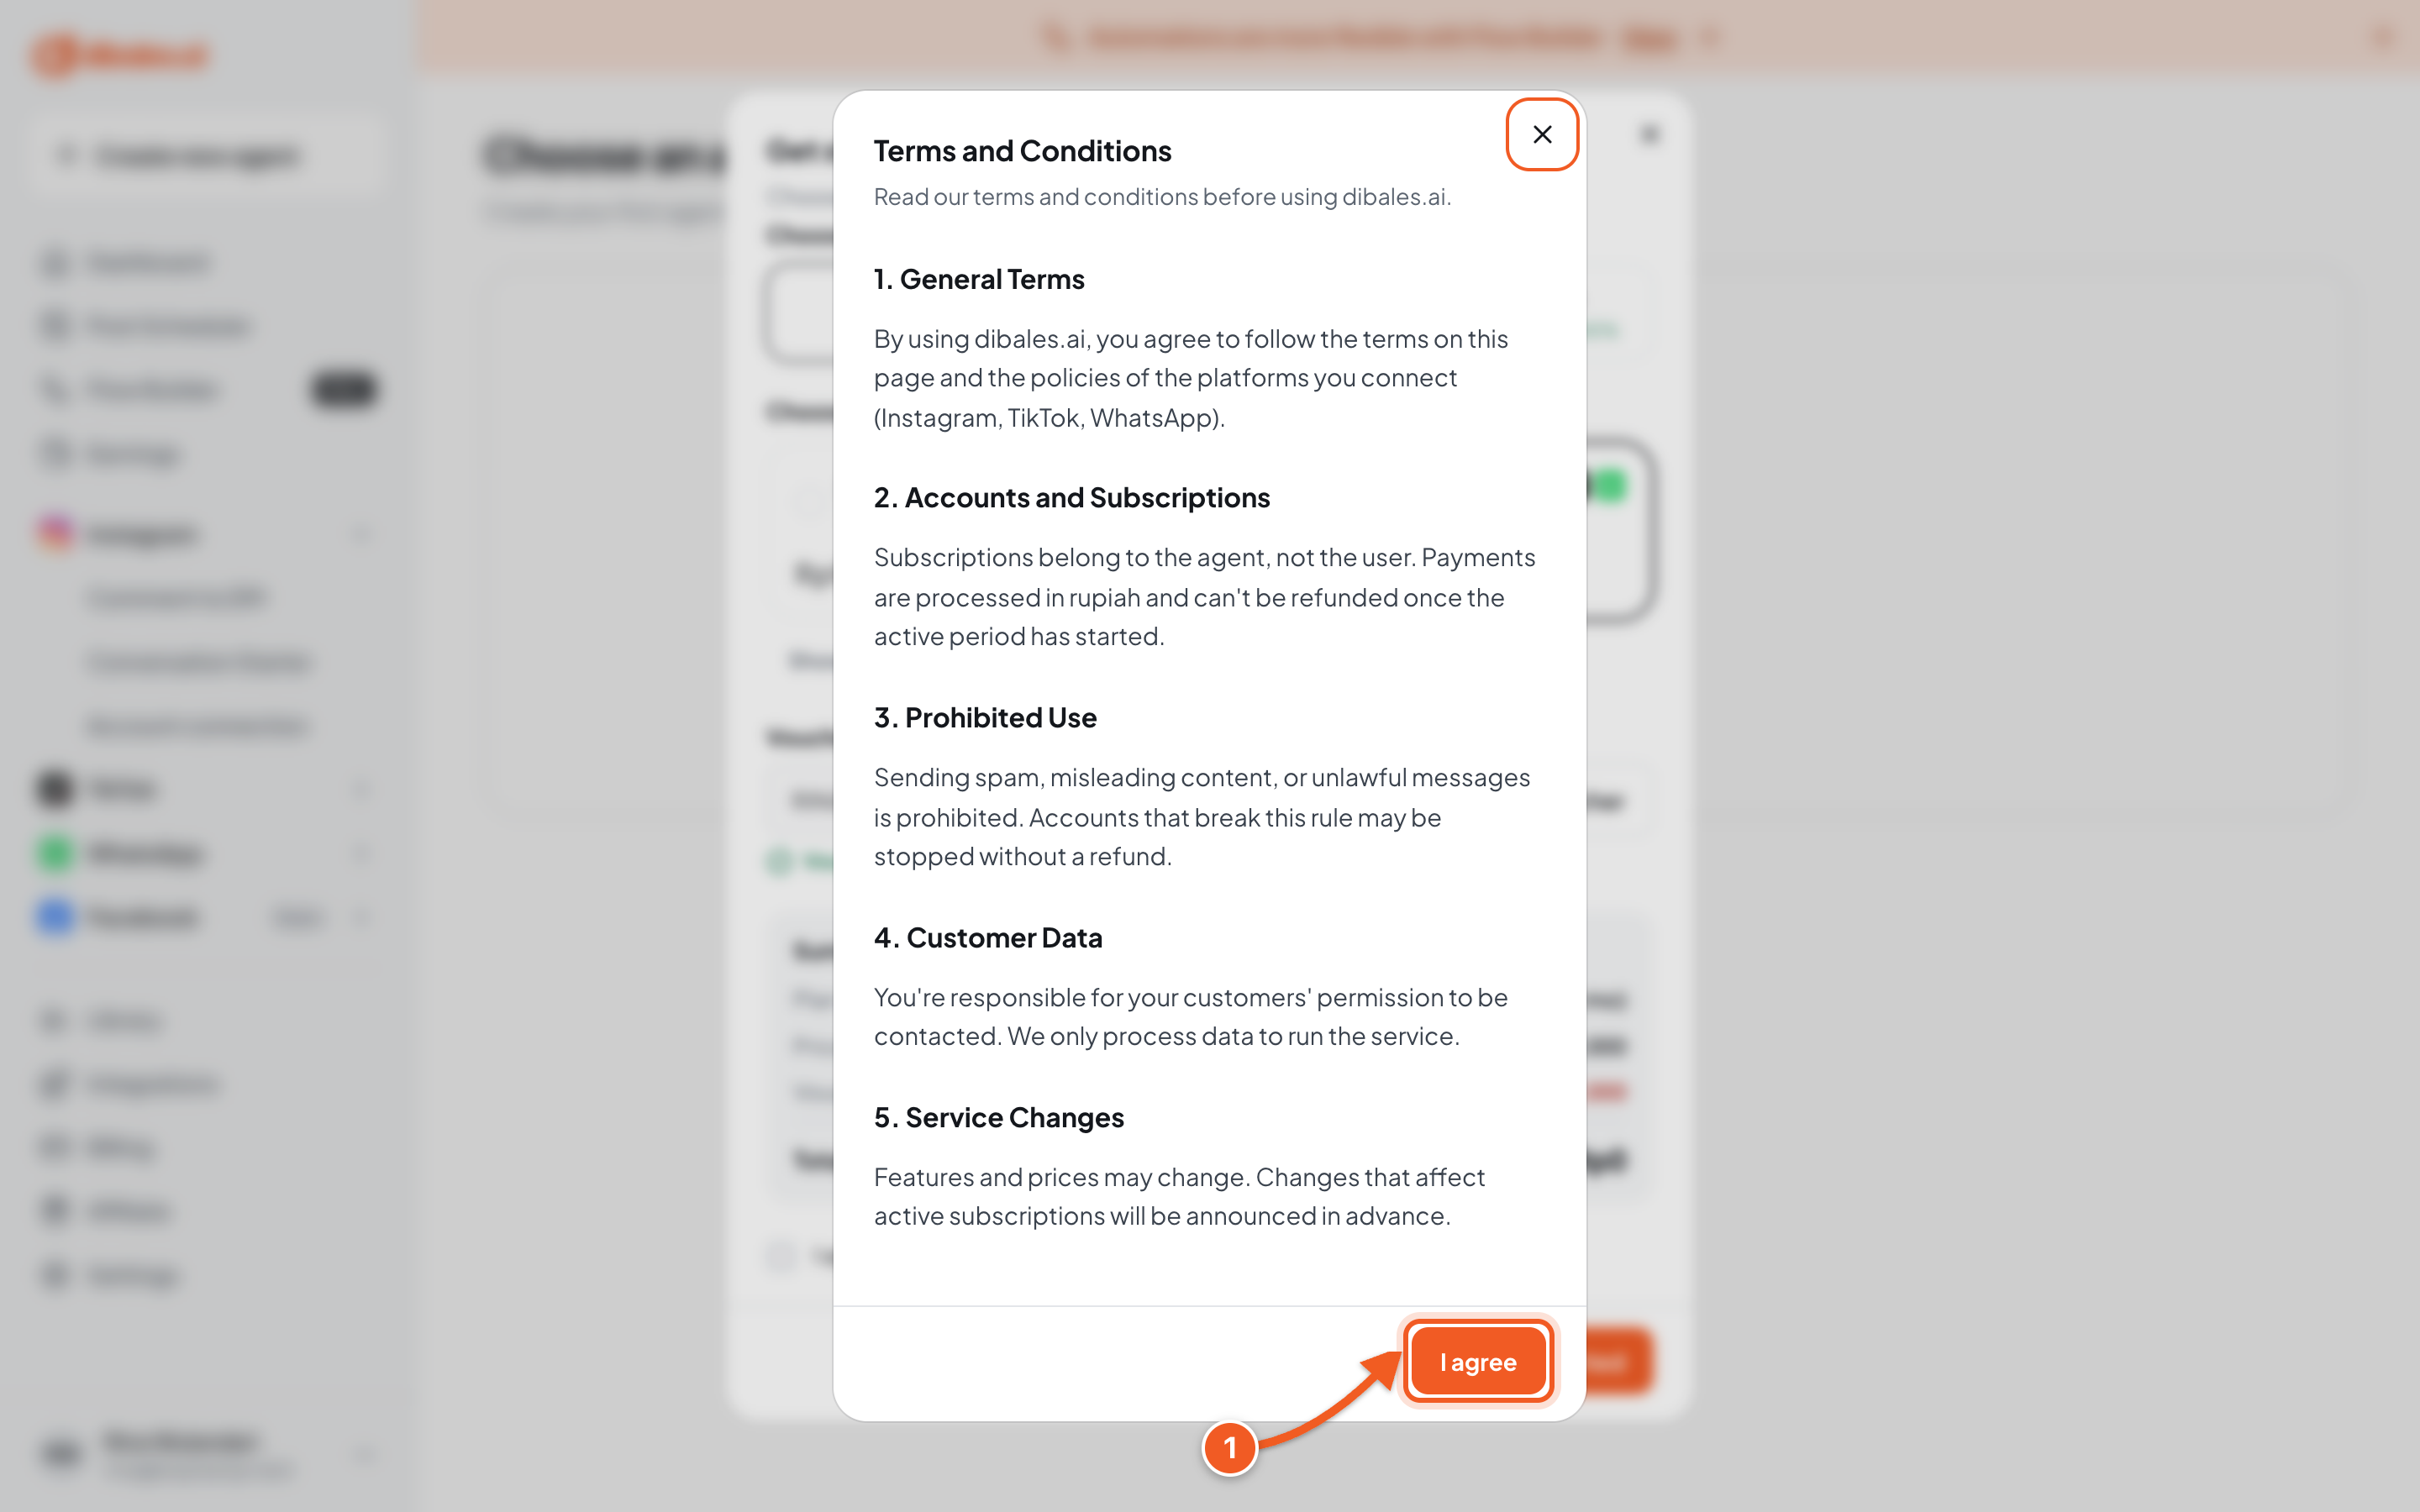
- Scroll to the bottom, then click I agree. The button only becomes active after you scroll all the way through the text.
6. Pay
Total Rp0 (with a voucher): there's nothing to pay. Your agent is active right away, so go to step 7.
Total above Rp0: the payment provider's page opens. Complete the payment there.
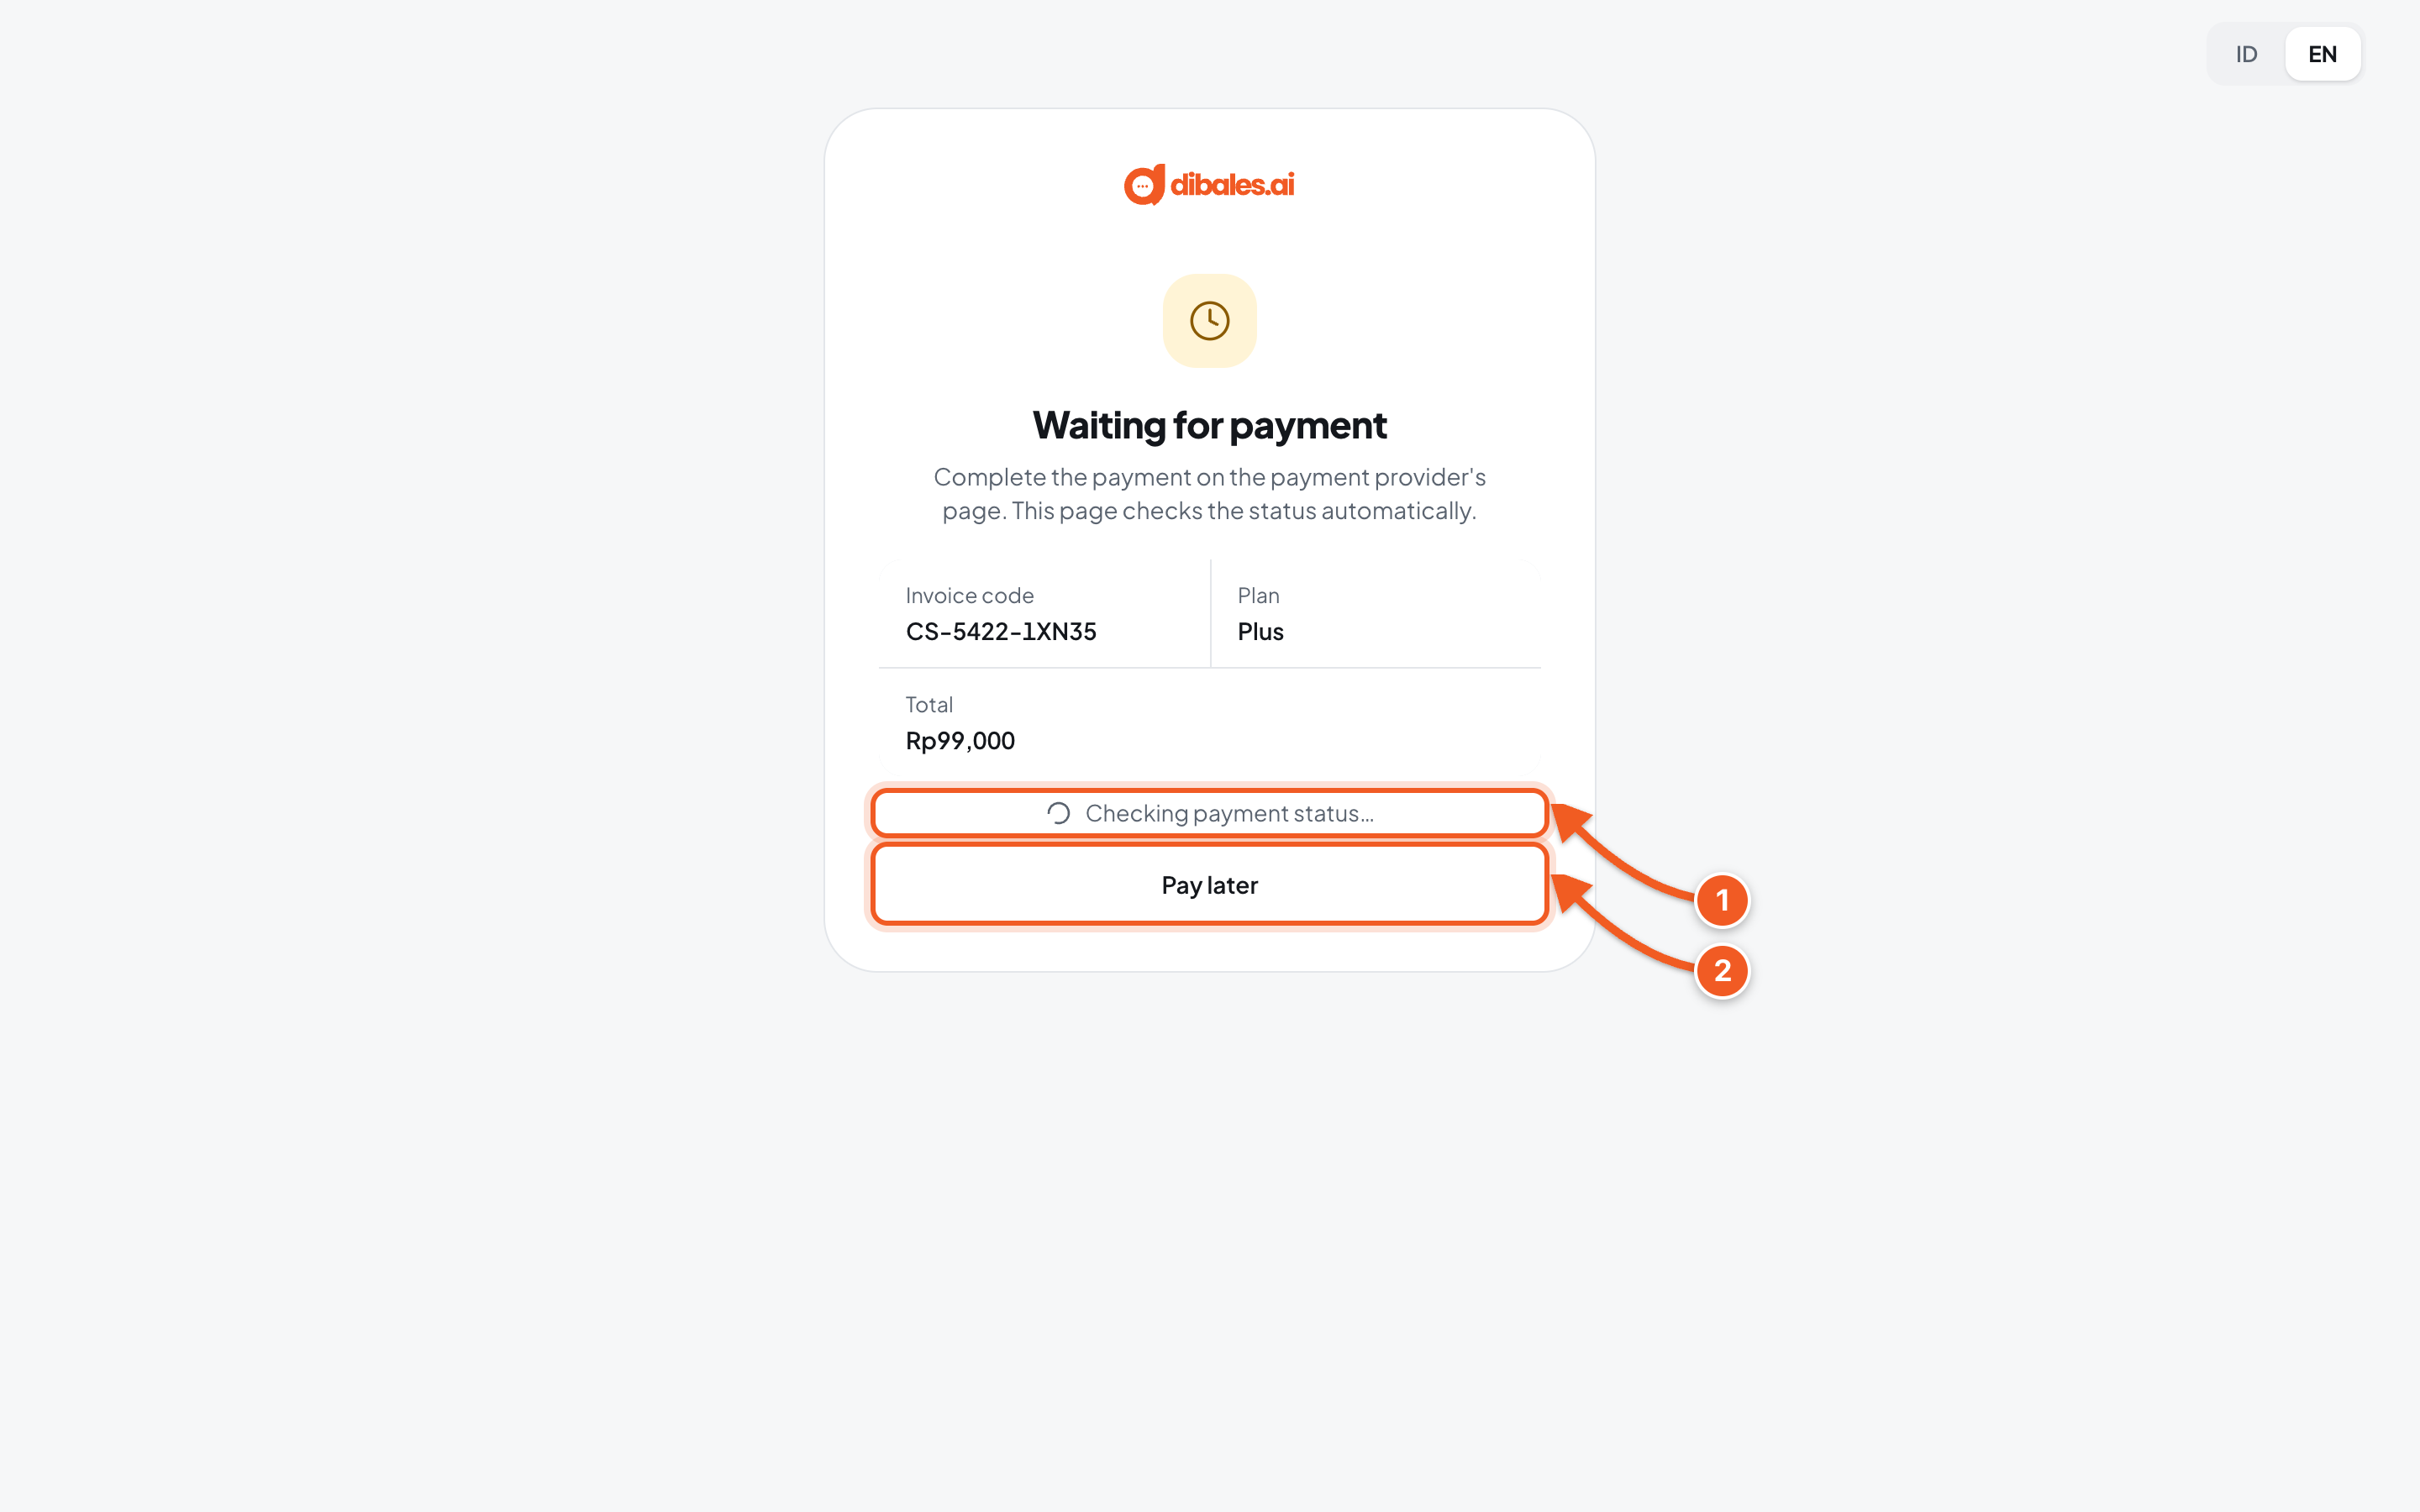
- The Waiting for payment page checks your payment status automatically. As soon as the payment succeeds, your plan is active. Closed the payment page by accident? Click Open payment page on this page.
- Can't pay yet? Click Pay later. The agent is still saved, and you can complete the payment later from the Billing menu.
7. Your account is ready
The dashboard shows a Start your automation now section with two first steps: connect an account, then create your first automation.
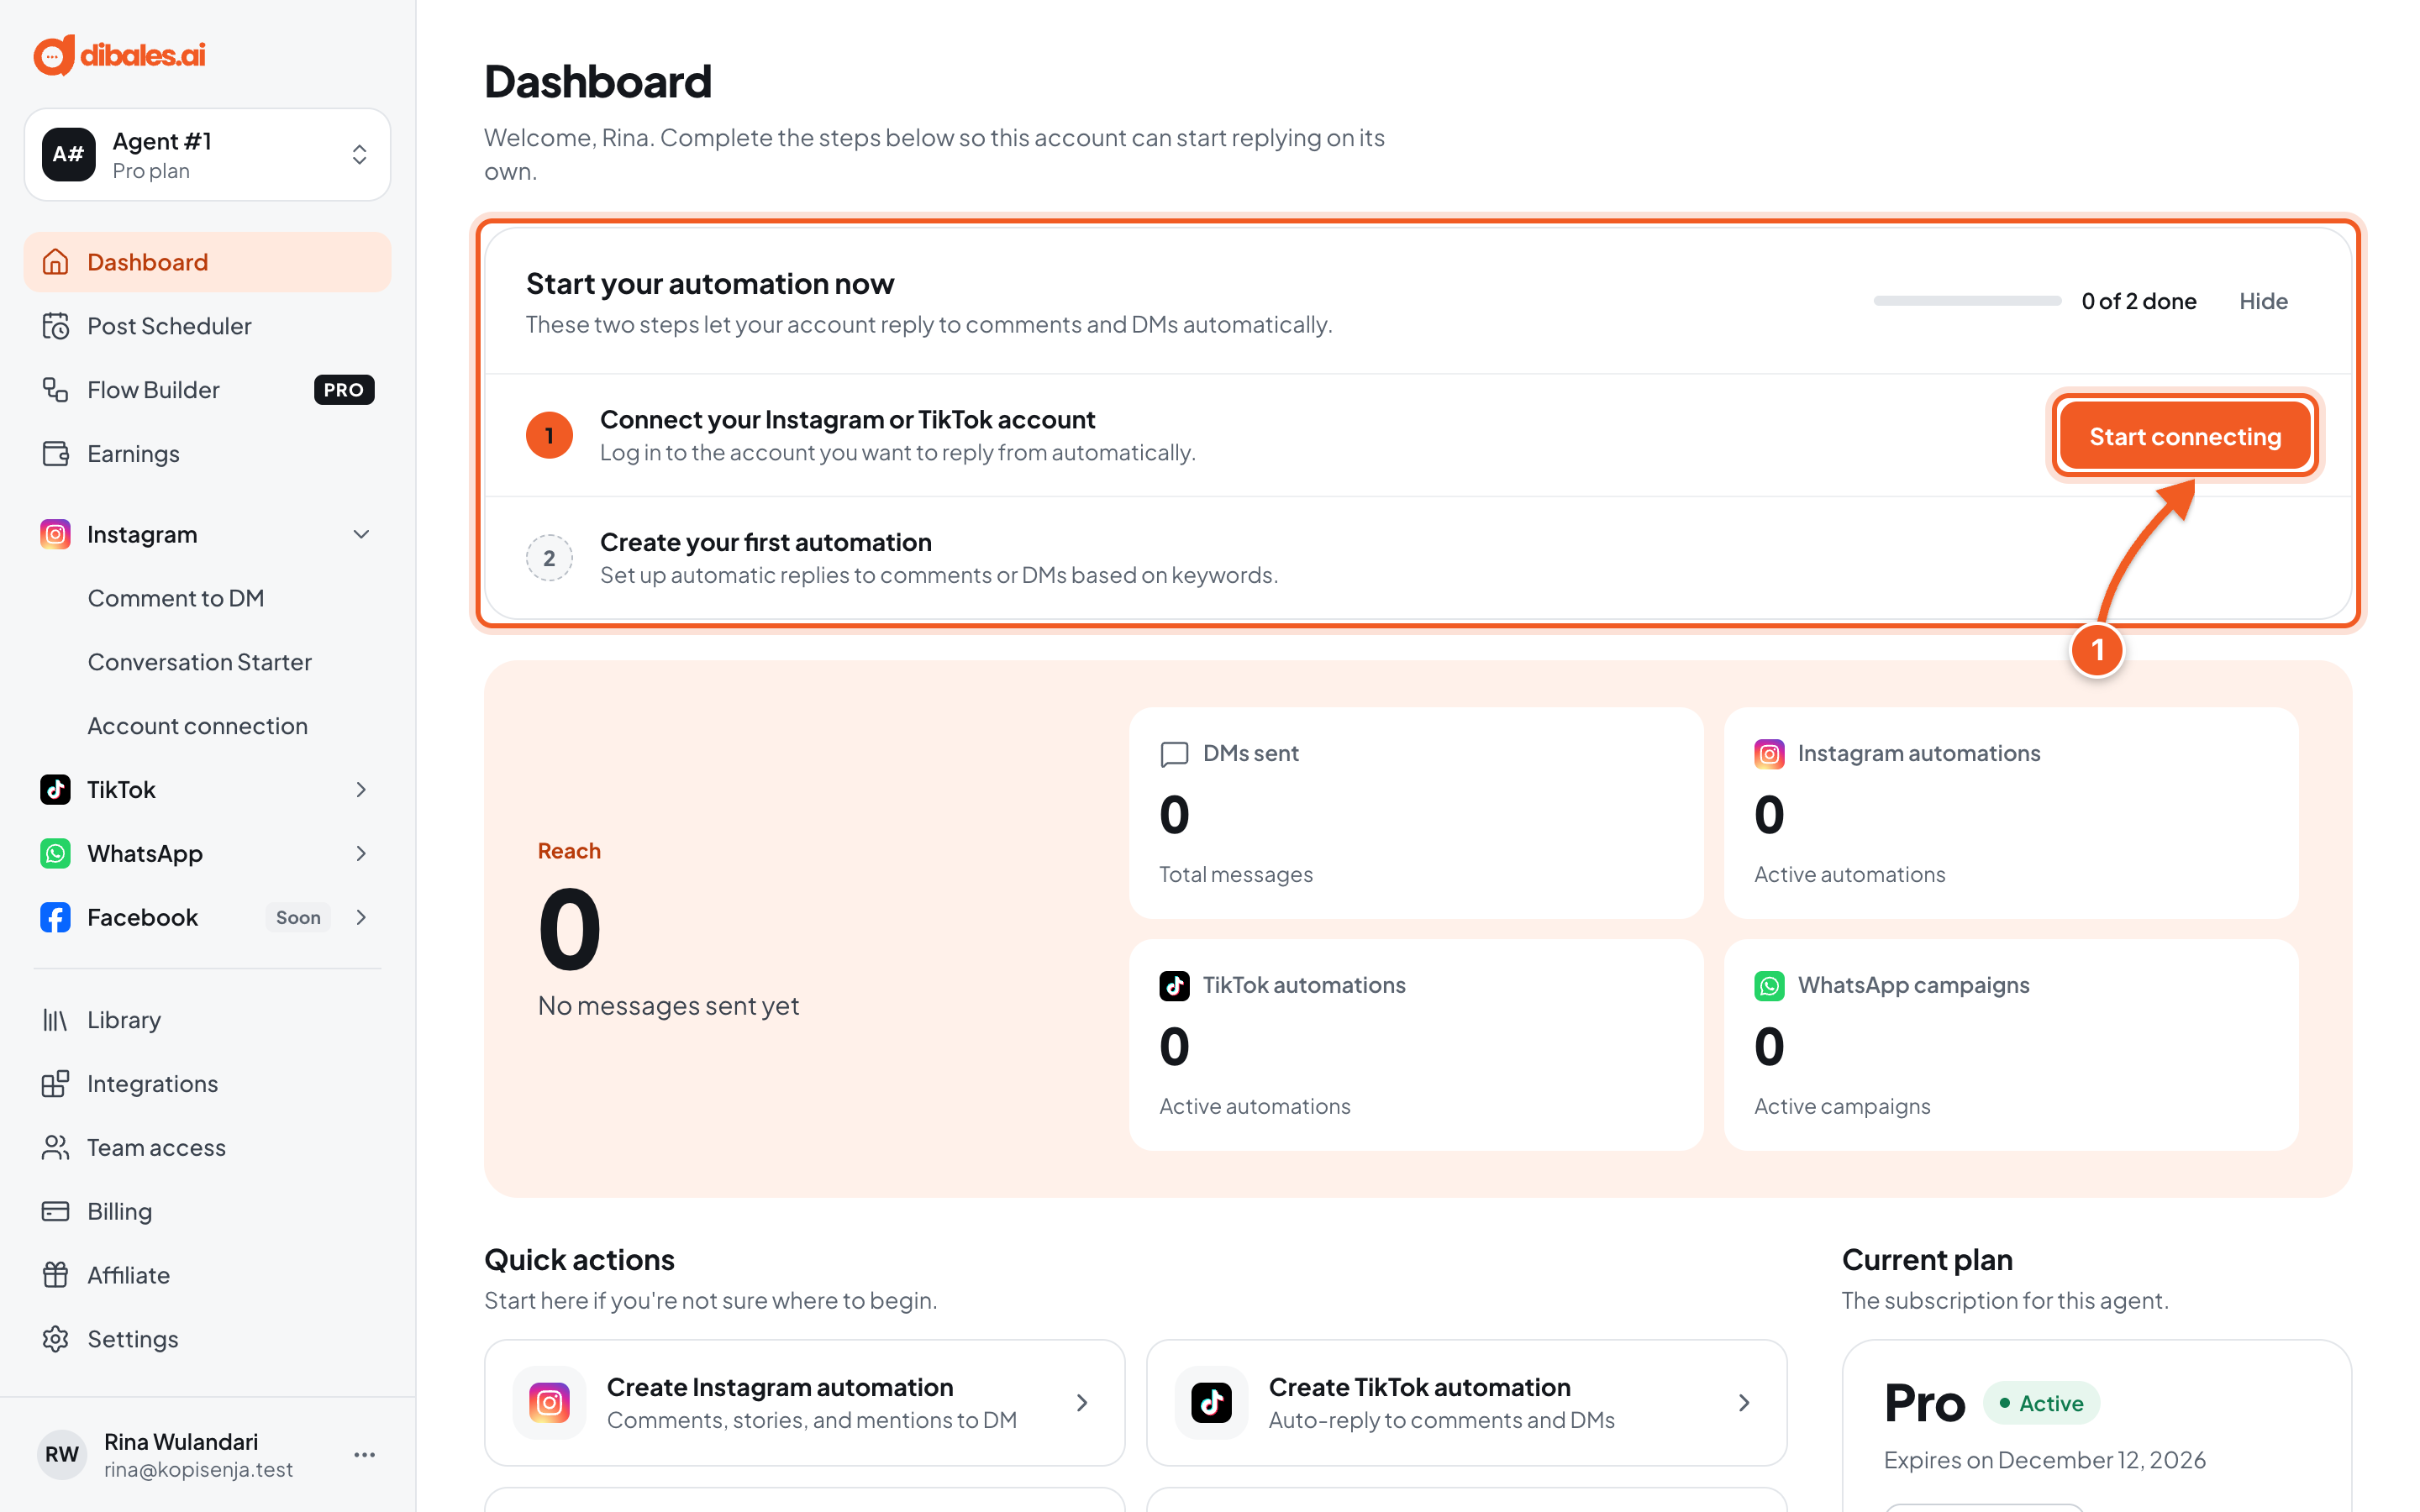
- Click Start connecting, then follow this guide:
Switching agents
Managing more than one business? Each business can have its own agent, each with its own plan.
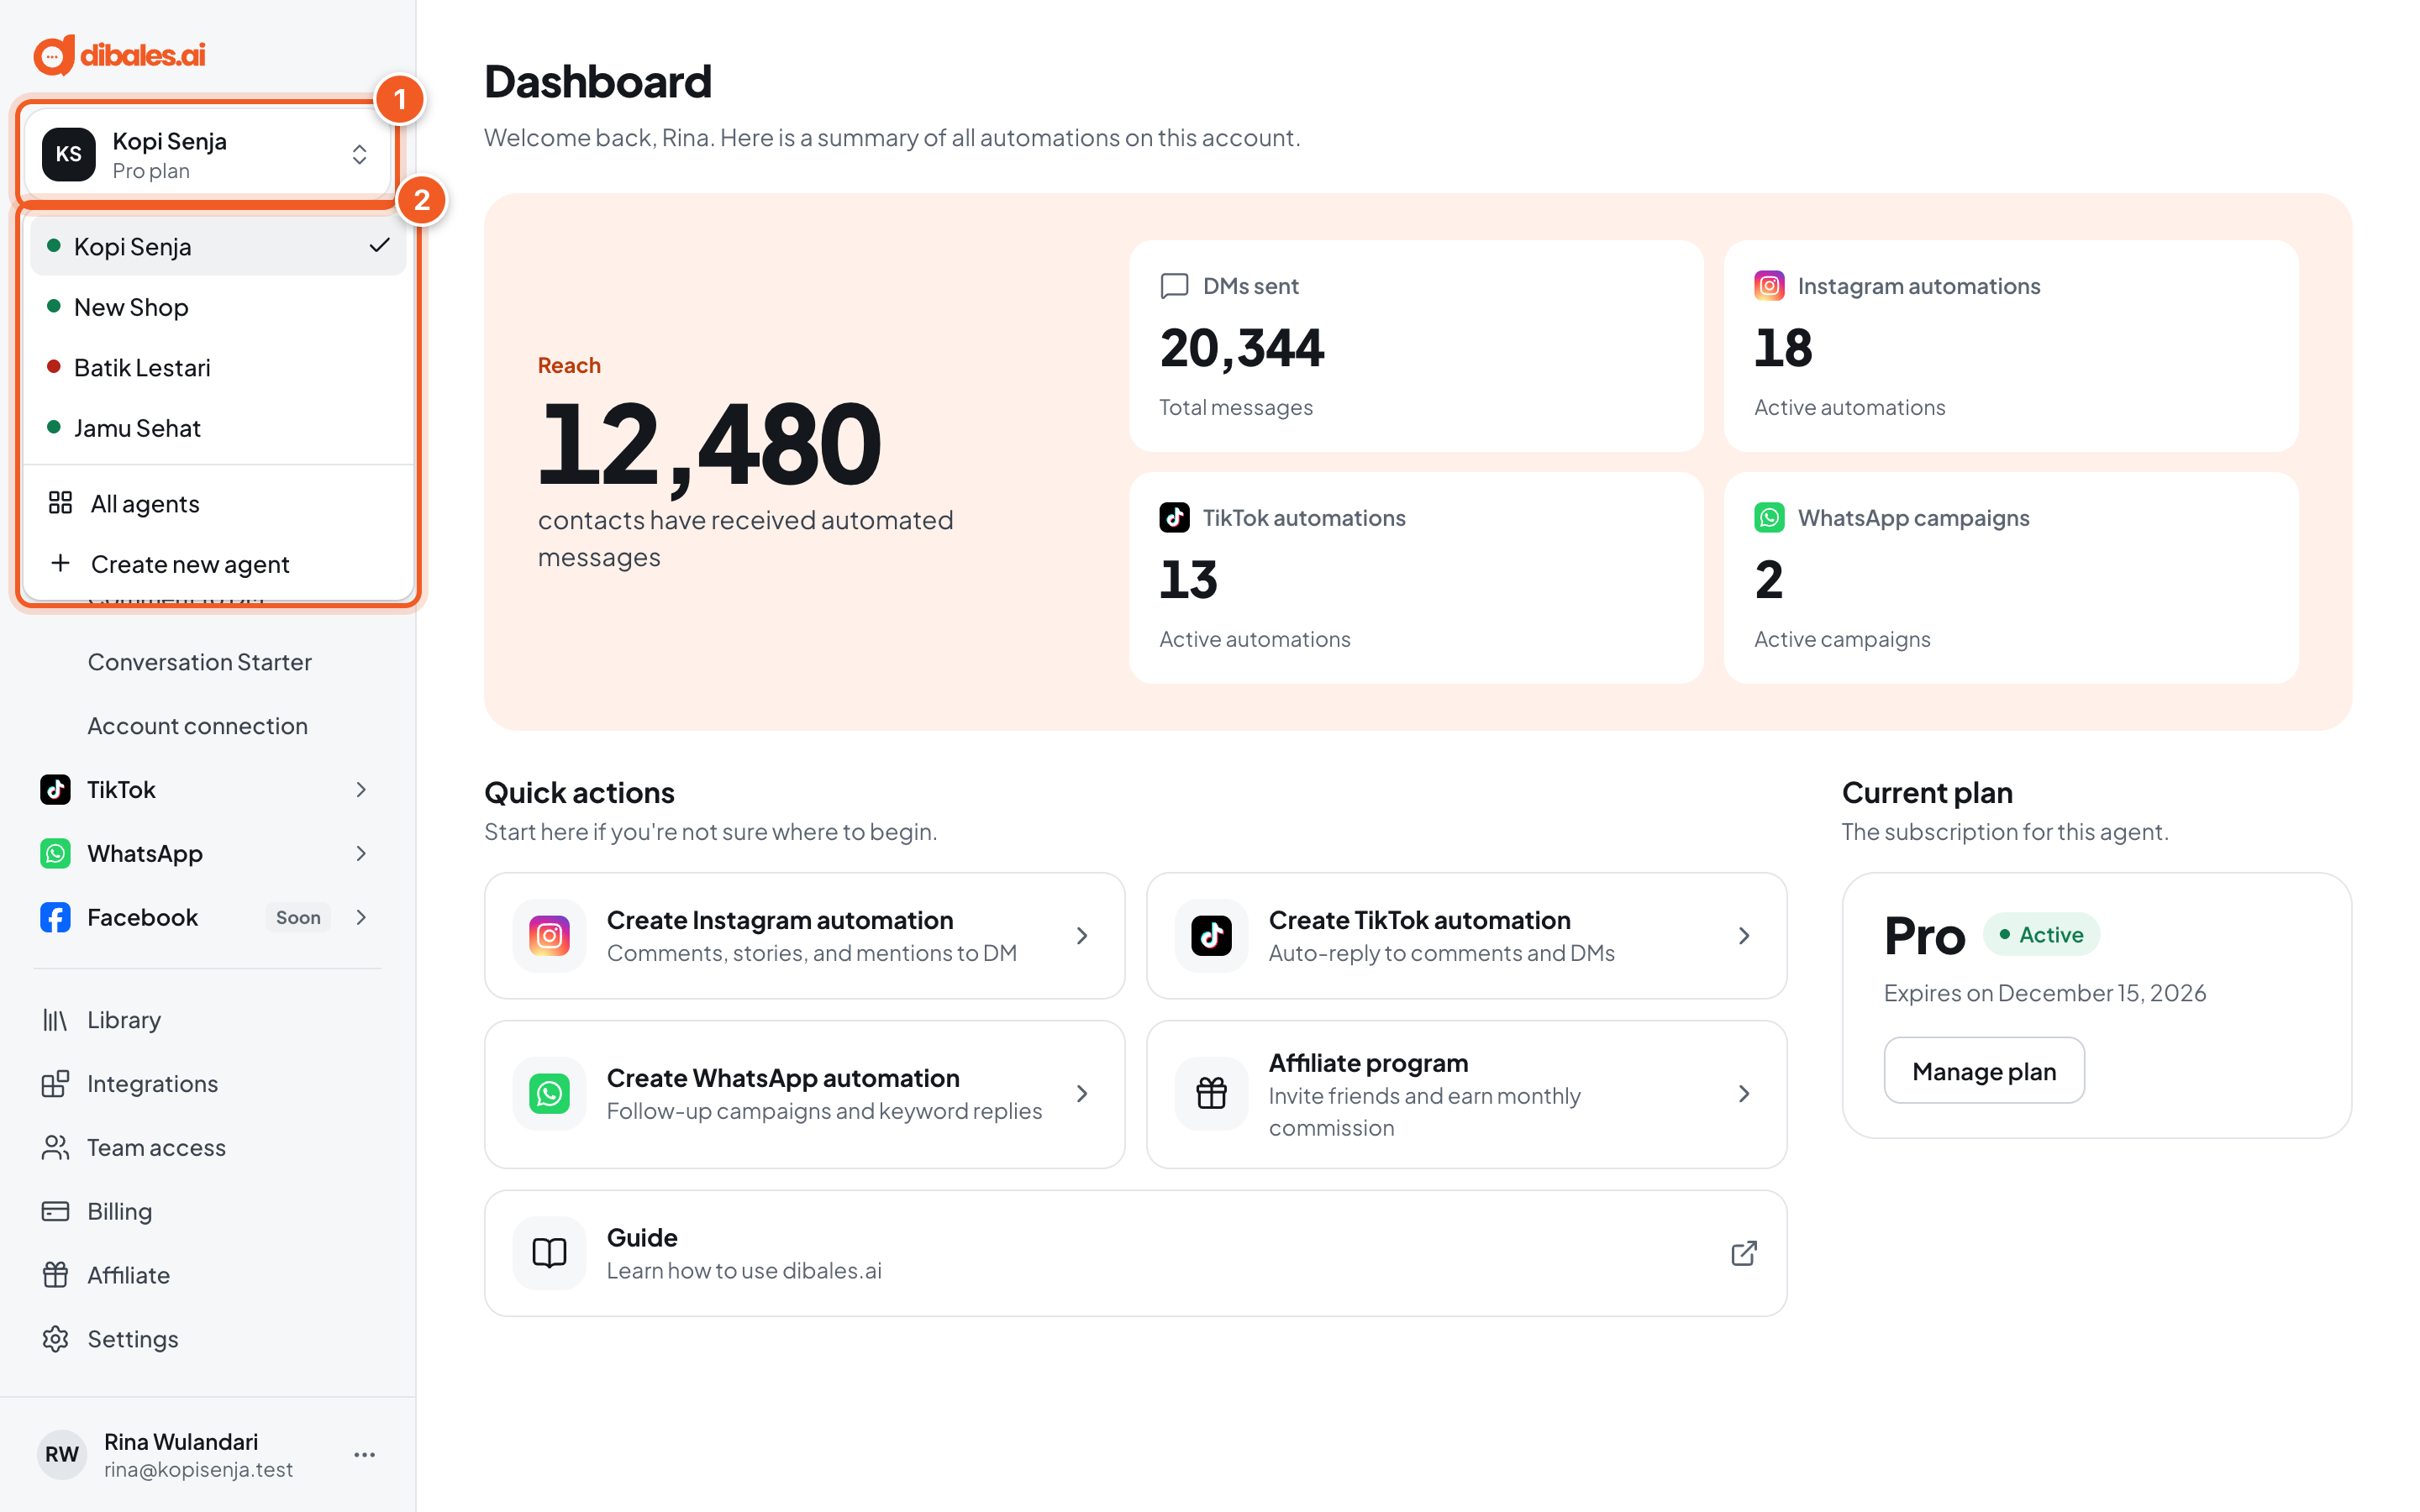
- Click the agent name at the top left. On a phone, open the menu first with the ☰ icon at the top right.
- Choose the agent you want to open. All agents shows the full list with each plan's status, and Create new agent adds another agent.
Troubleshooting
| Problem | Fix |
|---|---|
| Google sign-in fails or the Google page doesn't open | You opened the link in an in-app browser (for example from Instagram). Copy the link, then open it in Chrome or Safari. |
| Voucher not found. | Check the code's spelling again. |
| This voucher has already been used. or This voucher has expired. | A voucher only works once and until its deadline. Contact whoever gave you the voucher. |
| This voucher is not valid for this plan. | Change the plan to match the voucher, or clear the voucher code. |
| Apply or clear the voucher code first. | Click Apply for the code you typed, or delete the code, then click Get started again. |
| The I agree button can't be clicked | Scroll the terms and conditions all the way to the bottom first. |
| Bill expired or Payment unsuccessful | Create a new payment from the Billing menu, see Billing. |
| The transactions could not be claimed. Try again. | Try claiming again. If you see This claim is already being processed, wait a moment, then reload the page. |
| The plan from checkout doesn't show up | Make sure you signed in with the Google account that uses the same email as your checkout. |